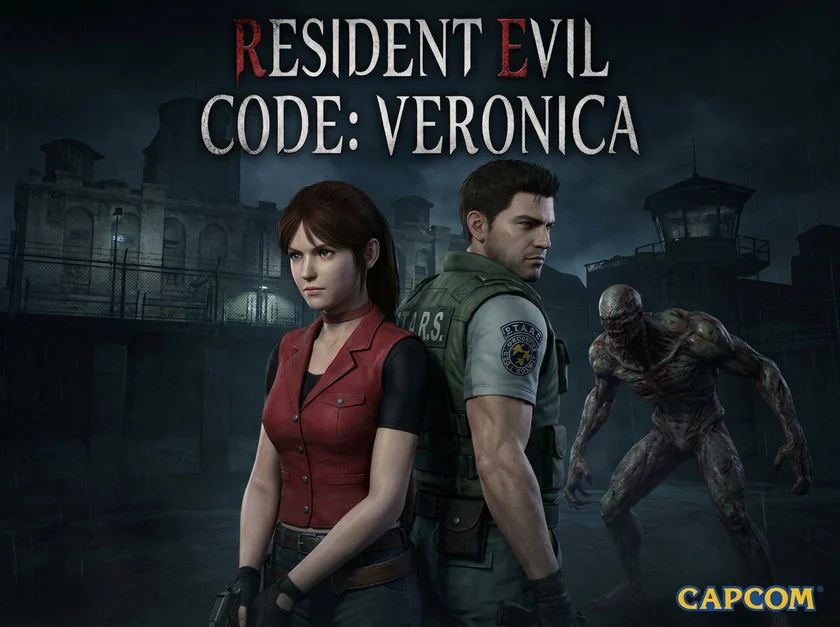
CH 1Rockfort PrisonClaire — the island prison
Claire Redfield breaks into Umbrella's Paris facility looking for her brother, is captured, and wakes up in a cell on Rockfort Island in the middle of a viral outbreak. This chapter is one closed loop: you leave the prison through a single gate, and that gate needs an emblem you have to manufacture.
CellsPrison B1 — no save
1
Claire comes round on the cell floor. The guard Rodrigo Juan Raval unlocks the door, gives back her belongings and leaves. FILE #1 Playing Manual is already in your inventory.
2
Take the
KEY ITEM Lighter.
Never discard the Lighter. It lights dark rooms now, but far more importantly it is the only ignition source for the explosive locker in the Antarctic base, and Chris needs it to burn open a grate later. Losing it costs you two weapons.
3
Collect Handgun Bullets ×15 from the chair beside the cells and a Green Herb on the floor inside one of the cells.
4
Take the WEAPON Combat Knife off the desk by the door. It is your only weapon for the next two rooms.
5
Talk to Rodrigo. He is badly wounded and mentions needing
Hemostatic Medicine.
You cannot help him yet. Remember this conversation — the medicine turns up in the Training Facility much later, and trading it to him is what gets you the Lockpick.
Cells EntryPrison B1 — typewriter
6
First save point in the game. Take the Ink Ribbon on the desk and Handgun Bullets ×15 from the floor beside it, then save.
GraveyardPrison 1F — 5 zombies
8
An explosion tears the ground open and five zombies climb out. You still only have the knife: do not fight, run straight for the far door.
9
Note the
burning truck in the middle of the yard. You cannot touch it yet — it needs a fire extinguisher, and nothing in the game reminds you to come back.
This truck is the single most forgotten object in the prison. Everything in the next hour depends on returning here.
YardPrison 1F
10
Cutscene: Steve Burnside opens fire from the guard tower, mistakes Claire for a zombie, then realises his error. He mentions an airport on the island and walks off alone.
11
Take the WEAPON M93R handgun from the ground. It comes loaded with 12 rounds and is Claire's main sidearm for the whole Rockfort half.
12
Search the body lying near the wrecked truck for Handgun Bullets ×15. Sweep both this yard and the graveyard — there is ammunition on the ground in each.
13
Note the large gate with an emblem-shaped recess. That gate is this chapter's goal and nothing else opens it.
BarracksPrison 1F — 3 zombies
14
Clear or evade the three zombies. Handgun Bullets ×15 sit on the bookshelves against the south wall and a Green Herb is on the table on the raised east side.
15
MAP Prison Map hangs on the wall in the kitchen area, south-east corner. It fills in the map screen and marks rooms you have not entered — easy to walk straight past.
Barracks BunkhousePrison 1F — weapon trigger
16
FILE #2 Prisoner's Diary lies on the bunk bed nearest the entrance. There are also Handgun Bullets ×15 on the shelf by the west window and more on the shower-room floor.
17
MISSABLE Examine the shelf beside the west window. This is a deliberate trap: three zombies get up in the room and a fourth crashes in through the window.
The window zombie drops the WEAPON M-100P dual machine pistols. No shelf, no M-100P. There is no second chance and nothing in the room hints at it — this is the most commonly missed weapon in Claire's scenario.
Barracks YardPrison 1F — short dead-end spur
18
A Green Herb sits at the end of the wooden walkway. Two zombie dogs burst out from under the building on one of your passes through — you can simply run for the door.
19
Note the padlocked metal fence. It opens later with the Padlock Key and its only purpose is a shortcut.
Execution YardPrison 1F — 3 zombies
20
Clear the yard. The metal shutter and the fenced guillotine enclosure are both locked; the release is in the Observation Room, so you will be back.
Security CorridorPrison 1F — the metal detector
21
A metal detector guards the far end of this room. Put every weapon and every box of ammunition into the security deposit box beside it before walking through, or the shutters slam and you cannot advance. Collect everything again on the way back out. You pass this checkpoint three separate times — empty the box every single time, because it is not a real item box and anything left behind is gone.
22
FILE #3 User's Manual and a First Aid Spray are on the middle table. The workshop tables hold B.O.W. Gas Rounds ×3 and Flame Rounds ×6 — hold on to the gas rounds, they are the intended answer to the second Tyrant fight.
23
Note the 3-D Duplicator. It has nothing to work with yet.
Observation RoomPrison 1F — typewriter
24
Walking past the dividing shelves triggers a cutscene: Steve is at the computer, Claire emails Rockfort's coordinates to Leon Kennedy, and Steve reveals how thoroughly Umbrella watches the island.
25
Take Ink Ribbon ×3 from the desk and save.
26
MISSABLE Examine the inside of the computer desk to open a concealed drawer holding the KEY ITEM Hawk Emblem. Nothing signposts the drawer at all.
27
FILE #4 Facility Entrance Fax is on the workstations along the west wall.
28
Push the wall lever up. This releases the shutter lock back at the Execution Yard. The east door of this room stays blocked until Claire's second visit to the prison.
Security Corridorreturn — scan the emblem
29
PUZZLE Scan the Hawk Emblem into the 3-D Duplicator. The machine registers its shape but has no stock to print with.
The Hawk Emblem is metal, so it physically cannot leave this room past the detector. Copying it in a non-metallic alloy is the whole point of the puzzle chain.
Execution Yardreturn — shutter open, 4 zombies
30
Two zombies come out of the fenced area as the shutter rises and two more wait behind the shutter itself.
31
Take the KEY ITEM Padlock Key from beside the guillotine inside the enclosure, and the KEY ITEM Extinguisher from behind the metal shutter. There is also a shootable explosive container here — useful crowd control if the zombies bunch up.
Graveyardreturn — the truck
32
Use the Extinguisher on the burning truck. It becomes the
Empty Extinguisher.
Put the Empty Extinguisher into a real item box and never discard it. Chris refills it in the Antarctic base to put out a fire and claim the Colt Python Magnum. Throw it away here and that weapon is lost for the entire game.
33
Search the wreck for the Briefcase. Open it in your inventory for the KEY ITEM TG-01 special alloy and FILE #5 TG-01 Product Description. Three zombies respawn here — run.
Security Corridorfinal visit — print the emblem
34
PUZZLE Deposit your metal gear again, then load the
TG-01 into the duplicator. It prints the
KEY ITEM Special Alloy Emblem: an identical copy in a plastic-like alloy the detector ignores.
Three zombies smash through the windows the instant you take it. If you lower the metal window shutters at the security panel first, they cannot get in at all.
35
Empty the deposit box and leave.
Yardthe gate
36
Use the Special Alloy Emblem on the gate recess. The way to the Iron Bridge opens.
Iron BridgePrison 1F
37
Handgun Bullets ×15 are on the seat of the crashed jeep, and Green Herb ×2 lie on the ground at the far (north) end — past the damaged span, so easy to abandon if you just sprint across.
38
Push the crate to shield yourself from the fire and cross along the intact pedestrian walkway.
MISSABLE Prison checklist before you cross. M-100P (window shelf), Prison Map, Hawk Emblem drawer, Padlock Key, Empty Extinguisher stored in an item box, and files 1–5. You can return to the prison later, but only long after the fact.
CH 2Military Training FacilityClaire — first pass
The Passage on the far side of the bridge forks three ways: back to the prison, left into the Military Training Facility, and forward to the Palace. The facility is not locked — it is an optional detour — but it holds the Bow Gun, and every arrow pickup in the game is dead weight until you own it. Sweep it now.
PassageMTF 1F — 4 zombies
1
Four zombies wander here. Fight or slip past them, then take the left fork into the Exercise Yard.
Exercise YardMTF 1F — zombie dogs
2
Two or three fast dogs patrol the open ground. You can outrun them straight to the double doors.
3
Bow Gun Arrows ×30 sit on top of the oil drums.
Tank YardMTF 1F — optional side door, 2 dogs
4
A short spur most players never open. Bow Gun Arrows ×30 lie beside the wooden crates. The garage and the hangar corridor beyond belong to Chris's half of the game.
LobbyMTF 1F/2F
5
A Red Herb is on the seats and Bow Gun Arrows ×30 are sitting on one of the payphones.
6
Take the stairs to the second floor.
Observation RoomMTF 2F — keypad door
7
PUZZLE Pass number. The door here is sealed by a four-digit keypad. Look through the observation window at the red
skeleton picture hanging at the back of the biology room beyond and zoom in on the signature. The number written on it is
1126.
If you cannot get the angle from the window, the security camera control in the adjoining room lets you pan and zoom onto the same picture.
8
WEAPON Bow Gun is on the table inside — a major weapon, and the reason every arrow pickup exists. FILE #6 Memo on the Pass Number is beside it.
9
The room beyond, the Biohazard Containment Room, holds Acid Rounds and the Skeleton Picture itself. Leave the picture where it is for now — pulling it off the wall releases four Albinoid Infants, and you have no use for it until much later.
Locker RoomMTF 1F — 4 zombies
10
Three separate stacks of Bow Gun Arrows ×30: one in a west-side locker, one in a locker in the middle of the room, and one on the body near the east door.
Swimming PoolMTF 1F — 2 zombies
11
PUZZLE Drain the pool. Turn the valve wheel to shut the water off, then walk down and take the KEY ITEM Storage Key from the pool floor. Skip this and the office cupboard stays shut.
Front OfficeMTF 1F — 3 zombies, one playing dead
12
A body on the floor near the door gets up as you pass it. A Green Herb is in the south-west corner and Bow Gun Arrows ×30 are on the desk opposite the entrance.
13
Use the Storage Key on the locked cupboard for
Bow Gun Powder ×10.
Combine Bow Gun Powder with Bow Gun Arrows to make explosive arrows. Only a handful of powder pickups exist in the entire game. Never spend explosive arrows on ordinary enemies — they are your best answer to the Tyrant and to Nosferatu.
14
MAP Print the Training Facility Map from the printer. Nothing prompts you; walk up and use it.
15
The top desk drawer here needs the Lockpick, which comes from Rodrigo much later. Leave it and come back.
Passagemoving on
16
Go back out and take the far gates.
The facility's Back Courtyard, its Warehouse and the whole basement are sealed behind shutters that need the Biohazard Card from the Airport. You will make a full second pass through this building — that is why walkthroughs disagree about the area order.
17
Continue to the Palace Courtyard.
CH 3Palace & AirportClaire — the Ashford estate
The Palace is where Code: Veronica stops being a prison-escape game. This chapter runs from the front doors to the submarine, across to the Airport, and back with the keycard that reopens the Training Facility.
CourtyardPalace 1F — 3 zombie dogs
1
Work left around the burning wreck and push the crates past the fire on the central path.
2
Take the KEY ITEM Navy Proof from the central path — the first of the three emblems you need to board the plane — and the Green Herb on the terrace by the entrance.
3
Note the stairway down to the Submarine Dock. It is useless until you have the Steering Wheel.
Palace HallPalace 1F/2F
4
Handgun Bullets ×15 are on the reception desk. The computer terminal wants a passcode you do not have; the north-west door and the second-floor casino door are both locked.
Secretary's OfficePalace 2F — typewriter + item box
5
Your first item box since the prison. Save and offload anything heavy.
6
FILE #7 Secretary's Note is on the coffee table. Ink Ribbon ×3 are on the secretary's desk, Handgun Bullets ×15 on the bookshelves, and a Green Herb by the far door.
7
MISSABLE Push the cabinet standing against the wall beside the plaque door. The KEY ITEM ID Card is underneath it. Without it the whole west wing stays sealed.
8
PUZZLE Umbrella security lock. Examine the ID Card in your inventory and turn it over — the reverse is printed with NTC0394. Enter that at the Palace Hall computer and the north-west door unlocks.
9
Note the door with the gold plaque carrying two pistol-shaped recesses. That is Alfred's Office, and it needs a matching pair of guns you do not have yet.
BathroomPalace 1F — 4 bats
10
A dead end worth clearing now. First Aid Spray on the sinks, Handgun Bullets ×15 in the cubicle with the smashed door.
11
MISSABLE Take the KEY ITEM Duralumin Case from the floor by the pipes. It is locked and stays locked until you have the Lockpick, so put it in an item box — and remember it is there. It holds Bow Gun Powder ×10.
Palace CorridorPalace 1F — 4 zombies
12
Handgun Bullets ×15 on the ledge near the entrance and a Red Herb beside the seat mid-corridor. Two doors here are locked and both belong to a later chapter: the Family Portrait Room needs the Gold Key, the Umbrella Meeting Room needs the Silver Key.
Collection Display RoomPalace 1F — the trap
13
Handgun Bullets ×15 are on the central table.
14
Examine the
jewelled ant model among the display cases. A projector plays a film of Alfred and Alexia as children and a shelf slides aside.
Watch that film. It is the clue for the dragonfly puzzle in the Private Residence much later — the children pull the wings off a silver dragonfly.
15
Enter the opened room and take the KEY ITEM Steering Wheel.
16
Do not take the Gold Lugers off the wall. Removing them drops a shutter and seals you in; you have to put them straight back to get out. Steve is going to steal them for you shortly — leave them alone.
Collection Display Roomreturn — saving Steve
17
Try to leave the Palace. You hear Steve shouting: he took the Lugers and is trapped. Go back.
18
PUZZLE Weapon display puzzle. A panel of six switches labelled A to F appears, with a riddle about two pairs completing. Of everything pictured, only the twin pistols come as a pair.
Press C and E. Do it quickly. Every wrong press and every second wasted injures Steve. He survives regardless, but a clean solve is worth 400 points at the ranking screen and a slow one costs you 1,000 — a 1,400-point swing.
19
Cutscene: Steve is freed and walks off still carrying the Lugers. On your way out through the Palace Hall, Alfred appears and shoots at Claire. It is scripted — there is no fight.
Submarine DockPalace B1
20
Handgun Bullets ×15 in the storage area under the stairs, Bow Gun Arrows ×30 on the oil drum by the water, and the MAP Palace Map on the storage-area wall.
21
Use the Steering Wheel on the dock console to call the submarine up and open it.
SubmarinePalace B1
22
MISSABLE Take the Side Pack from the seats. It permanently adds two inventory slots. The submarine reads as a transit room, so this is skipped constantly — and inventory pressure is the defining difficulty of the whole game.
23
Work the control to dive. You surface at the Airport.
Check-in AreaAirport 1F — 3 zombies
24
Ink Ribbon ×3 on the boxes behind the desks and Handgun Bullets ×15 on the seats.
25
The Boarding Area to the left holds the three-slot control unit the Proofs go into. You can drop the Navy Proof in now or carry all three to the end — it makes no difference.
Bridge 1FAirport 1F — 4 bats
26
Cross quickly.
This room gets far worse later: two Bandersnatches move in the moment you own the Gold Lugers, and you have to cross it several more times.
Cargo BayAirport 1F/2F — 5 zombies
27
PUZZLE Cargo crane. Go up to the crane controls on the upper level and shift the storage crate aside so the cargo-lift switch is exposed, then run the lift.
28
The lift rises with five zombies riding it. Clear them, then take the KEY ITEM Biohazard Card and Bow Gun Arrows ×30 off the platform.
29
Note the metal shutter down here. It opens with the Airport Key at the very end of Claire's half.
30
Take the submarine back and head for the Training Facility. The Biohazard Card opens every shutter you walked past in Chapter 2.
CH 4Facility Return & PrisonClaire — the Biohazard Card loop
The Biohazard Card reopens the Training Facility, and the Training Facility hands you the two things that unlock the second half of the Palace: the Gold Key and the Hemostatic Medicine that buys the Lockpick from Rodrigo. It is a long loop with no shortcuts — stock ammunition before you start.
Exercise YardMTF 1F — new hazard
1
A Gulp Worm is now active in this yard, burrowing under the sand. It swallows Claire whole and that is an instant death. Do not fight it — sprint across and take the doors. Chris fights this thing properly later.
LobbyMTF 1F/2F
2
Use the Biohazard Card on the northern shutter. It opens the route to the Back Courtyard and the warehouse level above it.
Warehouse CorridorMTF 2F
3
Two stacks of Handgun Bullets ×15 sit on the boxes beside the vending machine.
4
Use the Biohazard Card on the shutter blocking the Warehouse — but visit the manager's room first.
Warehouse Manager's RoomMTF 2F — typewriter + item box
5
MISSABLE Take the
KEY ITEM Hemostatic Medicine from the seats.
This is the most consequential pickup in the chapter. No Hemostatic means no Lockpick, and no Lockpick costs you the Duralumin Case powder, a First Aid Spray in the model room, the office desk ammunition, another spray at the Airport, and ammunition Chris needs in the Antarctic. It also costs you 250 points of ranking bonus and a 1,000-point penalty.
6
Ink Ribbon ×3 on the desk and Green Herb ×2 in the room. Save.
WarehouseMTF 1F/2F — the trade
7
Go up to the upper floor and take the WEAPON Ingram ×2 submachine guns.
8
A
Bandersnatch drops in the instant you lift them, and
Steve smashes through the window and kills it.
This is a cutscene, not a boss fight. You cannot lose it and you cannot influence it. Steve then trades: Claire hands over the Ingrams, Steve hands over the Gold Lugers.
9
The Gold Lugers are a key item, not a weapon — they cannot be fired. Their only use is the gold plaque in the Secretary's Office. Taking them also repopulates the map: four zombies appear in the Palace Hall and two Bandersnatches each in the Passage and on Airport Bridge 1F.
BasementMTF B1 — playable Steve
10
Control switches to Steve, armed with the Ingrams and effectively unlimited ammunition. Nothing here is missable and he cannot pick anything up — but everything he kills stays dead for Claire, so clear the rooms properly rather than running.
11
His route runs turntable → basement storehouse → weapon repair shop → back through the storehouse → boiler room → the lift at the Back Courtyard.
Two explosive containers sit in the boiler room. Shoot them to clear the four zombies in there, but do not stand next to them.
12
Claire rejoins him at the lift and the scene about Steve's father plays. Control returns to Claire.
Command CenterMTF 2F — 2 zombies
13
Take the KEY ITEM Army Proof from the computer terminal — Proof number two. Grenade Rounds ×6 are beside the commander's chair and Green Herb ×2 by the wall.
14
Two bodies in this room get up after you view the security monitor. Loot before you look.
Basement StorehouseMTF B1 — the grenade launcher
15
MISSABLE Open the shutter with the
Emblem Card and take the
WEAPON M79 Grenade Launcher off the box behind it, plus
Grenade Rounds ×6 from the north-east shelves.
Both Tyrant fights are balanced around you having this weapon. Do not leave the facility without it.
16
The Emblem Card is inside the stone panel on the Back Courtyard balcony and the panel is opened with an Eagle Plate. If you have not done it yet, do it now — the same card also works the Warehouse Corridor and Lobby shutters.
Biohazard Containment RoomMTF 2F — 4 Albinoid Infants
17
Acid Rounds ×6 are on the desk. Take the
KEY ITEM Skeleton Picture off the wall — the one you read
1126 from.
Pulling it down releases four Albinoid Infants. They are slow and weak, but they poison, so keep moving.
Diorama RoomMTF 1F — typewriter
18
PUZZLE Hang the Skeleton Picture on the empty hook on the adjoining wall. The false wall behind the display slides open. Take the
KEY ITEM Gold Key.
No Gold Key means no Queen Ant Object, and that is a hard stop — the game cannot be finished without it.
19
Ink Ribbon ×3 beside the typewriter, and a cabinet here holds a First Aid Spray once you have the Lockpick. Save.
20
Read the commemorative plate on the model while you are here. The number on it is 128 — Chris needs it for a refrigerator dial in his half of the game.
CellsPrison B1 — the trade
21
Cross back over the Iron Bridge to the prison. Save at the Cells Entry typewriter, then give Rodrigo the Hemostatic Medicine. He hands over the KEY ITEM Lockpick.
22
The Lockpick opens locked drawers and cases for the rest of the game and never runs out. Go back and clear the ones you skipped: the office desk drawer in the Training Facility, the model-room cabinet, and the Duralumin Case from the Palace bathroom — open it now for Bow Gun Powder ×10.
Cremetorium & ClinicPrison 1F
23
Go through the
Prison Backyard and look into the
Cremetorium first — that is what wakes the Clinic.
Walk into the Clinic before the Cremetorium and the room is empty; the anatomist you need does not spawn.
24
In the Clinic: FILE #8 Anatomist's Note on the office table, a First Aid Spray in the wall cabinet and Handgun Bullets ×15 on the boxes by the entrance.
25
Kill the heavy anatomist zombie and take the KEY ITEM Glass Eye from its body. A second zombie sits up out of the bed — expect it.
26
PUZZLE Insert the Glass Eye into the life-size anatomy model in the office. A stairway down to the Secret Corridor opens.
Secret Corridor & Torture ChamberPrison B1
27
Five bats in the corridor — the Lighter drives them off — and a Green Herb by the pipes. The torture chamber beyond holds three zombies, Bow Gun Arrows ×30 on the device in the south-west corner and Handgun Bullets ×15 on the small round table by the armchair.
Statue RoomPrison B1 — the Iron Maiden
28
PUZZLE Iron Maiden. Take the KEY ITEM Rusted Sword from the statue on the south wall, turn the central statue so it faces correctly, then thrust the sword into the slot. The maiden swings open and a zombie falls out — kill it.
29
Take the
KEY ITEM Piano Roll from inside.
This is the only Piano Roll in the game. No Piano Roll means no King Ant Object, which means no Air Force Proof, which means the plane never leaves. It is unmissable in practice, but do not walk out of this room without it.
30
Retrace the whole route back to the Palace Courtyard.
CH 5Palace Return & Private ResidenceClaire — the Ashford secrets
Two ant statuettes, two music boxes and two forced trips across the same bridge. The residence cannot be done in one pass: the Silver Key is inside it, but the King Ant Object that key unlocks is back in the Palace casino, and that object is what opens the way up.
Courtyard & Palace HallPalace — 4 new zombies
1
Carrying the Piano Roll into the Palace triggers an ambush: Albert Wesker corners Claire. It is scripted and there is no fight. The hall now holds four zombies from the Gold Lugers respawn — two downstairs, two up.
Family Portrait RoomPalace 1F — Gold Key
2
Unlock the door with the Gold Key.
3
FILE #9 Memo to the New Family Master is on the ledge under Alfred's portrait. It lists the Ashford succession and it is the entire clue for the puzzle in this room.
4
PUZZLE Family portraits. Press the buttons beneath the paintings in succession order: the woman → the man holding twin babies → the red-haired man with the teacup → the red-haired man with the plate behind him → the man holding the paper → the man in blue with the candlestick → the large portrait of the boy.
5
The wall below Alexia's portrait opens. Take the Earthenware Vase, then examine it in your inventory and break it for the KEY ITEM Queen Ant Object.
Secretary's OfficePalace 2F — save and unlock
6
Save. If you have not opened the Duralumin Case with the Lockpick yet, do it now.
7
PUZZLE Place the Gold Lugers into the gold plaque beside the door. The two pistol recesses take them and Alfred's Office unlocks.
Alfred's OfficePalace 2F — 1 Bandersnatch
8
Handgun Bullets ×15 on the table between the couches.
9
PUZZLE Alfred's computer code. Examine the antique music box in this room, press the pale blue panel, then work the left and right controls. It reveals the digits one at a time: left-right gives 1, left gives 9, right gives 7, right-right-right gives 1. The code is 1971.
10
Enter 1971 at the office terminal. A secret passage opens — and a Bandersnatch crashes through the window at the same moment. Kill it; they are tanky, so use the shotgun, grenades or explosive arrows.
11
Take the Blue Herb on the passage floor and cross the covered bridge.
Private Residence — ground floortrip 1
12
Courtyard: two Bandersnatches patrol it and a Red Herb is behind the railing on the upper level. You cross this yard four more times — conserve heavy ammunition.
13
Entrance Hall: five bats. A First Aid Spray and Handgun Bullets ×15 are on the second-floor landing.
14
Dining Room: one Bandersnatch. Handgun Bullets ×15 by the armour display in the south-east corner, Bow Gun Arrows ×30 on the mantelpiece, and MISSABLE Ink Ribbon ×3 in the cabinet in the south-west corner — that cabinet is easy to miss and ribbons are scarce.
15
Bedroom Corridor (2F): Handgun Bullets ×15 on the desk by the entrance and a Green Herb opposite the northern bedroom door.
Alexia's BedroomPrivate Residence 2F
16
PUZZLE Use the Queen Ant Object on the music box lid. The lid opens; take the KEY ITEM Music Box Plate from inside. The music stops.
17
With the music stopped you can see the KEY ITEM Silver Key on the bed. Take it.
Alfred's BedroomPrivate Residence 2F
18
FILE #10 Message Card is on the desk.
19
The second music box here needs the
King Ant Object, which is back in the Palace.
This is the forced round trip. There is no way to shorten it — go back across the bridge.
Casino LoungePalace 2F — Silver Key
20
Unlock it from the Palace Hall upper floor with the Silver Key. Handgun Bullets ×15 on the podium by the door, Green Herb ×2 on the bar, Bow Gun Powder ×10 on the roulette table.
21
PUZZLE Use the Piano Roll on the piano. It is an auto-play piano — you do not play any notes. The tune springs a hidden compartment in one of the slot machines. Take the KEY ITEM King Ant Object.
22
Build your explosive arrows here. You now have Bow Gun Powder from the storage cupboard, the Duralumin Case and the roulette table — combine every stack with arrows. The airborne Tyrant is what they are for.
Umbrella Meeting RoomPalace 1F — Silver Key, 2 Bandersnatches
23
MISSABLE This room exists almost entirely for one file, and it is guarded by two Bandersnatches — the nastiest optional room in the Palace. FILE #11 Hunk's Report is on the desk beside the projector screen on the east wall, with Handgun Bullets ×15 on the chair in the north-west area.
24
The Eagle Plate embedded in this floor is Chris's content, not Claire's. Ignore it.
Private Residencetrip 2 — the map repopulates
25
The moment you carry the King Ant Object across, the residence refills: five zombies on the bridge, two more Bandersnatches in the courtyard (four total), four zombies in the entrance hall and four more in the bedroom corridor. Save at the Secretary's Office and stock up before you cross.
26
PUZZLE In Alfred's Bedroom, use the King Ant Object on the music box lid, then insert the Music Box Plate. The box starts playing and the concealed way up from Alexia's bedroom opens.
Play RoomPrivate Residence 3F
27
Take the KEY ITEM Silver Dragonfly from the chair beside the grandfather clock, and the Green Herb by the pile of books.
28
PUZZLE Silver Dragonfly. Examine it in your inventory and pull its wings off — exactly what the twins did in the film you watched in the Palace. Fit the wings into the slot on the large ant emblem in this room. The carousel rotates aside and exposes a ladder.
Private StudyPrivate Residence 4F — typewriter
29
Save. This is the last safe save before the endgame chain.
30
FILE #12 Newspaper Clip on the wooden steps, Handgun Bullets ×15 beside the desk and Ink Ribbon ×3 on the desk.
31
MISSABLE Push the box against the east shelves and climb it. FILE #13 Confession Letter is on the upper shelf — the file that reveals what Alfred has been doing — and the
KEY ITEM Air Force Proof is underneath it.
This is the single most-missed file in the game. Take the box push seriously: without it you lose the file and Proof number three.
Alexia's Bedroomthe reveal
32
Leaving Alexia's bedroom triggers the confrontation. Alexia appears with a sniper rifle; Steve intervenes and Claire survives. Follow through to Alfred's bedroom for the second half of the scene: Alfred is shot, catches his own reflection, understands what he has become, and flees.
33
This is what arms the island's self-destruct system. No countdown starts yet — you still have time to finish your sweep. The live five-minute timer begins much later.
34
Retrace the residence, save at the Secretary's Office one last time, and head down to the submarine.
CH 6Escape from RockfortClaire — the five-minute run
Everything from here is one continuous chain with a point of no return in the middle of it. Finish your file sweep before you board the plane, because boarding closes Rockfort Island to Claire permanently.
Boarding AreaAirport 1F — 4 bats
1
PUZZLE The three Proofs. Slot the Army Proof, Navy Proof and Air Force Proof into the three hexagonal recesses on the control unit. Order does not matter; all three must be present. The boarding gangway extends.
CockpitTransport Plane — typewriter + item box
2
Steve is in the pilot's seat. He tells you the raised bridge is blocking the take-off run.
3
Save and use the item box. This is your last full-service room before the run.
4
MISSABLE Take the KEY ITEM Control Lever off the cockpit floor. It is the missing handle for the bridge control panel. It sits on the ground while Steve is talking, which is exactly why people walk out without it. Ink Ribbon ×3 are on the bench beside the typewriter.
Bridge 2FAirport 2F
5
Ride the corner lift in the Cargo Bay up past the crane controls and out through the upper door.
6
PUZZLE Fit the Control Lever into the bridge control panel and operate it. The bridge lowers and clears the plane's path.
Maintenance RoomAirport 2F
7
Take the KEY ITEM Airport Key from the floor amongst the bodies in the corner.
8
MISSABLE Use the Lockpick on the cabinet beside the aquarium for a First Aid Spray. Almost everyone walks past this cabinet, and you are about to need every spray you own.
Cargo Bay → Cargo TransportAirport 1F — typewriter + item box
9
Use the Airport Key on the metal shutter beside the lift and go through. The room behind it is the last safe room on Rockfort Island.
10
Handgun Bullets ×15 and Grenade Rounds ×6 on the metal crates, Green Herb ×2 by the elevator. Save.
11
Build your loadout now — there is no second chance. Carry the M79 Grenade Launcher with every grenade and flame round you own for the Tyrant on the ground, the Bow Gun with explosive arrows and your B.O.W. Gas Rounds for the Tyrant in the air, and at least two healing items. Everything else goes in the box — and make sure the Empty Extinguisher is in there, not in your hands.
12
PUZZLE Crate elevator. The crates are jamming the lift. Push the rightmost crate into the elevator, then push the leftmost crate all the way right and push that one in as well. Board and ride up.
The countdown5 minutes
13
The cutscene fires on arrival: Alfred's broadcast, the island's self-destruct, and five minutes to reach the plane. The countdown appears on screen from this point — the self-destruct was armed much earlier, back in the Private Residence, but the live timer only starts here. Do not stop for items.
14
You come out in the Exercise Yard. Run for the Passage.
PassageBOSS Tyrant, first fight
15
BOSS Tyrant (T-078). It smashes through the fencing while fire closes in behind you.
Fire the grenade launcher and back away continuously — fire, retreat, fire, retreat. Roughly ten heavy hits put it down.
Do not melee it, do not stop to reload during its charge, and never let it pin you against the flames. If the fire behind you catches up before the Tyrant goes down, it is an instant game over.
16
It is knocked down rather than killed. Run past its body and keep going — Palace Courtyard, down to the dock, submarine, Airport Entry. Three extra zombies have spawned at check-in; run, do not fight.
17
Board the plane. Steve takes off and Rockfort Island detonates behind you.
Cargo HoldTransport Plane — BOSS Tyrant, second fight
18
In the cockpit, save and pull your explosive arrows and gas rounds out of the box. Steve tells you something is wrong at the rear of the aircraft.
19
BOSS Tyrant (T-078), rematch. It boarded before take-off. The back of the fuselage is open to the sky and there is a
catapult switch to one side.
You cannot kill this with ammunition. The ejection is the kill — damage only softens it up.
20
Weaken it first: fire all three B.O.W. Gas Rounds with a short pause between each, then follow with explosive arrows. Circle-strafing with grenade or flame rounds works just as well. Watch for the tell — when it starts limping and bleeding, it is ready.
21
Hit the catapult switch. Fire it too early and the Tyrant simply braces and stops the crate before it reaches the open end. The mechanism has to reset between attempts, and the launch only sticks once it is weak enough, so expect two or three cycles.
22
The crate carries it out of the back of the plane. Cutscene: Alfred's autopilot seizes the aircraft and turns it toward Antarctica. End of Rockfort Island.
CH 7Antarctic BaseClaire — the Umbrella facility
Claire's half of the Antarctic base is confined to the industrial levels: the helipad on 1F, and B1 and B2. Everything deeper — the buried Ashford mansion and Alexia's laboratory — belongs to Chris. There is exactly one save point in this entire section, and one weapon here has no spare ammunition anywhere in the game.
Jet Hangar & SiloAntarctic B1
1
The transport crashes into the base and Steve pulls Claire out of the wreck. The hangar itself is empty — do not waste time sweeping it.
2
The Silo is your hub for the whole section: it connects the hangar, the sorting room above, the bunkhouse and the stairs down to B2.
Worker's BunkhouseAntarctic B1 — 4 zombies on a trigger
3
MAP Take the Antarctic Transportation Base Map first — it turns on the map screen for the whole terminal.
4
FILE #14 Worker's Diary is on the table in the north-west corner. It is the foreshadowing file: a driver complains about the posting, repeats a rumour about a man caged below the base for more than ten years, and ends by describing growling from underground at midnight.
5
This is the richest supply room in the section: four separate stacks of Handgun Bullets ×15 (north-east shelves, the open locker, the bunk beds, north-west shelves), a First Aid Spray and Ink Ribbon ×3.
6
Take the Bow Gun Powder ×10 last — picking it up is what wakes the four bodies in the room. Also note that Chris cannot use the Bow Gun at all, so every arrow and every gram of powder must be spent by Claire or it is wasted.
Frozen CorridorAntarctic B2 — 3 moths, respawning
7
The trough here grows infinite Blue Herbs. This is a renewable antidote farm — the moths poison on contact, so top up here before every trip.
8
The three moths come back every single time you enter, and you cross this corridor a dozen times. That tax is the main cost of backtracking down here.
OfficeAntarctic B2 — typewriter + item box
9
This is the only save point and the only item box in Claire's entire Antarctic section. Everything routes through this room.
10
FILE #15 Alexander's Memo is in the cabinet on the north wall, between the desk and the item box. It explains the mother virus, Umbrella Chemical as a front, and why the Antarctic project was named Veronica.
11
Ink Ribbon ×3 on the desk, a Green Herb and Bow Gun Arrows ×30.
12
MISSABLE Push the bookcase unit aside to open a concealed area behind it. Open the locker inside for FILE #16 Butler's Letter.
13
MISSABLE Take the
Plant Pot off the floor of that hidden area, then
examine the Plant Pot in your inventory. The KEY ITEM Machine Room Key is stuck to its underside. Picking the pot up is not enough — this is the most commonly missed item in Claire's Antarctic half, and the section cannot be finished without it.
14
There is a wall button in the hidden area that does nothing until base power is restored, and a locked cupboard that only Chris can open later. Note both and move on.
Sorting RoomAntarctic B2 — 3 zombies
15
MISSABLE Use the Lockpick on the locker in the north-east corner for Shotgun Shells ×7.
16
Note the conveyor belt and its send switch — that is the machine the gas mask puzzle runs on. Nothing works on it until the power is on. The Mining Room door here is locked.
Weapon RoomAntarctic B2 — the AK47 locker
17
Take the KEY ITEM Mining Room Key off the metal crate beside the package chute, and the KEY ITEM Detonator from the corpse at the back.
18
PUZZLE Explosive locker. Use the Detonator on the charges rigged to the steel locker to plant it, then
use the Lighter to set it off. Inside:
WEAPON AK47 Assault Rifle and three stacks of
Handgun Bullets ×15.
The Lighter you picked up in the very first room of the game is the only ignition source in the base. If you discarded it, this weapon is unreachable.
19
The blast wakes the room: four dormant zombies get up and the body on the floor reanimates.
20
The Colt Python Magnum is visible in here behind a fire. Claire cannot get it — putting that fire out needs the Empty Extinguisher refilled at a tank Claire can never reach. It is Chris's weapon. Do not waste time on it.
21
Worth considering: leave the AK47 in the item box for Chris. He meets far more Hunters and Sweepers than Claire has left to fight, and the box is shared.
Mining Room & Power RoomAntarctic B2 — 3 dogs
22
Unlock the Mining Room with its key. Steve is here, tinkering with an enormous drilling machine. Go through to the Power Room first, while the air is still clean.
23
The power room is unlit and three fast dogs are loose in it — genuinely dangerous in the dark. Green Herb ×5 are scattered around it and Handgun Bullets ×15 ×2 sit on the ledge in the south-east corner.
24
Start the generator, then throw the main power switch. Three things come alive: the sorting-room conveyor, the hidden button in the office, and the lighting.
25
Back at the drill, Steve tampers with the control panel and runs off, flooding the drilling complex with poisonous gas. From here on the game asks whether you want to put on a gas mask you do not own. You are gated until you find one.
B.O.W. RoomAntarctic B2 — 3 Black Widows
26
One of the three giant spiders is wedged under the floor and is literally unkillable — but it can still poison you. Do not stand on that patch trying to fight it.
27
Take the KEY ITEM Bar Code Sticker from the crates at the far end, Bow Gun Arrows ×30 by the conveyor, a Green Herb and Blue Herb in the north-west corner and Handgun Bullets ×15 ×2 from the north-east crates.
28
Note the sealed emergency case beside the door. It holds a gas mask and it will not open by hand: it is built to release automatically when the room detects a hazardous gas condition.
Sorting RoomPUZZLE the conveyor
29
PUZZLE Gas mask chain. One package is still sitting on the conveyor — a crate of Anti-B.O.W. gas. Stick the Bar Code Sticker onto that crate to give the sorter a destination, then press the send switch. The powered conveyor routes it into the B.O.W. Room.
30
Go back into the
B.O.W. Room. The crate has ruptured, the room is full of gas, the hazard sensor has tripped and the emergency case has popped open.
Take the KEY ITEM Gas Mask and get out.
You solved it by deliberately gassing the room you were standing in. That is the intended answer.
Tool StoreroomAntarctic B1 — the lathe
31
Handgun Bullets ×15 ×2, Ink Ribbon ×3, a Blue Herb and a Green Herb. One zombie is sealed inside the cage and cannot reach you; the case beside it is Chris's.
32
Note the lathe — a metal-shaving machine. You have nothing to feed it yet.
Machine RoomAntarctic B1 — gas mask required
33
Unlock it with the Machine Room Key and answer yes to the gas mask prompt.
34
Examine the gas pipe. The description states outright that the handle needed to shut it off has to be octagonal — the game telling you what to manufacture. Continue up to the walkway beyond and take the KEY ITEM Valve Handle off the floor. It is the wrong shape.
Tool Storeroomreturn — the conversion
35
PUZZLE Use the Valve Handle on the lathe. It shaves the shaft down to an octagonal profile and you receive the KEY ITEM Octa Valve Handle.
36
Five extra zombies spawn in the B2 sorting room the moment you take it, on top of the three already there. Budget your ammunition or plan to run.
Machine Roomreturn — vent the gas
37
Use the Octa Valve Handle on the pipe. It seats into the octagonal socket and vents the gas out of the drilling complex below.
Claire leaves the handle attached to the valve. It has not vanished — Chris collects it from that exact valve much later, and five zombies ambush him for it.
Mining RoomAntarctic B2 — the rifle
38
With the gas cleared, Alfred and Steve appear. Alfred opens fire from an elevated position and proves to be a spectacularly poor shot; Steve returns fire and Alfred falls into the pit.
39
Take the
WEAPON MR7 Sniper Rifle from the lower level where he dropped it. It is bolt-action with a scope and a laser pointer, and aiming snaps to a first-person view.
There is no MR7 ammunition anywhere in the game. What is in the magazine is all you will ever have, and it exists for exactly one fight. Do not fire a single round at a zombie, dog, moth or spider.
40
Go back to the Office and save now. There is no typewriter and no item box past this point, and the next room transition drops you straight into a boss fight.
HelipadAntarctic 1F — BOSS Nosferatu
41
Loot before you trigger anything. Handgun Bullets ×15 are inside the metal crate on the left of the platform and a
First Aid Spray is on the antenna on the right.
Get the spray first. Once the fight starts, crossing the open platform to reach it is a serious risk.
42
BOSS Nosferatu — Alexander Ashford, the twins' father, mutated by a failed T-Veronica experiment and caged beneath the base for over a decade. Moving toward the steps spawns him.
43
Create distance immediately. His whip-like tentacles sweep wide and can knock Claire clean off the edge of the helipad, which is an instant death rather than damage.
44
Weak point: the exposed heart in his open chest. It is only vulnerable at certain moments — most reliably during and just after a wide tentacle sweep, when his torso opens up.
45
Back off to maximum range, equip the MR7 and scope in. Put the reticle on the heart. Four to six clean heart shots finish him. Do not shoot the head or the body — you have no ammunition to spare for misses. If the rifle runs dry, switch to explosive arrows or the AK47.
46
Avoid the purple gas he vents. It inflicts a special poison that Blue Herbs will not cure, and Claire has no cure anywhere in her scenario. If she ends this fight poisoned she stays poisoned into the handover, and Chris is forced into a long, dangerous detour to fetch the Serum — an item that only exists because she needs it. Fighting from range is worth real time on the clock.
47
With Nosferatu dead, Alexia Ashford makes her entrance. Claire's section ends and control passes to Chris Redfield.
CH 8Rockfort ReturnChris — the caverns and the facility
Chris arrives on a ruined island with a Glock 17, a knife and everything Claire banked in the item boxes. His half is far more combat-heavy — Hunters, Sweepers and Spotters replace the zombies — and it opens with a boss fight you are not equipped for.
CaveMTF B3 — BOSS Gulp Worm
1
Opening sequence: Chris scales the cliff and loses his supply pack. Take the Green Herb and Blue Herb near the south entrance.
2
Walking forward triggers the scene: the Gulp Worm erupts and swallows Rodrigo.
3
Do not fight it bare. Push north to the Tomb first, raid the item box for whatever Claire left, and save.
4
BOSS Gulp Worm. It hunts by ground vibration.
Stand still until the tremor telegraphs directly under you, sidestep the lunge, then dump damage into the exposed body before it burrows again. Explosive arrows or the assault rifle are fastest.
Being swallowed is an instant kill. And kill it quickly: Rodrigo is only expelled alive if you are fast, and a slow kill can cost you the Lighter he hands over.
5
MISSABLE Rodrigo tells Chris that Claire has gone to Antarctica and gives him Claire's Lighter, then dies. Collect Handgun Bullets ×15 and Bow Gun Arrows ×30 by the north elevator.
TombMTF B3 — typewriter + item box
6
MISSABLE Use the Lighter on the wall grate to burn through it and take a second pair of
WEAPON Ingram ×2 submachine guns.
No Lighter, no Ingrams — permanently.
7
Green Herb by the collapsed north-east entrance, Bow Gun Arrows ×30, plus Ink Ribbon ×3 and more arrows in the south-west furniture.
Garage & Tank YardMTF 1F — 3 zombies, 2 dogs
8
Climb the wooden box onto the barrels for Handgun Bullets ×15. The construction lift in here is dead — it needs a battery pack.
9
In the Tank Yard: press the switch on the back of the tank to drive it aside. It was parked on Handgun Bullets ×15, and moving it clears the way to the stairs down. Bow Gun Arrows ×30 sit by the wooden crates.
Jet Hangar CorridorMTF B1 — Black Widows
10
Green Herb, Blue Herb and Shotgun Shells ×7 along the corridor.
11
Take the KEY ITEM Battery Pack from the floor at the far end. Black Widows drop out of the ceiling vent as you lift it — they poison, so deal with them at range.
12
Note the sealed door with the odd recessed panel at one end. That is the way off Rockfort and it is the last thing you will do here.
Captain's RoomMTF B1 — typewriter + item box
13
Save. This room is a supply depot: Ink Ribbon ×3 by the typewriter, a Green Herb in the north lockers, Acid Rounds ×6 in the middle locker, shotgun shells and handgun bullets on the south benches — and an infinite Blue Herb spawn in the north-east corner, which is your poison insurance for the whole facility.
14
PUZZLE Coloured drawers. The clue reads that lava burns the forest, flows to the sea and forms the earth. Open them in that order: RED → GREEN → BLUE → BROWN.
15
MISSABLE The brown drawer yields the
KEY ITEM Luger Replica.
It does nothing in the story and it is easy to dismiss — but carrying it to the end of the game is the unlock condition for playable Steve in Battle Game. Miss it and the only fix is another full playthrough.
Garagereturn — the lift
16
Install the Battery Pack in the construction lift and ride it up to the east upper walkway.
17
Take the
KEY ITEM Chemical Storage Key and
FILE #17 MISSABLE Alloy Report from the table at the end.
The report is your pointer that the indigo special alloy needs a solvent — that is the Clement chain, and it runs the rest of this chapter.
Iron WalkwayMTF B1/B2 — the shotgun
18
Take the WEAPON SPAS 12 Shotgun off the wall hook by the metal stairway. This is your workhorse for the rest of Rockfort. A zombie in the water below wakes as you lift it.
19
Sweep the rest: Flame Rounds ×6 and Ink Ribbon ×3 by the south-west shelves, Red Herb ×2 on the eastern ledge, and MISSABLE Handgun Bullets ×15 hidden inside the gargoyle's mouth.
Specimen LabMTF B1/B2
20
Use the control panel in the south-west corner to lower the third specimen tank, then take the Assault Rifle Bullets off the top of it. A Green Herb is on the lower floor.
Turn Table RoomMTF B1 — 2 Bandersnatches, then 2 Hunters
21
Kill the Bandersnatches from range — they leap. Bow Gun Arrows ×30 are in the corner by the switchboard.
22
Take the
KEY ITEM Door Knob from the turn table.
Two Hunters drop in the instant you take it. Hunters decapitate Chris outright when his health is low — heal to full before you pick it up, then shotgun them or fight from a doorway.
Chemical Storage RoomMTF B1 — the refrigerator
23
Unlock it with the Chemical Storage Key. Shotgun Shells ×7 and Handgun Bullets ×15 on the middle bench, Red Herb and Blue Herb on the south-east side bench.
24
PUZZLE Refrigerator temperature. Set the dial to exactly
12.8 °C and take the chemical:
Clement Σ.
The number comes from the commemorative plate on the model in the Diorama Room, which reads 128. Any other temperature produces the wrong compound.
25
A Sweeper — the poisonous purple Hunter variant — attacks once you take it. The infinite blue herbs are back in the Captain's Room.
Weapon Repair ShopMTF B1 — 3 zombies
26
MISSABLE Use the parts on the workbench to build the WEAPON Modified Glock 17. It is a straight upgrade to damage and rate of fire and there is no reason to skip it.
27
Take Clement α from the shelves by the workbench and Handgun Bullets ×15 by the north bench. If Claire banked the Lockpick, the glass cupboard holds Acid Rounds ×6.
28
PUZZLE Combine Clement α with Clement Σ to make the Clement Mixture — the solvent for the indigo alloy. You do not need it until the water pool, so bank it if slots are tight.
Basement Storehouse & Boiler RoomMTF B1
29
Grenade Rounds ×6 on the north-east shelves of the storehouse. The boiler room holds eight zombies in a tight space and two explosive containers — shoot the containers rather than burning shells on the crowd.
Back Courtyard & LobbyMTF 1F/2F
30
A zombie plays dead by the fence in the courtyard and gets up as you pass. In the Lobby: a Red Herb on the seats and Bow Gun Arrows ×30 on a payphone.
31
PUZZLE Fit the Door Knob to the handleless door at the top of the lobby stairs. It opens onto the garage's west upper walkway.
32
Take the KEY ITEM Tank Object — a miniature tank model — from the table there, plus Handgun Bullets ×15.
Elevator CorridorMTF 1F — Spotter
33
A Spotter patrols this corridor from the moment you hold the Door Knob. If its camera beam sees you, it deploys a Hunter. Shoot it down if you can spare the ammunition, otherwise time your run through its sweep. It leaves once the Tank Object is used.
Diorama RoomMTF 1F — typewriter
34
PUZZLE Place the Tank Object into the depression on the diorama. A panel behind the plaque springs open.
35
Take the KEY ITEM Turn Table Key and FILE #18 MISSABLE Passage Memo. If you have the Lockpick, the cabinet here holds a First Aid Spray. Save.
Turn Table Room & WarehouseMTF B1/1F
36
Use the Turn Table Key on the switchboard and rotate the turn table. It links the storehouse to the lift up into the Warehouse.
37
Take the
Bow Gun Powder ×10 up in the Warehouse.
Chris cannot fire the Bow Gun, so this powder is only worth taking if Claire still has arrows banked, or purely for the completion sweep.
Specimen Labreturn — Wesker
38
Approach the west side. Wesker reveals himself, mocks Chris and confirms Alexia is alive. A Bandersnatch bursts out of the cracked second tank during the scene — kill it.
Exercise YardMTF 1F — 2 Hunters
39
Two Hunters in open ground is the most dangerous non-boss encounter on the island. Use the SPAS 12, keep your back clear and never let them flank you. Three dogs are loose here as well.
40
Take the Bow Gun Arrows on the oil drums and the Shotgun Shells on the ground by the collapsed boxes, then head north-east for the Airport.
CH 9The Airport & the HalberdChris — leaving Rockfort
One puzzle in this chapter — the oil-pressure gauges — stops more players than any boss in the game. The rest is a loop: take the three Proofs back out of the airport, feed them to the diorama, and dig down to the key that gets you off the island.
Cargo TransportAirport 1F — typewriter + item box
1
Save and rebalance. Handgun Bullets ×15 and Grenade Rounds ×6 on the metal crates, Green Herb ×2 by the elevator.
Cargo BayAirport 1F/2F — 5 zombies, 1 Hunter
2
Use the upper control panel to move the storage crate and free the cargo-lift switch, then run the lift. Five zombies ride up on it.
3
Take the KEY ITEM Biohazard Card and Bow Gun Arrows ×30 off the platform.
Check-in AreaAirport 1F — 6 zombies
4
Ink Ribbon ×3 on the boxes behind the desks, Handgun Bullets ×15 on the seats and Shotgun Shells ×7 on the floor by the metal shutter.
Maintenance RoomAirport 2F — PUZZLE oil pressure
5
Take the KEY ITEM Airport Key from the floor among the bodies, and use the Lockpick on the cabinet beside the aquarium for a First Aid Spray.
6
PUZZLE Oil pressure. The console feeds a bottom tank that holds 10 litres from three upper gauges: a broken 1 L, a 3 L and a 5 L. You need the bottom tank sitting on exactly 7 litres. Press: 3, 3, 5, empty, 3, 3, 5.
7
Why it works. 3+3 fills the tank to 6. The 5 L gauge can then only pour in 4 more before the tank caps at 10, which strands 1 litre inside it — and the 5 L gauge does not refill. Empty the bottom tank, pour 3+3 to reach 6 again, and discharge that leftover litre for exactly 7.
8
The bodies in the corner get up as the puzzle resolves — three zombies, sitting on Shotgun Shells ×7. Restored pressure drops the gangway and opens the route to the boarding area.
Boarding AreaAirport 1F — 4 bats, 1 Hunter
9
Switch the electricity off at the console first — the panel is live until you do.
10
Open the control panel and take all three Proofs: KEY ITEM Army, KEY ITEM Navy and KEY ITEM Air Force. These are the same emblems Claire slotted in to board her plane; Chris pulls them back out.
11
Expect two Sweepers waiting in the Exercise Yard on the way back. They poison — carry blue herbs.
Observation RoomMTF 2F — the Side Pack
12
Use the Biohazard Card on the southern Lobby shutter to reopen this wing.
13
MISSABLE Take the Side Pack from the top of the collapsed lockers. It takes Chris to ten inventory slots.
The endgame item juggling — three jewels, four wing objects, a paper weight, a halberd, a security card — is brutal without it.
14
Bow Gun Arrows ×30 on the south-west floor. A Spotter works this room too, so keep out of its beam.
Diorama RoomMTF 1F — final visit
15
PUZZLE Insert the Army, Navy and Air Force Proofs into the diorama's control panel. The model and the description podium slide aside, revealing Shotgun Shells, a Green Herb and a hatch down.
16
Save before you descend.
Underground PassageMTF B1 — 2 Black Widows
17
Green Herb and Grenade Rounds ×6 on the ground in the middle. Kill the spiders at range.
Water PoolMTF B2 — BOSS Albinoid Adult
18
Do not wade in. The Albinoid electrifies the entire body of water; stepping in while it is alive is near-guaranteed heavy damage.
19
BOSS Albinoid Adult. The reliable approach is to shoot it from the pool edge whenever it swims along the perimeter — magnum, shotgun and grenade rounds all work.
20
It is skippable. If you would rather keep the ammunition, sprint to the centre, grab the plate and get out before it closes on you. Risky, but entirely legal.
21
Take the KEY ITEM Eagle Plate from the centre of the pool, plus Green Herb ×2, a Blue Herb and Handgun Bullets ×15 from the north-east corner.
22
PUZZLE Use the Clement Mixture on the Eagle Plate. The solvent eats away the indigo alloy shell and leaves the golden KEY ITEM Halberd — an Ashford family crest key.
Jet Hangar CorridorMTF B1 — point of no return
23
MISSABLE Bank your gear before you use the Halberd. Put the Luger Replica in an item box and make sure the Halberd itself travels with you — you need it again in Antarctica for a locked cupboard, and there is no way back. Confirm the Alloy Report and Passage Memo are read.
24
Use the Halberd on the door panel at the sealed end of the corridor. Sirens, warning lights, and a cutscene: Chris — former Air Force, former S.T.A.R.S. — commandeers the jet and flies after Claire. End of Rockfort Island.
CH 10Antarctic BaseChris — the industrial levels and the mansion
Chris reopens the levels Claire could not reach: the buried Ashford mansion below B3. This chapter is a long chain of combinations — a valve handle becomes a socket wrench, a socket wrench restores power, power lets you take two jewels out of a statue, and one of those jewels ends up in a mural. Keep the Halberd on you.
Jet Hangar & SiloAntarctic B1 — 2 Tentacles
1
Wall-mounted tentacles guard the silo and cannot be dodged cleanly at close range — shoot them off or hug the far wall.
Worker's BunkhouseAntarctic B1 — 4 zombies on a trigger
2
If Claire cleared this room it is thin, but Chris gets his own pickups: Grenade Rounds ×6 on the west bunk bed, a First Aid Spray in the open locker, Ink Ribbon ×3 between the west bunks, plus the wall map if it is still there.
3
The bodies here animate the moment the Bow Gun Powder is taken, so leave it for last as Claire did — or skip it entirely, since Chris cannot use the Bow Gun.
Tool StoreroomAntarctic B1 — 4 zombies
4
MISSABLE Use the Lockpick on the Duralumin Case inside the cage for Magnum Bullets. Claire could not open the cage; Chris can, and this ammunition is for the weapon that kills Alexia. Also here: Handgun Bullets ×15 ×2, Shotgun Shells, more Magnum Bullets, Ink Ribbon ×3 and herbs.
Machine RoomAntarctic B1 — 5 zombies
5
Take the
KEY ITEM Octa Valve Handle — it is still screwed onto the pipe where Claire left it.
Five zombies rise the instant you pull it. Back into the doorway and funnel them rather than fighting in the open.
Frozen CorridorAntarctic B2 — poison zombies
6
Chris meets two zombies infected with moth larvae down here, on top of the three respawning moths. They poison — kill them at range and stock up from the infinite Blue Herb trough, which is your permanent antidote supply for the whole base.
OfficeAntarctic B2 — typewriter + item box
7
Save. Bow Gun Arrows ×30 on the coffee table, two lots of Ink Ribbon ×3 and a Green Herb.
8
MISSABLE Use the Halberd on the locked cupboard — the one Claire had to walk away from. Inside:
FILE #19 MISSABLE Alfred's Diary,
Ink Ribbon ×3, and the
KEY ITEM Paper Weight.
The Paper Weight is not optional. The symbols on its four faces are the answer to the console puzzle in Alexia's laboratory, and that puzzle is a hard lock. This is why the Halberd had to come with you from Rockfort.
9
If Claire did not do it, push the bookcase aside for FILE #16 Butler's Letter in the hidden locker.
Weapon RoomAntarctic B2 — the Serum
10
MISSABLE Take the Serum from the shelf opposite the entrance.
If Claire finished the Nosferatu fight poisoned, this is the only thing that saves her when Chris finds her. Three zombies wake when you take it — take it anyway and carry it with you.
If Claire came through that fight clean, this room may have nothing for you but the fire.
11
The Colt Python is here behind a fire and you still cannot reach it. Note it and go up.
Water Tank RoomAntarctic B1 — the refill
12
PUZZLE Extinguisher chain. Pull the Empty Extinguisher Claire banked back on Rockfort out of the item box, hit the central switch to raise the tank, and refill it here.
13
Take the refilled extinguisher back down to the
Weapon Room,
put out the fire, and claim the
WEAPON Colt Python Magnum.
This is your primary weapon for Alexia's first two forms. The entire extinguisher chain — a burning truck in the Rockfort graveyard, hours earlier, in a different character's scenario — exists for this one moment. Hoard every Magnum Bullet you find.
CorridorAntarctic B1 — 2 Spotters
14
This is Wesker's surveillance gauntlet. Every time a Spotter's beam catches you it deploys a Hunter. Time your run or shoot them down.
Mansion CourtyardAntarctic B5 — 1 Sweeper
15
MISSABLE Take
both KEY ITEM Wing Objects: one on the ground by the rotating carousel and
one sitting on the large urn beside it.
The urn one is very easy to walk past, and you need all four wings later to build the key that opens the reactor core. Missing it is a hard lock.
16
Green Herb ×2 flank the double doors.
Main HallAntarctic B4/B5 — finding Claire
17
MISSABLE Take the Combat Knife off the central balcony on the second floor before you do anything else. Revive Claire first and the knife falls to the ground floor. You specifically need it later to cut her free of Alexia's slime, so take it now while it is easy.
18
Revive Claire under the stairs. If she is still poisoned from Nosferatu, use the Serum on her now. Cutscene: Alexia appears, Wesker arrives, Claire is taken.
19
Note the mural at the top of the central staircase with three empty jewel settings. That is this half of the game's destination.
StudyAntarctic B4 — typewriter
20
Save. Take the KEY ITEM Sterile Room Key from the desk drawer, Shotgun Shells ×7 from the bench and Ink Ribbon ×3 by the typewriter.
21
MISSABLE Search the coat hanging on the coat rack. There is a First Aid Spray inside it — one of the easiest free items in the game to walk past.
22
The Bedroom Corridor outside holds four zombies (and five more once you carry both coloured jewels) with Green Herb ×2 on the north side.
High Voltage RoomAntarctic B5 — typewriter + item box
23
Reached through the Icy Corridor, which has eight zombies and herbs at both ends. Inside: Green Herb ×2, a Blue Herb, Handgun Bullets ×15 ×2, Shotgun Shells ×7 and Ink Ribbon ×3. Save and bank.
24
The master power switch in this room is the hinge of the next puzzle. Remember where it is.
Art RoomAntarctic B5 — PUZZLE the tiger statue
25
Open the Main Hall double doors with the Sterile Room Key to reach it.
26
PUZZLE Tiger statue. The statue is wired to the mains and it behaves differently depending on the power. With the power ON, pull the Blue Jewel — the statue rotates and exposes a hidden compartment behind its left side. Take the KEY ITEM Socket.
27
Then go to the High Voltage Room and switch the power OFF, come back, and take the
KEY ITEM Red Jewel and
KEY ITEM Blue Jewel out of the eye sockets safely.
Yanking jewels out with the current live is what hurts you and closes the compartment again. Order matters: socket with power on, jewels with power off.
28
MISSABLE Take the Magnum Bullets hidden behind the right side of the statue — Colt Python ammunition, and genuinely easy to leave behind.
29
MISSABLE Push the statue over the crack in the floor and search the urn for the MAP Antarctic Lab Map. Without it you navigate the mansion levels blind.
30
Handgun Bullets and Shotgun Shells are in the south-east cabinet.
Square Valve HandlePUZZLE the combination chain
31
PUZZLE Combine the Octa Valve Handle with the Socket to make the KEY ITEM Square Valve Handle. The socket restores the shaft to its original square profile — the shape Claire had ground off.
32
Fit it to the valve in the High Voltage Room to restore power to the facility.
33
Then take it to the Water Tank Room and drain the tank. The
KEY ITEM Crane Key is at the bottom.
A Sweeper explodes through the tank glass the second you grab it. Be at full health before you reach in.
Sorting Room 2FAntarctic B1 — the crane
34
Enter the crane cabin and use the Crane Key. The crane hauls a frozen body out of the ice: Nosferatu, the boss Claire killed, still wearing an earring.
35
Take KEY ITEM Alexander's Pierce from the ice beside him, then examine it in your inventory and remove the jewel → KEY ITEM Alexander's Jewel. Jewel 1 of 3.
36
BOSS A
Giant Black Widow bursts up out of the ice.
Optional. Keep moving and use heavy firepower if you want the room clear, or simply take what you came for and leave.
Alexia appears in cutscene afterwards.
CH 11Alexia's Lab & FinaleChris — the last stand
Two jewels, one dragonfly, one password and three forms of Alexia Ashford. Everything in this chapter feeds the same lock, and once the self-destruct is armed there is no going back for anything you left behind.
Ant FarmAntarctic B6 — swarming ants
1
MISSABLE Take the third KEY ITEM Wing Object from the small jutting platform in front of the giant nest. Green Herb ×2 sit by the doors. The ants chip away at you constantly — keep moving.
Alexia's StudyAntarctic B6 — 5 zombies
2
FILE #20 Queen Ant Report is on the desk. Green Herb and Blue Herb by the lamp pillar, Handgun Bullets ×15 ×2 on the north lab bench. One zombie starts prone.
Alexia's LabAntarctic B6 — PUZZLE the symbol console
3
PUZZLE Symbol sequence. Read the four faces of the
Paper Weight and enter them on the console in order:
AA → CROWN → HEART → SPADE. Then
insert the Paper Weight itself into the slot.
The reading is twins, then royalty, then love, then rank — the Ashford family in four symbols.
4
A cryotube opens and Alfred Ashford's body tips out. Take KEY ITEM Alfred's Ring, then examine it and remove the jewel → KEY ITEM Alfred's Jewel. Jewel 2 of 3.
5
FILE #21 MISSABLE Virus Research Report is on the console under the large north screen.
The music boxesAntarctic B4 — PUZZLE
6
PUZZLE In Alfred's Bedroom, use the Blue Jewel on the music box to open its lid. It is missing its plate.
7
PUZZLE In Alexia's Bedroom, stop the music first, then use the Red Jewel on that box to open it and take the KEY ITEM Music Box Plate.
8
PUZZLE Return to
Alfred's Bedroom and
fit the Music Box Plate into his box. It plays the Ashford tune and a
hidden ladder drops, opening the way up to the Conference Room.
This is the same two-box trick Claire solved with the ant statuettes in the Private Residence, rebuilt with jewels.
Conference RoomAntarctic B3
9
Take the KEY ITEM Dragonfly Object out of the tub containing an anthill on the conference table. Also here: Handgun Bullets ×15, Green Herb ×2 and Ink Ribbon ×3 on the west shelves.
T-Veronica LabAntarctic B4
10
FILE #22 MISSABLE Veronica Report is in here, with Green Herb ×2 by the metal steps, Handgun Bullets ×15 between the two large test tubes and Shotgun Shells ×7 by the lower control panel.
11
Use the control panel to open the containment chamber for the fourth KEY ITEM Wing Object.
12
PUZZLE Attach all four Wing Objects to the Dragonfly Object → KEY ITEM Gold Dragonfly. It is the only thing that opens the Reactor Core.
Sitting RoomAntarctic B4 — item box
13
MISSABLE Shoot the hook panel behind the bookcase with the shotgun. A concealed alcove opens holding
Flame Rounds ×6 and
Grenade Rounds ×6.
Nothing in the room suggests shooting the wall. This is free heavy ammunition immediately before the hardest run of fights in the game.
14
Green Herb, Red Herb, Handgun Bullets ×15 on the central table and Shotgun Shells ×7 on the south-east sofa.
'L' CorridorAntarctic B4 — 2 Tentacles
15
One tentacle bursts through on each stretch. Bow Gun Arrows ×30 and Grenade Rounds ×6 are hidden under the middle glass cabinets — one under each.
Detention CenterAntarctic B4 — PUZZLE the crystal
16
Loadout check before you trigger anything here. Once the Steve sequence starts you go almost straight into Alexia with no chance to restock. Chris should be carrying the Colt Python and every Magnum Bullet, the SPAS 12 with shells, at least one First Aid Spray, mixed herbs and the Combat Knife. Save at the Study or High Voltage Room first.
17
Bow Gun Arrows ×30 ×2 are in the upper-level cell.
18
PUZZLE Crystal and crushing slab. Turn the handle on the cannon on the upper level to tip out the
KEY ITEM Crystal. It cannot be broken by hand:
place it under the descending weight, then
get clear and trigger the slab.
The slab kills Chris outright if he is standing under it.
The crystal shatters and yields the
KEY ITEM Security Card.
19
At the barred door: Chris finds Claire trapped in slime. Cut her free with the Combat Knife, and if she is still poisoned, use the Serum. Steve is dragged away and injected with T-Veronica.
Hall of ArmorsAntarctic B4 — BOSS Mutated Steve
20
Control switches to Claire, and this fight cannot be won. Mutated Steve takes no meaningful damage from anything and his axe cannot be fully dodged. Any ammunition you gave her is wasted.
21
Run. Sprint straight up the passageway between the suits of armour, take the corner cleanly and keep going. Do not stop, do not turn to fight.
Carry healing only in this segment — a First Aid Spray and herbs. If Claire is still poisoned and you never used the Serum, this chase can kill her.
22
Cutscene: Steve smashes through the door, fights off Alexia's control long enough to save Claire, reverts to himself and dies in her arms.
Detention Centerreturn — the password
23
Control returns to Chris. Two zombies wake as you pass them.
24
FILE #23 Claire slides the Security File under the door. Take it and examine it — it carries the security clearance and the self-destruct documentation, and the final password is written in it.
25
Use the Security Card on the iron bars in the Hall of Armors to open the route onward.
Main HallAntarctic B5 — BOSS Alexia, first form
26
Cutscene:
Alexia confronts Wesker. He fights her — wall-running, on fire, the full display — then breaks off the moment he spots Chris and leaves her to him.
Wesker is never a boss fight. In Code: Veronica X and the HD release this scene is rebuilt to show off his superhuman abilities, but it is always a cutscene.
27
BOSS Alexia Ashford, first form. One of the most lethal fights in the game.
Her grab is a near-guaranteed instant kill. Stay as far from her as you can and never let yourself get cornered.
28
She throws heat projectiles from her fingertips and lays lines of burning blood across the floor to funnel you into a corner. Keep circling the hall and keep the staircase between you.
29
Use the Colt Python. Five to six magnum rounds is the usual kill — end it fast rather than trying to chip her down. Roughly fourteen shotgun blasts is the fallback.
30
She retreats. Take KEY ITEM Alexia's Choker from the floor beside the staircase and examine it to remove the jewel → KEY ITEM Alexia's Jewel. Jewel 3 of 3.
31
PUZZLE The three-jewel mural. Go to the top of the central staircase and set Alexander's, Alfred's and Alexia's jewels into the mural. The painting slides down and opens the way to the rest of the base.
Reactor CoreAntarctic B4 — the self-destruct
32
MISSABLE Point of no return. Before you use the Gold Dragonfly: confirm all 23 main-game files are read, that the Luger Replica is sitting in an item box, and that you are carrying magnum rounds, grenade rounds and healing. Nothing behind you is reachable after this.
33
Use the Gold Dragonfly to open the reactor core. Two zombies inside; Green Herb ×2 in the north-east corner and by the south-west panel — the last free healing in the game.
34
PUZZLE At the south-west control panel, use the Security Card, then enter the password: VERONICA.
35
Self-destruct armed — five minutes. This base fails progressively rather than in one blast, so sections start collapsing immediately.
Upper Ant FarmAntarctic B4 — BOSS Alexia, second and third forms
36
BOSS Alexia, second form. She erupts as the countdown starts: an insect upper body from the ant DNA in T-Veronica over a mass of plant-like roots, summoning flying ants.
37
There is no finesse here — unload everything. Magnum rounds, grenade rounds, shotgun shells, assault rifle. You are never coming back for this ammunition. Keep moving to shake the swarm and heal the moment you hit yellow.
38
BOSS Enough damage forces the
third form — she splits away as a fast, spindly, winged thing.
She is immune to essentially every conventional weapon. Do not waste your remaining ammunition on her.
39
The moment she transforms, the wall lock on the
WEAPON Linear Launcher releases in this room.
Take it. It is not missable and you cannot lock yourself out of it — the release is automatic.
40
It is an experimental anti-B.O.W. rail cannon: it
must charge before it fires. Dodge her until you have a clean line,
hold the charge until it maxes, and release only when she pauses inside the reticle.
Firing early wastes the charge, but a miss is survivable — the launcher does not run out. One clean maximum-charge hit ends Alexia Ashford permanently.
Escapethe last five minutes
41
Sprint out as the base tears itself apart. Chris chases Wesker, who has taken Claire, and loses them at a door.
42
He reaches Claire and gets her on her feet; she runs ahead to the aircraft.
Chris versus Wesker is scripted. Wesker is no longer human and you cannot out-fight him — in Code: Veronica X and the HD release the sequence is extended, with Chris using a metal pipe. He is put down regardless.
43
An explosion engulfs Wesker, falling debris finishes the job, and he breaks off — declaring he is taking Steve's body. Chris takes the elevator up and jumps aboard the jet Claire is already flying. They clear the blast as the Antarctic base goes up. End of game.
Clearing the game unlocks Battle Game, and an A rank unlocks the infinite Rocket Launcher. See the Unlockables tab for every condition.