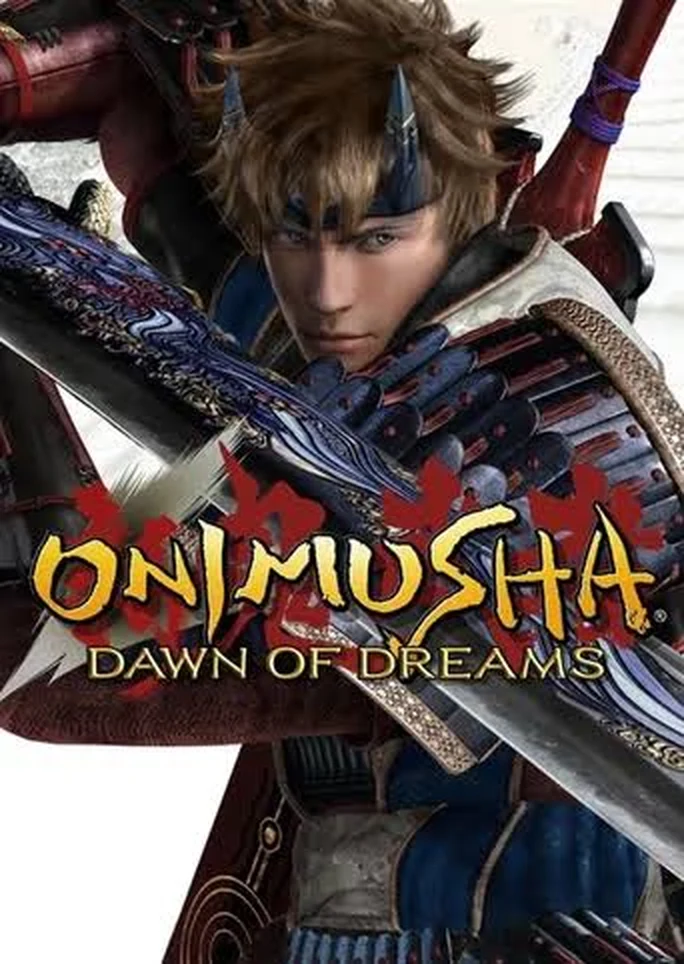
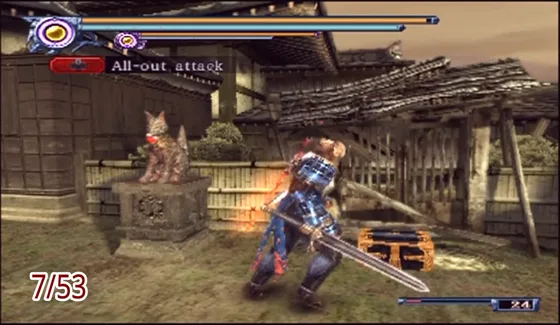
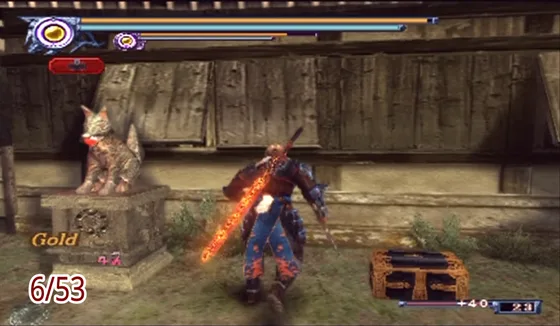
Onimusha: Dawn of Dreams (known as Shin Onimusha: Dawn of Dreams in Japan) is the fourth main entry in the Onimusha series, developed and published by Capcom for the PlayStation 2 in 2006. It departs from the fixed-camera pre-rendered backgrounds of earlier titles in favour of a full 3D camera, a larger cast of playable characters, and an expansive partner system across 17 stages.
Detail
Info
Title
Onimusha: Dawn of Dreams (Onimusha 4)
Release
January 26, 2006 (JP); March 7, 2006 (NA)
Developer / Publisher
Capcom
Platform
PlayStation 2
Genre
Action / Hack-and-Slash
Stages
17 (with backtracking via Minokichi hideouts)
Playable Characters
Soki, Jubei, Ohatsu, Roberto, Tenkai
Dark Realm
100 levels per character (unlocks after Stage 8)
Tests of Valor
30 time-limited challenges with Gold/Silver/Bronze rewards
New Game+
Available — weapons and levels carry over after the final save
Story Synopsis
Set in the Sengoku period, the Genma warlord Hideyoshi Toyotomi has unleashed a demonic army upon Japan, raining destruction from the sky with crimson meteors. A young warrior named Soki — who bears the soul of the Oni — rises to oppose Hideyoshi and the Genma leader Fortinbras. Along his journey Soki is joined by the ninja girl Jubei Yagyu, the gunner Ohatsu, the Western boxer Roberto, and the monk Tenkai. Together they battle across fortresses, temples, hospitals, and castles to thwart Hideyoshi and the resurrected god of light, Fortinbras.
100% Completion Roadmap
The cleanest path to 100% completion follows these steps. Backtracking is available through Minokichi at hideouts, but several items require specific partners and are missable on first visit to an area.
1
Complete Stages 1–17 on Normal difficulty. Collect every weapon, file, puzzle box reward, and Test of Valor Gold rank along the way. Use backtracking at each hideout to retrieve partner-locked items you missed.
2
Unlock and clear the Dark Realm. After Stage 8, the Dark Realm becomes available through Minokichi. Reach Level 100 with all five characters to obtain each character’s final weapon and exclusive Dark Realm rewards.
3
Complete all Tests of Valor with Gold rank. Every Test of Valor has Gold, Silver, and Bronze tiers. Gold yields the rarest weapon or accessory. All Gold unlocks Special Outfits 2.
4
Unlock all costumes, joke weapons, and modes. Enter the Street Fighter costume codes, joke weapon codes, unlock Hard Mode and Oni Mode, and access Onimusha Arena and two-player mode.
5
Beat the game on Hard Mode, then Oni Mode. Hard Mode unlocks after beating Normal; Oni Mode unlocks after beating Hard. Save after the final boss to preserve weapons and levels for New Game+.
Tip: Keep a separate save at Hideout 14 (before the final battles of Stage 16). It is the last normal backtracking point, and the remaining fights are tough.
Key Mechanics
Souls
Defeated enemies release souls absorbed with X. Red Souls power up weapons, armor, and items. Yellow Souls restore health. Blue Souls restore magic. Purple Souls charge the Overdrive Meter for Oni Awakening.
Oni Magic
Press Triangle to use Oni Magic. Weapon elements are Fire, Ice, Light, Dark, Wind, and Earth. Weapons without an element cannot use Oni Magic. Hold Triangle to charge a stronger spell; a level-3 charge with a partner enables a co-op magic attack (press L2 when the co-op icon appears).
Critical Attacks / Issen
Counter (attack immediately before an enemy strike) is the “True Issen” and yields the most souls and damage. Kicking a guarding enemy, deflecting via guard, and stunning with Oni Magic also open critical windows. Tap Square repeatedly after a critical to start a Critical Chain.
Oni Awakening
After Stage 8, charge the Overdrive Meter with Purple Souls and activate Oni Awakening with L3 + R3. Characters gain new moves, regenerate health, deal more damage, and become invincible. If a Charon’s Bell is equipped, it revives the character on death instead of triggering Oni Awakening. The bell is consumed when it fires, so carry spares if you are relying on it.
Partner System
Issue commands with the D-pad: Up All-out Attack, Left character-exclusive order, Right Follow and Attack, Down Wait and Recover. Partners revive automatically if defeated. Each partner has unique traversal abilities needed to reach items: Jubei crawls and crosses boards, Ohatsu grapples and bombs, Roberto moves blocks and punches iron doors, Tenkai speaks to the dead.
Skills
Each level gained provides one skill point for that character. Exclusive moves unlock when the skill above reaches Level 3. Full skill slots become available after Stage 8.
Rapport
Rapport measures friendliness between Soki and the active partner. Higher Rapport yields more item combinations, friendlier dialogue, and more questions during hideout areas.
Missables & Warnings
CRITICAL: Many items require specific partners that are not available until later. You must backtrack via Minokichi at hideouts to collect partner-locked items. Ohatsu is unavailable for backtracking to earlier stages until after Stage 8.
Tests of Valor are time-limited and rank-graded. Missing Gold means missing exclusive weapons and accessories — but you can retry a test as often as you like. Leave the room and come back, or return to the stage later from the hideout at a much higher level. There is never a reason to reload a save over a missed Gold.
Dark Puppet enemies must be finished with Soki’s Sword of Purification as the final hit, or they fully recover their health. The Sword of Purification is not a weapon you equip — it is Soki’s R2 special-attack set: R2 for the Coil, forward + R2 for the Stab, back + R2 for the Flight. Genma Ohatsu must be purified immediately after her health is depleted — missing the R2 prompt restores her health.
Soul farming: Kyoto’s Juntei Hall, Twisted Kyoto’s Connecting Road, and the Dark Realm are excellent for grinding souls and experience.
Story Walkthrough — 17 Stages
How to read the tags. Every pickup in the walkthrough carries a coloured tag, and the number inside a tag is a permanent ID — click it and it takes you straight to that entry.
Tag
What it marks
Number
ITEM
Consumable or material you pick up
Counted per stage
KEY ITEM
Opens a door, a box or a path
Counted per stage
WEAPON
A weapon you can equip
1–141 · opens Weapons
ACCESSORY
A ring, necklace, scarf or charm
1–98 · opens Items & Accessories
FILE
A document you can read
1–72 · opens Files
PUZZLE BOX
A puzzle box; its solution sits under the step
1–53 · opens Puzzle Solutions
TEST OF VALOR
Optional trial with a gold reward
1–30 · opens Tests of Valor
BOSS
A named fight
—
PARTNER
The character who joins you
—
SAVE
A save point
—
BACKTRACK
Go back to an area you have already cleared
—
ST 1Dawn of NightmaresOpening Rooftops
A Genma assault levels a town at night while Soki fights across a collapsing row of rooftops. This is the combat tutorial stage: it teaches locking onto enemies, basic combos, and soul absorption before throwing the player into the game’s first boss, a building-sized Genma Giant. The stage is short, fully linear, and ends with Soki’s Onimusha transformation.
Playable: Soki only. No partner system yet — this is a solo stage.
Walkthroughevery step in play order
1
The stage opens mid-fight: control starts with several Genma Soldiers already closing in on Soki on a rooftop at night as the town burns around him. Hold R1 to lock onto the nearest one.
2
Open with the standard Square combo. Genma Soldiers wind up visibly before swinging — a Square press timed right before their hit actually lands executes a True Issen counter for bonus souls and damage, but at this stage a plain combo kills them just as fast, so don’t stress the timing yet.
3
After your first kill, a colored soul cloud is released from the body — walk into it and press X to absorb it. Get the habit started now: Red souls are what you spend on weapon/armor/item power-ups at a Mirror later, Yellow souls refill HP, Blue souls refill MP, and Purple souls charge the Overdrive meter (not usable until much later in the game).
4
Clear the rest of this first group of Genma Soldiers — there’s no benefit to rushing past them, since every kill here is free souls with essentially no risk.
5
Advance into a narrow alley. At the first turn, break the clay pot on the right for ITEM 1Medicine LV1 — this is the only breakable container in the entire stage, so there’s nothing else to search for here.
6
Continue through the alley itself; no enemies ambush you in the alley proper, it’s a straight walk to the next cutscene trigger.
7
A cutscene plays as Soki reaches the first rooftop proper: the BOSSGenma Giant is visible in the background, smashing through nearby buildings — this is your first look at the stage’s boss.
8
Fight another wave of Genma Soldiers on this rooftop, same enemy type and same counter timing as before. They die in a few hits each — focus on thinning the crowd rather than fighting one at a time so you don’t get surrounded from behind.
9
Once the rooftop is clear, the Genma Giant smashes the building out from under you. A scripted transition carries Soki onto the next rooftop automatically — no input is lost here, just let it play out.
10
On this second rooftop, three elite Genma Soldiers ambush together as a group. They’re noticeably more aggressive and have more HP than the regular Soldiers you’ve fought so far, but they still fall to a normal Square combo — the real danger is letting all three surround you at once, so stay on the offensive and try to peel one away from the pack rather than backing into the middle of them.
11
Defeating all three elites triggers the transition to the third rooftop, which is the boss arena.
12
A cutscene plays: Soki transforms into Onimusha (Oni) form for the first time. This form has extended reach and damage plus additional combo-extension options that aren’t available in human form.
13
This transformation also unlocks the Sword of Purification special moves on R2 for the rest of the fight (and the rest of the game): Coil (just R2) spins the purifying sword around Soki, hitting everything nearby; Stab (Forward+R2) throws the sword at whatever’s directly in front of you and has noticeably longer range than the other two; Flight (Back+R2) spins briefly then stabs into the ground in front of you, best used to punish a knocked-down enemy.
14
The BOSSGenma Giant boss fight begins immediately after the transformation cutscene, no further setup — see BOSS below for the full phase-by-phase breakdown.
15
Regular Genma Soldiers continue to drop into the arena throughout the fight; clear them quickly (1–2 hits each) both to stop them from chipping your HP while you’re focused on the Giant and to keep your soul income flowing.
16
Keep absorbing every soul that drops during the boss fight itself — Yellow souls in particular matter here since there is no other way to heal mid-fight.
17
Oni Magic (Triangle) is also available from this fight onward; it’s a valid alternative to Sword of Purification for the sword-buried damage window in Phase 1 if you’d rather save your R2 specials for finishing off downed Genma Soldiers.
18
Once the Giant’s HP bar is fully emptied, a scripted death cutscene takes over automatically — there is no additional input required to finish it off.
19
The stage ends the moment the cutscene finishes; there is no post-boss exploration and nothing left to pick up on Stage 1.
20
Stage 1 has no manual save point anywhere in it — progress checkpoints automatically around the boss transition, so there’s nothing to manage beyond simply finishing the fight.
Puzzle Box Solutions
None this stage.
Boss Strategies
BOSS Genma Giant
Fought immediately after Soki’s first transformation into Onimusha form, on the third rooftop. The fight runs through four distinct phases in order: Phase 1 — Sword buried: The Giant slams its huge sword into the building and leaves it embedded there. This is your main damage window — run in and unload normal Square combos, Oni Magic, or the Sword of Purification’s Stab (Forward+R2) if you want the extra range while it’s still recovering. Genma Soldiers may drop in during this phase; clear them fast so they don’t interrupt your combo. Phase 2 — Sword raised: When the Giant pulls its sword back overhead, stop attacking and block — this is a heavy overhead swing, not another opening. The Giant also fires blasts from a cannon/gun mounted on its chest at range during this phase; block these too on reaction rather than trying to dodge them. Phase 3 — Bare-handed (sword knocked away): Once you’ve dealt enough damage the sword is knocked out of its hand entirely and the fight opens up into its most active phase. Step to the side — not straight backward — when it lobs purple meteors down at your position, since backing straight up keeps you inside the blast radius. When it slams a fist down into the rooftop, rush in immediately and attack the fist/arm for a big damage window. Keep blocking its horizontal sweeping arm swing throughout this phase. Phase 4 — Double-fist crush tell: If the Giant crouches and appears to duck out of view, that’s the telegraph for an unblockable double-fist ground crush. Don’t block it — run to the side immediately, then punish the recovery once the attack lands. This tell can appear repeatedly during Phase 3, so treat it as a recurring fourth phase rather than a one-time finisher. General tip: keep soul-absorbing between exchanges — this fight is generous with souls, and topping off HP/MP between openings (especially Yellow souls for HP, since Phase 3 and 4 can chip you down fast if you misread the crouch tell) makes the rest of the fight much safer.
Items & Collectibleseverything you can pick up here
ITEM 1Medicine LV1 — clay pot in the alley at the first turn, early in the stage.
Files & Documents
None.
Weapons Found Here
None found this stage; Soki fights with his starting sword (Lamentation) throughout.
Do not leave without:
None. Stage 1 is fully linear with a single pickup and no permanent-loss content.
Notes:
This stage exists purely to teach lock-on, the basic Square combo, blocking, and soul absorption — there is no wrong way to play it, and nothing here affects later stages.
Pay attention to the Oni-form transformation cutscene; this form (and its extended combo options) recurs as a core mechanic for the rest of the game.
This is also the first time the Sword of Purification (R2: Coil / Forward+R2: Stab / Back+R2: Flight) is available — it stays with Soki for the entire game, so it’s worth learning the feel of all three inputs here against low-threat Genma Soldiers before it matters more in later boss fights.
Only one breakable container exists in this stage (the Medicine LV1 pot in the alley) — there’s no point backtracking within the stage looking for more.
--
STAGE 1 OF 17
ST 2The Blue DemonSuruga Outpost
Soki reaches the Suruga Outpost and is immediately confronted by Danemon, a blue-armored Genma commander who serves as the stage’s sole boss fight. Beating him opens up Hideout 1, the game’s first upgrade hub, where Soki can spend absorbed souls to power up weapons, armor, and skills for the first time.
Playable: Soki only. Still solo — Jubei is not recruited until Stage 3.
Walkthroughevery step in play order
1
The stage begins with Soki arriving at the Suruga Outpost; a short cutscene has BOSSDanemon step out and block the path forward — there is no exploration or lead-in combat before this, the boss fight starts immediately.
BOSS Danemon
His whole moveset is slow and telegraphed, and almost everything he does can be blocked — the main danger is that some of his combo strings will break your guard if you hold block through the whole sequence instead of looking for gaps. His signature move is an overhead flame attack with a long wind-up; block it and punish the recovery. The core tactic that speeds this fight up massively is countering: press attack right before one of his strikes actually lands (a proper parry/counter rather than a plain block). A clean counter here strips roughly half his health bar in one hit, so two well-timed counters can end the fight outright. Between his attack strings he backs off briefly to reset — use that window for normal combos or Oni Magic if you’d rather play it safer than counter-timing. When his health bar empties, don’t relax: he throws one last sword swing before actually dying. Block it and the fight ends.
2
Genma Soldiers accompany Danemon and will try to crowd around you during the fight. They have limited attacks and aren’t much of a threat on their own — the play here is to stay locked onto Danemon and only break off to clear a Soldier if you’re actually about to get surrounded.
3
Watch for Danemon’s main threat: a slow overhead flame attack with an obvious charge-up animation. Block it — it strips a significant chunk of HP if it connects clean, but the wind-up is long enough to react to on sight.
4
Between his attack strings, Danemon backs off briefly to reset. Use that window for a normal Square combo, or cast Oni Magic (Triangle) — a successful Oni Magic hit staggers him briefly and opens an even bigger follow-up window than a plain combo would.
5
For a much faster kill, go for the True Issen counter instead of trading combos: press Square right before one of his strikes actually lands (not a plain block — a timed counter-hit). A clean counter here strips roughly half his health bar in a single hit.
6
Because nearly all of Danemon’s attacks are slow and telegraphed, two consecutive clean counters are enough to kill him outright — this is by far the fastest way to clear the fight once you’ve got the timing down, and it’s worth prioritizing over grinding out normal combos.
7
Be careful not to just hold block through his entire combo strings, though — some of his multi-hit sequences will break your guard partway through if you don’t either counter or create space instead of holding L1 the whole time.
8
Once his HP bar empties, don’t relax immediately: Danemon gets one final scripted sword swing in if you’re still standing next to him when he goes down. Block it (or simply step back the instant his HP hits zero) to avoid taking a free hit right at the very end of the fight.
9
The death cutscene plays automatically once the final swing is handled, and the path opens directly into Hideout 1.
10
Hideout 1 is the first of the game’s recurring hub areas. Minokichi is here, and from this point on he’s your fast-travel NPC for revisiting any stage you’ve already cleared.
11
Approach the Mirror in the hideout room. This single Mirror handles both saving your game and every upgrade menu — there’s no separate save-only mirror, so use it before doing anything else.
12
Save your game here first, since Stage 3 is significantly longer than Stages 1–2 combined and introduces the partner system, puzzle boxes, and Tests of Valor all at once.
13
Open the Mirror’s power-up menu and spend any Red souls collected across Stages 1–2 on Soki’s current weapon (Lamentation) — weapon power-ups raise base damage and, at certain thresholds, add bonus effects.
14
Also check armor power-ups at the Mirror — raising armor level increases Soki’s defense rating, reducing incoming damage for the rest of the run.
15
If you’re unsure how to prioritize limited early souls, put them into weapon power first — it has the most immediate impact heading into Stage 3, which includes Jubei’s recruitment boss fight and several Tests of Valor.
16
Check the skill point menu at the Mirror as well. Every level Soki gains grants one skill point, but full skill slots don’t unlock until after Stage 8, so there isn’t much to meaningfully spend yet — it’s worth knowing the menu exists now rather than being surprised by it later.
17
Talk to Minokichi directly, separate from the Mirror — from Hideout 2 onward he’s also how you return to retry any Test of Valor you didn’t earn Gold on the first time, so it’s worth knowing his role here even though Stage 2 itself has no Tests of Valor.
18
Don’t expect much from the shop inventory yet at Hideout 1 — most purchasable weapons only unlock after specific later bosses, so there’s little to buy at this point beyond what you already have.
19
Stage 2 has no breakable pots, crates, or hidden pickups anywhere in it outside of souls dropped during the BOSSDanemon fight itself — the entire stage is the boss fight plus the hideout visit, so there’s nothing else to search the area for.
20
This is also the first real fight (rather than a scripted tutorial moment) where both Oni Magic and the Sword of Purification R2 specials (Coil / Stab / Flight) are fully usable against a single, slow, readable target — if you didn’t experiment with them during the Genma Giant fight, Danemon’s pattern is a good low-risk place to practice landing a Stab or a charged Oni Magic hit before Stage 3 introduces more enemy variety.
21
With upgrades applied and your save made, there’s nothing left to do at Hideout 1 — trigger the transition into Stage 3 when ready.
Puzzle Box Solutions
None this stage.
Items & Collectibleseverything you can pick up here
None notable outside of souls dropped by Genma Soldiers during the Danemon fight.
Files & Documents
None.
Weapons Found Here
None found this stage; new weapons become purchasable at the Hideout 1 shop once unlocked (no purchase is required to proceed).
Do not leave without:
None.
Notes:
Hideout 1 is the tutorial for the upgrade/power-up system (the Mirror). Nothing you spend here is wasted — souls put into weapon and armor power-ups carry forward for the rest of the game.
Minokichi becomes your stage-select/fast-travel NPC from this hideout onward. Remember him for Stage 3’s Tests of Valor — if you miss Gold on one, you don’t need to reload a save; you can come back and retry it later through Minokichi once backtracking opens up (after Hideout 2).
There are no breakable containers anywhere in this stage — don’t waste time looking for pots or crates around the outpost; every soul you get here comes from Danemon and his accompanying Genma Soldiers.
--
STAGE 2 OF 17
ST 3Jubei Has Arrived!Plains Highway / Plains Town
Soki pushes through the ruined Plains Highway and into Plains Town, where he’s ambushed by the masked ninja Jubei Yagyu. After defeating her in a duel she joins as a permanent partner, and the back half of the stage — Plains Town’s Back Road, Old Temple, and the sealed inner temple — is played with Jubei fighting alongside Soki. This is the first stage with puzzle boxes, Tests of Valor, and the partner-command system, and ends with the Crab Walker boss.
Playable: Soki solo for the first half (Wrecked Road / Plains Highway); Soki + Jubei (forced partner, recruited mid-stage) for the second half (Plains Town onward) and the Crab Walker boss.
Walkthroughevery step in play order
1
Start in the Wrecked Road. Search the wreckage for a pickup of ITEM 1Grass, then break the nearby pots for ITEM 2Medicine LV1 as you approach Minokichi’s stall.
2
Near Minokichi, enter the door leading to the Monster Show area. Defeat the three Genma Soldiers that ambush you there, then continue through the door beside the SAVEEnchanted Mirror.
3
In the left branch of the Wrecked Road, pick up FILE 1Drunkard’s Diary 1 and grab ITEM 3Oni Med LV1 from the wooden stand nearby.
4
Push on to the area Behind the Buildings. A Genma Soldier here repeatedly teleports away mid-fight — stay locked on and chase it down rather than losing your target; it doesn’t have much HP once you land a hit. Break the pots here for ITEM 4Medicine LV1 and ITEM 5Fangs, and pick up ITEM 6Medicine LV2 and FILE 2Drunkard’s Diary 3 from between the two crates in the middle of the area.
5
Solve PUZZLE BOX 1Puzzle Box #1 here (Behind the Buildings) to obtain Soki’s new sword, WEAPON 12Fire Dance — see PUZZLE BOXES below for the exact two-press solution.
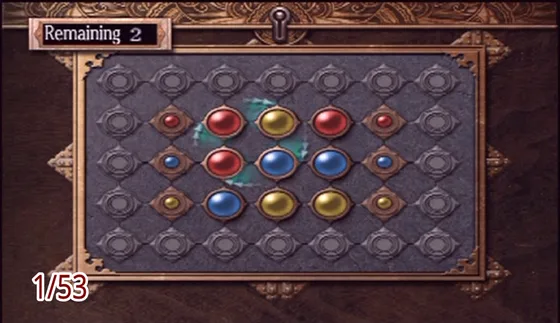
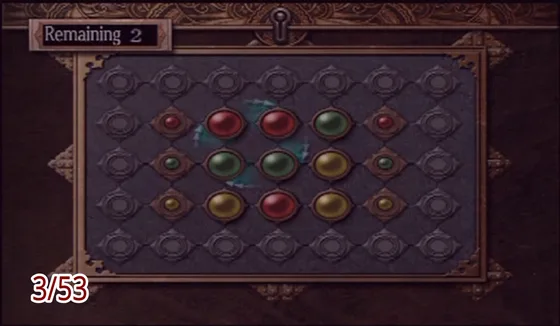
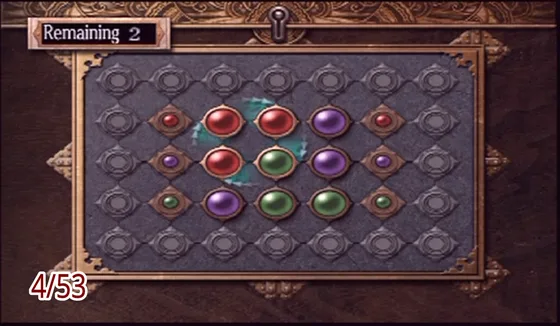
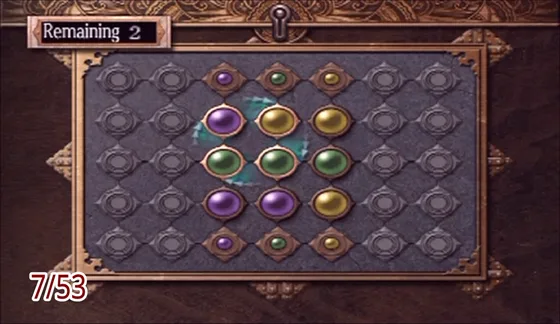
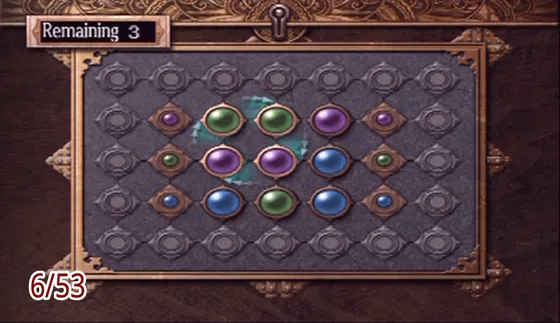
How to read these. Inside the box is a grid of coloured gems. A move is picking a 2×2 block of four gems and rotating it one step clockwise — one action, not four presses. Each panel below is one move, in order, and the four squares marked * are the block you rotate. You win by lining matching colours up along the rows or columns marked at the edges, in exactly the number of moves the box allows. Solving it opens the box intact; smashing it still gives you the contents, but unidentified until you pay to have it appraised.
PUZZLE BOX 1 Plains Highway, Behind the Buildings (Reward: Fire Dance)
GRID 3×3 · ALIGN ROWS · 2 MOVES
MOVE 1
* * o
* * o
o o o
MOVE 2
o o o
* * o
* * o
6
Climb the ladder at the far-left side of this area, cross the rooftop, and open the chest at the end for the ACCESSORY 45Footsoldier’s Choker accessory.
7
Continue left along the Wrecked Road. Two Genma Archers guard this stretch — block while they reload/aim rather than trying to rush them down, then close in once they’ve fired. Pick up ITEM 7Oni Med LV1 here.
8
Move into the Back Road. Archers again appear first (kill them before they can peg you from range), followed by a group of Genma Soldiers. Pick up the FILE 3Plains Outpost Map file/item.
9
At the far end of the Back Road, examine the hole/opening in the wall to trigger a cutscene — this leads directly into the boss duel against BOSSJubei.
BOSS Jubei (recruitment duel)
Nearly everything Jubei does can be blocked, but her fast multi-hit combo strings will break your guard if you try to hold block through an entire sequence — block the opening hits, then be ready to sidestep or interrupt rather than eating the whole string. She backs off and resets after finishing a combo; that retreat is your main attack window, so close in and punish immediately rather than waiting for her to approach you. Watch for a kick she throws out right after some of her combos — it’s a separate hit that catches players who attack immediately on reflex. Oni Magic is the fastest way to close this fight out once you’ve whittled her down with normal openings. Keep her locked on throughout since she moves around the arena a lot.
10
PARTNERBOSSJubei boss fight (see BOSS below). Winning recruits her as a permanent partner and advances you into Plains Town proper.
11
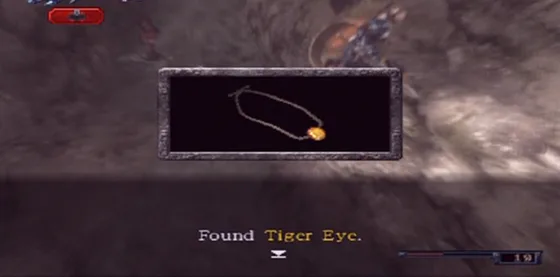
Now in Plains Town with Jubei in tow, solve PUZZLE BOX 2Puzzle Box #2 (Under the Bridge) for the ACCESSORY 51Tiger Eye accessory.
PUZZLE BOX 2 Plains Town, Under the Bridge (Reward: Tiger Eye)
GRID 3×3 · ALIGN ROWS · 2 MOVES
MOVE 1
o * *
o * *
o o o
MOVE 2
o o o
o * *
o * *
12
Head to the Front Road. Stepping into this area triggers TEST OF VALOR 1Test of Valor #1 (Axeman, 1:00) — see TESTS OF VALOR below. You can fight through normally instead if you’d rather skip it for now; nothing here is a one-shot opportunity since it can be retried later via Minokichi.
You can retry these as often as you like. Leave the room and come back and the orange sphere returns, and once stage revisiting opens up you can return to any earlier test at full strength. Never reload a save over a missed Gold.
Test of Valor #1 — Front Road
Target: Axeman | Time: 1:00 Gold: Secret Med LV2 | Silver: Medicine LV1 | Bronze: Grass
13
BACKTRACK Backtrack to the Back Road and unbar the sealed door there to trigger TEST OF VALOR 2Test of Valor #2 ("Eradicate the Genma," 1:00).
Test of Valor #2 — Back Road
Requirement: Eradicate the Genma | Time: 1:00 Gold: Oni Jewel | Silver: Medicine LV1 | Bronze: Grass
14
With the door open, lead Jubei through the gate beyond it. Grab the ITEM 8Power Jewel from the bridge crossing.
15
Fight through the Door Guardian mini-boss guarding the Red Soul Altar just past the bridge, then interact with the altar to drain it (this restores/banks souls — worth doing before moving on).
16
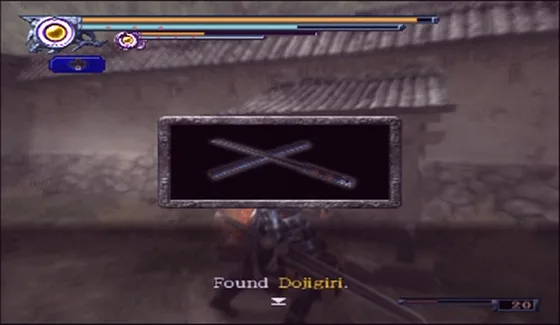
Solve PUZZLE BOX 3Puzzle Box #3, found in the Back Road area of Plains Town, for Jubei’s new sword, WEAPON 45Dojigiri.
PUZZLE BOX 3 Plains Town, Back Road (Reward: Dojigiri)
GRID 3×3 · ALIGN ROWS · 2 MOVES
MOVE 1
o o o
o * *
o * *
MOVE 2
o * *
o * *
o o o
17
Proceed to the Old Temple. Cross the bridge into the temple grounds, dealing with the Archers stationed here first before the Genma Soldiers close in.
18
Entering the temple courtyard triggers TEST OF VALOR 3Test of Valor #3 (Gacha, 3:00).
Test of Valor #3 — Old Temple
Target: Gacha | Time: 3:00 Gold: Kogarasu | Silver: Secret Med LV1 | Bronze: Mushrooms
19
Pick up the ITEM 9Sweet Herb item near where the Gacha was fought, then follow the forest path further into the temple grounds.
20
At the Back Road Entrance, break the middle pot for ITEM 12Oni Med LV1 and the other pots nearby for ITEM 10Oni Jewel; collect FILE 4Takezo Confession from the ground here. Climb the ladder, cross the rooftop, and grab the KEY ITEM 1Ancient Key at the far end.
21
Return to the Old Temple and use the KEY ITEMAncient Key on the locked door you passed earlier — this opens the Block Room.
22
Clear the Block Room (Gacha-type enemy plus Archers), then open the chest inside for KEY ITEM 2Temple Gate Key R.
23
Back in the main Old Temple room, pick up the FILE 5Lantern Trick file and a ITEM 11Medicine LV1 off the ground. Strike each of the temple’s torches three times with your weapon (any weapon works) to light them all — once every torch is lit, the left-middle torch slides aside to reveal KEY ITEM 3Temple Gate Key L.
24
With both KEY ITEMTemple Gate Key L and KEY ITEMTemple Gate Key R in hand, use them together on the sealed blue double door at the back of the temple.
25
Beyond the sealed door is the stage’s final arena — the BOSSCrab Walker boss fight (see BOSS below). Defeating it clears Stage 3 and unlocks Hideout 2.
BOSS Crab Walker
A large armored crab-type Genma. Stay close to it, ideally near or behind its body rather than at range — several of its attacks are aimed at mid-range and are easier to avoid up close. Block its front-leg swipe attack. When it leaps straight up, block on landing — the impact itself is the threat, not the leap. Don’t commit to the final hit of your longer combo strings against it; its counters punish over-extended combos, so cut strings short and reassess. It periodically calls down purple meteors that summon smaller Genma adds — staying close to the boss also keeps you out of the meteor drop zones, and the adds it summons are a convenient source of yellow souls if your HP is running low mid-fight. Set Jubei to All-Out Attack for extra DPS, and switch her to Guard briefly if you need to disengage and heal.
Backtrack — Return Here Laternot solvable on your first pass through this stage
BACKTRACKPUZZLE BOX 13 Plains Highway (backtrack), Rooftops (Reward: Stone Cutter)
Return visit only — bring Jubei and Roberto. Swap to Roberto at the White Mirror to shift the boulder, then swap back to Jubei to cross the plank to the box.
GRID 3×3 · ALIGN ROWS · 3 MOVES
MOVE 1
* * o
* * o
o o o
MOVE 2
o * *
o * *
o o o
MOVE 3
o o o
o * *
o * *
PUZZLE BOX 50 Plains Highway, Front Road (Reward: Sky Rifle)
Return visit only — Ohatsu is the one who can get across the broken bridge to reach this box.
GRID 3×3 · ALIGN COLUMNS · 4 MOVES
MOVE 1
o * *
o * *
o o o
MOVE 2
o o o
* * o
* * o
MOVE 3
o o o
o * *
o * *
MOVE 4
* * o
* * o
o o o
BACKTRACK Test of Valor #4 — Plains Highway, Monster Show (backtrack)
Requirement: Eradicate the Genma within the time limit Gold: Red Bell Only reachable on a return visit, and you need Roberto along to shift the boulder that opens the way in. Bring a wide-arc weapon and chain Oni Magic through the packs; picking enemies off one at a time will not clear the room in time.
Items & Collectibleseverything you can pick up here
ITEM 1Grass — wreckage in the Wrecked Road, right at the stage start.
ITEM 2Medicine LV1 — pots near Minokichi’s stall, Wrecked Road.
WEAPON 45Dojigiri — Puzzle Box #3 reward, Plains Town Back Road. Jubei’s sword.
Do not leave without:
None. All three core Tests of Valor (#1–#3) and Test #4 (Red Bell) remain accessible after the stage via Minokichi backtracking, and can be retried as many times as needed to earn Gold — there’s no need to reload a save to try again. Puzzle Boxes #1–#3 are solved during the stage itself; if skipped, the stage remains revisitable afterward as well.
Notes:
After Hideout 2 (unlocked once you clear this stage), all previous stages — including this one — become revisitable through Minokichi, and any Test of Valor you didn’t Gold on the first pass can simply be replayed there.
Two additional puzzle boxes exist in this stage’s map but require partners not yet available during a first playthrough of Stage 3: Puzzle Box #4 (Rooftops, reward: Stone Cutter for Jubei) and Puzzle Box #5 (Front Road, reward: Sky Rifle for Ohatsu). Both are solved on a later backtracking visit once the relevant partner has joined your roster — treat them as Stage 3-map content to mop up after Ohatsu recruits, not as something to chase on this first pass.
Jubei can combine crafting materials once recruited — worth checking her combination menu at the hideout after this stage for anything you picked up here.
Upgrade both Soki and Jubei at the Enchanted Mirror once you reach Hideout 2; Jubei starts underleveled compared to Soki since she joins mid-stage.
--
STAGE 3 OF 17
ST 4Ohatsu’s TearsFortress at Suruga
The party pushes into the Genma-occupied Fortress at Suruga, sneaking in along a mountain trail and over the fortress walls before working through a warehouse complex to the rooftop. The stage ends with the first appearance of Ohatsu, Soki’s childhood friend, who has fallen under Genma influence and blocks the party’s path with gunfire.
Playable: Jubei is the only controlled character from the Mountain Road through Inside the Wall — Soki is not yet with the party in this opening section. Once the party regroups at the Front of Warehouse, Soki rejoins and the two become freely switchable for the rest of the stage. Defeating Ohatsu recruits her as a playable partner starting next stage.
Walkthroughevery step in play order
1
Mountain Road (Jubei only): fight through Ninja Genma, Archer Genma, and a Soldier Genma along the trail and bridge. Pick up the FILE 9Mountain Fortress Map.
2
Cross the narrow board — only Jubei can balance across it. Save at the SAVEEnchanted Mirror just past the crossing.
3
BACKTRACK From the mirror, take the right-hand path first for a ITEM 1Medicine LV2 pickup, then backtrack and take the left path to continue.
4
Cliffside: cross the fallen tree to reach the fortress wall, watching for Axeman Genma along the ledge.
5
Inside the Wall: defeat the Spider Genma waiting in ambush and the Archer Genma on the walkway. Pick up ITEM 2Fangs and FILE 7Sentry’s Diary 2, then grab ITEM 3Oni Med LV1 before climbing the ladder that triggers the reunion with Soki.
6
Front of Warehouse: Soki and Jubei can now be freely switched. A chest here holds the ACCESSORY 13Acolyte’s Ring; pick up FILE 6Sentry’s Diary 1 nearby.
7
TEST OF VALOR 5Test of Valor #1 triggers automatically in this area — see below. Attempt it now or come back later; it can be repeated by revisiting Minokichi at any hideout. Clearing it at Gold earns WEAPON 3Black Sword for Soki.
You can retry these as often as you like. Leave the room and come back and the orange sphere returns, and once stage revisiting opens up you can return to any earlier test at full strength. Never reload a save over a missed Gold.
Test of Valor #1 — Front of Warehouse
Requirement: Eradicate the Genma | Time: 3:00 Gold: Black Sword | Silver: Secret Med LV1 | Bronze: Mushrooms
8
Side of Warehouse: skip the first ladder for now and pick up the ITEM 4Power Jewel. Switch to Jubei to crawl under the low gate blocking the path.
9
Back of Warehouse: climb the left ladder, cross the wooden framework, and pick up the KEY ITEM 1Castle Gate Key at the far end. Use it to unlock the door back toward the warehouse front.
10
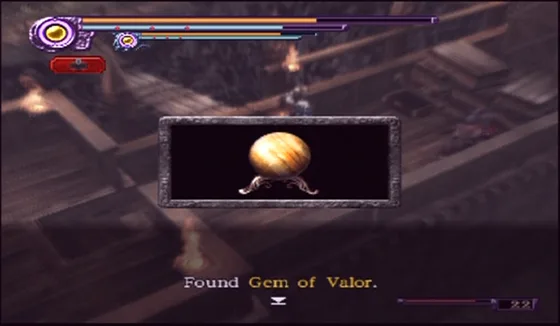
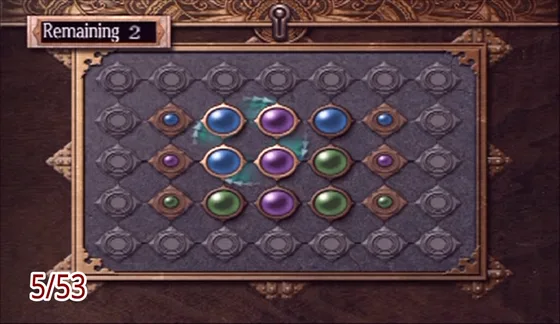
Cliffside (return trip): open the left chest for Jubei’s WEAPON 34Black Blade. Solve the Puzzle Box to its right for the Gem of Valor (see Puzzle Boxes below).
How to read these. Inside the box is a grid of coloured gems. A move is picking a 2×2 block of four gems and rotating it one step clockwise — one action, not four presses. Each panel below is one move, in order, and the four squares marked * are the block you rotate. You win by lining matching colours up along the rows or columns marked at the edges, in exactly the number of moves the box allows. Solving it opens the box intact; smashing it still gives you the contents, but unidentified until you pay to have it appraised.
PUZZLE BOX 4 Fortress at Suruga, Cliffside (Reward: Gem of Valor)
GRID 3×3 · ALIGN ROWS · 2 MOVES
MOVE 1
o o o
* * o
* * o
MOVE 2
o * *
o * *
o o o
11
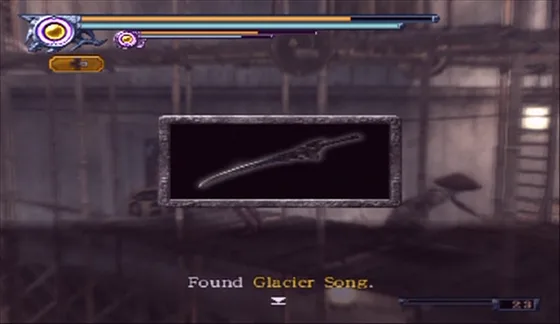
Side of Warehouse: climb the first ladder you skipped earlier, have Jubei crawl under the stacked wood, then raise the platform and pull the lever to unfold a ladder further along. Solve the Puzzle Box here for Soki’s WEAPON 14Glacier Song sword.
PUZZLE BOX 5 Fortress at Suruga, Side of Warehouse (Reward: Glacier Song)
GRID 3×3 · ALIGN ROWS · 2 MOVES
MOVE 1
* * o
* * o
o o o
MOVE 2
o o o
o * *
o * *
12
BACKTRACK Use the first switch to shift the wooden structure into place, then apply the ITEM 5Lubricating Oil (picked up nearby) to the second, stuck switch so it can be thrown. Pick up the KEY ITEM 2Crow Feather. Pull the first lever again before moving on — it saves a backtrack later.
13
Roof of Warehouse: knock the Genma Crows out of the air with Soki’s uppercut attack before they can dive-bomb the party. Cross the fallen tree trunk between rooftops and pick up ITEM 6Secret Med LV1.
14
TEST OF VALOR 6Test of Valor #2 becomes available on the rooftop — see below. Clearing it at Gold earns ACCESSORY 32Naga Ring (accessory).
BACKTRACK Test of Valor #2 — Rooftop (backtrack)
Technique: Chain Critical x5 | Time: 3:00 Gold: Naga Ring | Silver: Secret Med LV1 | Bronze: Mushrooms
15
A cutscene introduces Ohatsu as she opens fire on the party from among a stand of Genma trees. Save before engaging her.
BOSS Ohatsu
She hides among a stand of Genma trees that block melee approaches and periodically fires her rifle from range — block the shots or use the trees for cover while closing the distance. Rush in while she reloads and land a combo or an Oni Magic burst, then kick her away from the trees so she can’t retreat into their cover. Watch for her unblockable close-range burst attack, which she telegraphs before charging — back off or sidestep the instant you see the windup rather than trying to block it.
16
PARTNER Defeat BOSSOhatsu (boss fight below). She joins the party as a playable character afterward.
17
BACKTRACKPARTNER Once Ohatsu is recruited, backtrack through the fortress with her: grapple across the rooftop gap to a chest holding an ITEM 7Oni Jewel, bomb the barred gate inside the fortress wall to reach Tenkai’s WEAPON 120Dragonfly spear, and bomb the boulder blocking the Cliffside path.
18
Have Jubei or Soki grapple back across Mountain Road with Ohatsu to reach a chest with the KEY ITEM 3Mountain Shrine Key and a second chest holding the ITEM 8Warrior’s Code.
19
Use Tenkai (once recruited in a later stage) to speak with the dead body found on the return trip through the fortress; he supplies the code 1-3-6 for a locked gate. Opening it rewards a ITEM 10Rare Antler and a ITEM 11Rare Shell.
Items & Collectibleseverything you can pick up here
FILE 9Mountain Fortress Map — Mountain Road, on the ground
ITEM 1Medicine LV2 — Mountain Road, right-hand path past the Enchanted Mirror
WEAPON 34Black Blade — Cliffside, normal chest — Jubei
WEAPON 14Glacier Song — Puzzle Box, Side of Warehouse — Soki
WEAPON 3Black Sword — Test of Valor #1 Gold reward — Soki
ACCESSORY 32Naga Ring (accessory) — Test of Valor #2 Gold reward
WEAPON 120Dragonfly — dead body inside the fortress wall, requires Ohatsu to bomb the gate — Tenkai
Do not leave without:
None during a normal playthrough. Both Tests of Valor and the fortress backtracking chests remain accessible by returning to this stage from Minokichi after later hideouts.
Notes:
Ohatsu is Soki’s childhood friend; she is manipulated into staying loyal to Hideyoshi before this fight, and her Genma infection is the reason Soki later seeks the Onimusha’s power to save her. This background pays off much later in the story, but the Suruga boss fight is her first appearance. Portions of the fortress backtracking (rooftop grapple, wall-gate bomb, boulder bomb) require partners recruited in later stages, so plan to return here after picking up Ohatsu’s grapple/bomb skills and Tenkai’s ability to talk to the dead.
--
STAGE 4 OF 17
ST 5The Red DemonSawayama Castle Town
Soki’s party enters the walled grounds of Sawayama Castle Town, where six sealed rooms around a central Fox Gate each hide a colored pearl and a Fox Gem. Collecting all six gems opens the town’s central door, leading to a duel with the spear-wielding warrior Tenkai and then the Genma Bug lurking beneath the town.
Playable: Soki with Jubei or Ohatsu as the switchable partner (both are already recruited going into this stage). Defeating Tenkai at the end of the stage recruits him as a playable character from Stage 6 onward.
Walkthroughevery step in play order
1
Fox Gate (hub): pick up the FILE 22S. Castle Grounds Map and take the KEY ITEM 1Red Pearl V offered by the fox statue at the entrance. Soldier Genma, a Soul Absorber Genma, and a Spear Genma patrol this hub, and the same group respawns every time you re-enter it from a side room.
2
If a Soul Absorber Genma is active, deal with it quickly — it tries to steal every soul dropped nearby for itself. Use Soki’s soul-absorption pull to drag it toward you before it can grab the souls, then finish it with a combo. Block Spear Genma charges rather than trading hits, then punish once the charge ends.
3
The six side doors around the hub are color-coded red or blue. Placing a red pearl in its statue seals the red doors and opens the blue ones (and vice versa), which is why the room order below is mandatory rather than a suggestion. Each of the six rooms holds one Fox Gem: KEY ITEM 12Fox Gem Titan (1R), KEY ITEM 7Fox Gem Hell (2R), KEY ITEM 10Fox Gem Earth (3B), KEY ITEM 11Fox Gem Heaven (4R), KEY ITEM 9Fox Gem Animal (5B) and KEY ITEM 8Fox Gem Ghost (Room V).
4
Enter Room 2R (red door): fight the two Armored Genma guarding it. They mostly stay passive until you strike first, then counter-swing, so block through the counter while chipping their armor plating with sustained hits, and back off the instant the plating breaks — they detonate on death. Collect the KEY ITEM 13Red Pearl I, Fox Gem (Hell), and a ITEM 2Medicine LV2.
5
TEST OF VALOR 7Test of Valor #1 triggers automatically once 2R is cleared — see below. A Gacha teleports in with two Genma Soldiers as the trial’s enemies; you can leave and retry later via Minokichi if you don’t clear it now. Clearing it at Gold earns WEAPON 69Ice Rifle for Ohatsu.
You can retry these as often as you like. Leave the room and come back and the orange sphere returns, and once stage revisiting opens up you can return to any earlier test at full strength. Never reload a save over a missed Gold.
Test of Valor #1 — 2R Room
Target: 5 Critical hits | Time: 3:00 Gold: Ice Rifle Criticals only, so ordinary damage does not count. Bait an attack, then land the counter-timed strike; a partner set to hold enemies still makes the window far easier to hit.
6
Placing the KEY ITEM 14Red Pearl I unlocks Room V’s blue door. Enter and clear its two Armored Genma the same way, plus a wave of teleporting Axeman Genma and Soldier Genma. Take the KEY ITEM 15Blue Pearl II and Fox Gem (Ghost) from the fox statues, and open the chest for a ACCESSORY 62Pair Scarf.
7
Enter Room 5B: its two Armored Genma are the only threat here — no other enemies spawn in this room. Pick up the ITEM 3Power Jewel, FILE 12Takuan’s Diary 2, and the Fox Gem (Animal) in the same visit.
8
Enter Room 3B: after the Armored Genma, three Spear Genma and an Archer Genma teleport in together. Kill the Archer first since its arrows chip you from range while you’re occupied with the spear-wielders, who are safe to block-and-punish one at a time. Collect the KEY ITEM 4Red Pearl VI and Fox Gem (Earth).
9
Solve the Puzzle Box in Room 3B for Jubei’s WEAPON 44Mikazuki sword before leaving (see Puzzle Boxes below).
How to read these. Inside the box is a grid of coloured gems. A move is picking a 2×2 block of four gems and rotating it one step clockwise — one action, not four presses. Each panel below is one move, in order, and the four squares marked * are the block you rotate. You win by lining matching colours up along the rows or columns marked at the edges, in exactly the number of moves the box allows. Solving it opens the box intact; smashing it still gives you the contents, but unidentified until you pay to have it appraised.
Enter Room 4R: past the Armored Genma pair, three more Genma teleport in — Ninja Genma and Axeman Genma. Ninja Genma like to slip in a hit while you’re mid-combo, so block between swings instead of chaining blindly through the group. Pick up FILE 11Takuan’s Diary 1, then take the KEY ITEM 5Red Pearl III and Fox Gem (Heaven).
11
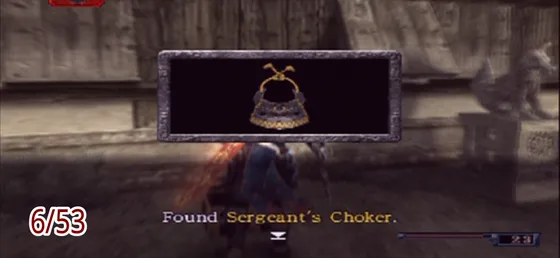
Solve the Puzzle Box in Room 4R for the ACCESSORY 46Sergeant’s Choker.
Enter Room 1R: clear the Armored Genma, then a teleporting Spider Genma and Archer Genma. Collect ITEM 4Secret Med LV1, the KEY ITEM 16Blue Pearl IV, and the Fox Gem (Titan).
13
Throughout all six rooms, set your partner to Wait and Recover before pushing in so they don’t eat an Armored Genma’s counter-swing on their own; switch them to All-out Attack only after you’ve stripped its armor and knocked it down.
14
Once all six Fox Gems are in hand, return to the Fox Gate and place them on the central door to unlock it.
15
Save at the SAVEEnchanted Mirror just past the door — this is the only save point in the stage, so top off medicine before the boss corridor.
16
Defeat BOSSTenkai in single combat (boss below).
BOSS Tenkai
BOSS Opening
he holds his ground with a spear guard rather than rushing you — stand back and block instead of approaching first, since closing the distance yourself just walks you into his spear’s reach.
BOSS Core loop
when he steps in, he unloads a full combo string and then holds his guard up. Block through the combo, then kick him the instant he settles into the guard to break it open for a critical hit.
BOSS Punish window
his combos leave noticeable recovery lag — if you sidestep any single hit instead of blocking, you get a free window to close in and combo him before he resets.
BOSS Danger attack
his only unblockable move is a short-range magic burst. It only threatens you at close range, so back off or sidestep the instant you see the wind-up rather than trying to guard it.
17
The Genma Bug bursts up from beneath the town immediately after BOSSTenkai falls — there is no break between the two fights, so go in with full health (boss below).
BOSS Genma Bug
BOSS Opening
it opens with a central electric shockwave that covers the middle of the room — start the fight near a doorway to one side of the arena, not in the open center, so the shockwave never reaches you.
BOSS Core loop
it alternates the shockwave with a spinning razor-sphere swing. Never challenge the first hit of that swing — it breaks your guard — but once the sphere finishes spinning and buries itself in the ground, that’s your punish window.
BOSS Punish window
attack immediately after the shockwave ends or right after the sphere buries itself; both openings close quickly, so go in with a fast combo rather than a slow charged attack.
BOSS Partner management
set your partner (Jubei or Ohatsu — Tenkai isn’t playable yet during this specific fight) to Wait and Recover during its attack strings so they don’t wander into the shockwave, then call an All-out Attack the moment the boss is stunned from a punish.
18
PARTNERBOSSTenkai joins the party as a playable character once the double boss fight ends; his character-exclusive partner order is Pray, which boosts Soki’s damage while Tenkai is the active partner in later fights.
19
BACKTRACK After Hideout 4 opens, talk to Minokichi — he’s still alive and running the hideout shop at this point — to spend souls powering up Tenkai’s stats before backtracking.
20
BACKTRACK Backtrack to the 4R Room for TEST OF VALOR 8Test of Valor #2 — see below. Clearing it at Gold earns WEAPON 119Horin for Tenkai.
BACKTRACK Test of Valor #2 — 4R Room (backtrack, after Hideout 4)
Requirement: Protect the two guards | Time: 3:00 Gold: Horin | Silver: Purple Ring | Bronze: Mushrooms
21
BACKTRACK While backtracking, the six pearl rooms stay open and their Armored Genma stay cleared, so they’re safe to pass through again if you want to grab anything you skipped or simply cut through toward 4R.
Items & Collectibleseverything you can pick up here
WEAPON 69Ice Rifle — Test of Valor #1 Gold reward — Ohatsu
WEAPON 119Horin — Test of Valor #2 Gold reward — Tenkai (usable once he joins)
Do not leave without:
None during a normal playthrough. Both Tests of Valor remain repeatable via Minokichi, and the pearl rooms can be revisited freely before and after opening the central door.
Notes:
The six pearl rooms are internally labeled 1R, 2R, 3B, 4R, 5B, and V by the game’s own room signage, which is why walkthroughs (including this one) use those labels instead of descriptive names. Test of Valor #1 in the 2R Room is easy to miss on a first pass since nothing in the room visually flags it — check the room as soon as you clear the two Armored Genma.
--
STAGE 5 OF 17
ST 6A Child’s RevengeSawayama Dungeon
The party descends into the cave system and prison beneath Sawayama Castle, solving stone-pillar lift puzzles to progress and freeing the Western missionary-fighter Roberto from a cell. The stage builds to a duel with the traitor Sakon, then climbs through the castle’s lower floors to confront Jubei’s nemesis Munenori and the Genma Wasp.
Playable: Soki with Jubei, Ohatsu, or Tenkai as the switchable partner through most of the stage. Roberto is fought as a boss in the Westerner’s Cell and joins the party as a playable character immediately afterward; the story frames the following Sakon fight as a Soki-and-Tenkai confrontation, so switch Tenkai in for that battle if he’s available.
Walkthroughevery step in play order
1
Cave Entrance: use Tenkai’s talk-to-the-dead ability on the body near the entrance for an ITEM 1Antidote — he’s required for this and for several other dead bodies later in the stage.
2
Fight off the Mushroom Genma and teleporting Axeman Genma in the entrance chamber. Kill the Mushroom Genma first — it continuously spawns Soldier Genma while alive — and back off the instant it starts shaking, since its death releases a poison gas cloud that inflicts a lingering poison status. Block the Axeman’s overhead swings rather than trading hits, then punish the recovery. Pick up the FILE 23S. Castle Dungeon Map; the bridge ahead is missing a gear and can’t be crossed yet, so head into the side passage.
3
Stone Pillar Room 1 (also called Lift Room 1): no enemies here, just the switch puzzle. Pick up the ITEM 2Oni Jewel, then use the blue and purple switches to cycle the stone pillars and character positions, riding them up to the top platform for a ITEM 3Power Jewel.
4
Solve the Puzzle Box in Stone Pillar Room 1 for Soki’s WEAPON 20Cutting Wind sword before leaving, and save at the SAVEEnchanted Mirror in this room.
How to read these. Inside the box is a grid of coloured gems. A move is picking a 2×2 block of four gems and rotating it one step clockwise — one action, not four presses. Each panel below is one move, in order, and the four squares marked * are the block you rotate. You win by lining matching colours up along the rows or columns marked at the edges, in exactly the number of moves the box allows. Solving it opens the box intact; smashing it still gives you the contents, but unidentified until you pay to have it appraised.
Stone Pillar Room 2: also enemy-free. Pick up the KEY ITEM 8Stone Pillars file, then use Tenkai to talk to the dead body for the KEY ITEM 1Cave Door Key. Grab a ITEM 4Medicine LV2, work the switches and pillars to the exit door, and save at a second SAVEEnchanted Mirror right by that door.
6
Back at the Cave Entrance’s lower route: lower the folding ladder and ride a stone pillar up to the ledge you couldn’t reach before.
7
Talk to one dead body with Tenkai for his WEAPON 122Yama spear. Talk to the second and an Invisible Genma attacks — it’s completely untargetable until you land a soul-absorption hit to reveal it, so don’t waste swings attacking blindly before that.
8
Pick up the KEY ITEM 2Copper Gear, place it on the device back at the entrance, and cross the now-lowered bridge.
9
Cave Lake: two Ninja Genma rush in the instant you enter — block their opening strings rather than trying to out-trade them, since they like to sneak hits in while you’re mid-animation — while an Archer Genma fires from the far shore. Close the distance on the Archer first so it stops chipping you from range. Use Tenkai to talk to the dead body on the shore for information about the Westerner ahead.
10
BACKTRACK A Mushroom Genma further along the path summons Axeman Genma the same way the one at the entrance did — drop it quickly to cut off the reinforcements. Pick up ITEM 5Oni Med LV2 and FILE 13Takuan’s Diary 3. If Jubei isn’t your active partner, note that a treasure chest beside a dead body on this path needs her specifically to reach — flag it for a later backtrack once she’s free.
11
An SAVEEnchanted Mirror sits further down the path just before the Westerner’s Cell — save here before the double boss fight ahead.
12
PARTNER Enter the Westerner’s Cell and defeat BOSSRoberto (boss below); he joins the party immediately afterward.
BOSS Roberto
BOSS Opening
he steps forward to close distance before doing anything else — stay locked on and watch for the step rather than pre-emptively attacking.
BOSS Core loop
once in range he throws a jab combo. Move to either flank as soon as the jabs start rather than blocking through them, since dodging to the side leaves him wide open.
BOSS Danger attack
the combo always ends in a hard straight punch that staggers you if it connects, so don’t stand and trade — commit to the sidestep the moment you see the jabs begin.
BOSS Punish window
kick him whenever he raises his guard to break it, then land a critical attack. Once enough damage lands, he stops fighting and joins the party immediately.
13
A handful of Soldier Genma spawn in right after Roberto falls — clear them before Sakon appears.
BOSS Sakon
BOSS Opening
a fire shield covers his front the entire fight, so plan to circle rather than approach head-on from the start.
BOSS Core loop
he leads with a three-thrust spear combo, then walks back toward you to repeat the cycle. Block or sidestep the thrusts, then immediately circle around him and hit him from behind or the side with one combo while he’s still recovering.
BOSS Danger attack/positioning
never let him corner you — the shield makes it very hard to disengage once you’re pinned against a wall, so keep escape room open at all times.
BOSS Partner assist
if Tenkai is your active partner, ordering him to Pray boosts Soki’s damage output for the rest of the fight, and Tenkai’s own attacks can briefly stun Sakon, opening an extra punish window.
14
Defeat BOSSSakon in the same room (boss below). Switch to Tenkai for this fight if he isn’t already active, since the story stages it as a Soki-and-Tenkai confrontation.
15
Above the Prison / Castle Courtyard: pick up a ITEM 6Medicine LV2. Switch to Ohatsu and grapple over the barricade blocking the path — this is the only way across.
16
Spear Genma and Soldier Genma attack in the courtyard beyond the barricade; block the spear-users’ charging thrust and punish the recovery. Have Ohatsu snipe the Archer Genma posted on the rooftop above before it can plink the party from range. Pick up FILE 14Takuan’s Diary 4, unlock the Castle Courtyard door, and grab the ITEM 7Fossilized Bone inside. Use the central double doors to continue.
17
Castle Entrance: a Spider Genma and a Door Guardian Genma guard the hall together. The Door Guardian sweeps a wide-range laser across the room, so drop the faster, more mobile Spider Genma first, then bait the laser and close in on the Door Guardian during its recovery. Pick up the FILE 20Elevator Notes file, then have Ohatsu grapple over the spike trap on the far side of the room to reach the KEY ITEM 31F East Door Key.
18
Folding Screen Room: no enemies here. Solve the Puzzle Box for Ohatsu’s WEAPON 78Decadence rifle, pick up the KEY ITEM 41F Machine Lever, and save at the SAVEEnchanted Mirror.
Second Floor: two Ninja Genma attack once you throw the lever — block their opening strike rather than assuming it’s unblockable, since it isn’t. Solve the Puzzle Box here for the ITEM 8Samurai Ring. Pick up the KEY ITEM 52F Central Door Key, then have Ohatsu shoot down the hanging rope to create a crossing over the gap. Use the key on the central door.
20
Second Floor Corridor: Soldier Genma and Axeman Genma teleport in — prioritize the Axeman, since its swings hit harder even though they’re slower. Have Ohatsu bomb the barred gate blocking the way. Pick up the KEY ITEM 63F Machine Lever, ITEM 10Vassal’s Memo 1, and ITEM 9Secret Med LV2, then climb the ladder at the corridor’s end.
PUZZLE BOX 10 Sawayama Dungeon, Second Floor (Reward: Samurai’s Ring)
GRID 3×3 · ALIGN ROWS · 2 MOVES
MOVE 1
o o o
* * o
* * o
MOVE 2
* * o
* * o
o o o
21
Third Floor: pick up ITEM 11Vassal’s Memo 2, solve the Puzzle Box for the ACCESSORY 21S. General Ring, then have Ohatsu grapple across the gap to reach the KEY ITEM 73F Central Door Key. Drain the Red Soul Altar for a burst of souls before opening the central door.
PUZZLE BOX 11 Sawayama Dungeon, Third Floor (Reward: S. General Ring)
Third Floor Save Room: solve the Puzzle Box for the ACCESSORY 14Magician’s Ring, and save at the SAVEEnchanted Mirror one last time before the final fight.
PUZZLE BOX 12 Third Floor Save Room (Reward: Magician’s Ring)
Defeat BOSSMunenori, then immediately defeat the Genma Wasp that follows — there is no break between the two (boss below).
BOSS Munenori
BOSS Opening
he opens with his own four-hit sword combo — block through it and wait for it to end rather than trying to interrupt it.
BOSS Core loop
punish immediately after his four-hit combo finishes, and kick him whenever he blocks to force a critical opening.
BOSS Weapon choice
avoid a five-hit combo blade against him — he reads and counters the fifth hit on reaction — so a four-hit combo weapon keeps your pressure safe.
BOSS Danger attack
his slash-then-thrust combo must be dodged, not blocked, because the first hit is a guard break; his sand-throw attack while he’s getting up should be blocked rather than punished, since attacking into it trades badly.
BOSS Rule to remember
never use a finisher move while he’s knocked down — wait for him to rise fully before committing to one, or the finisher whiffs and leaves you exposed.
BOSS Genma Wasp
BOSS Opening
it hisses audibly right before every attack — use that sound cue on reaction rather than trying to read its body movement.
BOSS Core loop
it alternates poison breath, a wind-gust, and an arm-swipe. Move away from the poison breath rather than blocking it; block or evade the gust and the arm-swipe instead.
BOSS Danger attack
the arm-swipe can hit twice in quick succession — get clear immediately after the first hit rather than assuming it’s a single strike.
BOSS Add management
its eggs can be destroyed for extra souls but don’t need to be cleared to win; let the Wasp itself kill the smaller Genma around the arena for easy soul pickups rather than wasting swings on them yourself.
BOSS Partner management
set your partner to Wait and Recover the moment you hear the hiss so they don’t eat an attack meant for you, then bring them back to All-out Attack once the animation resolves.
Items & Collectibleseverything you can pick up here
ITEM 1Antidote — Cave Entrance, dead body (Tenkai)
ITEM 12Samurai Ring (accessory) — Puzzle Box, Second Floor
ACCESSORY 21S. General Ring (accessory) — Puzzle Box, Third Floor
ACCESSORY 14Magician’s Ring (accessory) — Puzzle Box, Third Floor Save Room
Do not leave without:
None during a normal playthrough. All puzzle boxes and chests in this stage remain reachable on a later backtrack once Ohatsu, Tenkai, and Roberto are all available together.
Notes:
After Hideout 5 opens, new shop stock becomes available and it’s worth spending souls to power up Ohatsu before continuing. The Invisible Genma fought during the Cave Entrance backtrack cannot be targeted at all until you land a soul-absorption hit to reveal it — attacking blindly just whiffs. Puzzle Box #3, on the Second Floor, is easy to walk past since nothing else of note shares that room with it.
--
STAGE 6 OF 17
ST 7Temple of BloodshedKyoto / Daigo Temple
The surviving party reaches the ruins of Kyoto and pushes toward Daigo Temple to burn the Genma Trees and stop the Cherry Blossom Festival ritual, but the group is ambushed and scattered along the way. Soki fights alone through Kyoto’s streets while Tenkai is forced to intercept Sakon Shima, who has been turned against the party a second time; Soki then continues up to Juntei Hall and the Daigo Temple summit to confront Hideyoshi.
Playable: Soki is the controlled character for the whole stage and chooses his partner at the Enchanted Mirror on Main Street. The Sakon boss fight is a forced switch: the game hands control to Tenkai for that encounter only, then returns control to Soki, who proceeds alone (no partner) for the climb up the Path to Daigo Temple and the rest of the stage.
Walkthroughevery step in play order
1
Main Street: at the SAVEEnchanted Mirror, save and pick a partner for the street-level fighting (Ohatsu or Roberto are good choices for the open Bridge fight). Clear the enemies blocking the street.
2
Main Street: collect the ITEM 1Oni Jewel from behind the market carts, the FILE 24Kyoto Area Map, and ITEM 2Medicine LV3 on the stalls before moving on.
3
Connecting Road: two Door Guardians block the passage. Bait one at a time into the open rather than fighting both together, then take the ITEM 3Oni Med LV2 they were guarding.
4
Bridge: entering triggers TEST OF VALOR 9Test of Valor #1 against a Genma General. Immediately lock on and rush him before he can retreat to the far side of the bridge.
You can retry these as often as you like. Leave the room and come back and the orange sphere returns, and once stage revisiting opens up you can return to any earlier test at full strength. Never reload a save over a missed Gold.
Test of Valor #1 — Bridge
Target: Genma General | Time: 2:00 Gold: Ice Sword | Silver: Medicine LV2 | Bronze: Wildflower
5
Bridge: after the test, solve PUZZLE BOX 14Puzzle Box #1 for the WEAPON 39Earth Blade (a weapon for Jubei, who is not present this stage but will use it once she rejoins).
How to read these. Inside the box is a grid of coloured gems. A move is picking a 2×2 block of four gems and rotating it one step clockwise — one action, not four presses. Each panel below is one move, in order, and the four squares marked * are the block you rotate. You win by lining matching colours up along the rows or columns marked at the edges, in exactly the number of moves the box allows. Solving it opens the box intact; smashing it still gives you the contents, but unidentified until you pay to have it appraised.
Connecting Road: a Gacha ambushes from a side alley. Kill it quickly before it teleports away, then pick up the ACCESSORY 79Gambler’s Thimble it drops or guards.
7
Alleyway: an Armored Genma and a pair of Door Guardians wait here. Clear them, then collect FILE 15Takuan’s Diary 5, a ITEM 4Power Jewel, and the ACCESSORY 52True Tiger Eye accessory tucked in the alley.
8
Save at the Mirror before the Path to Daigo Temple — this is the last stop before Soki continues alone.
9
Path to Daigo Temple: control switches to Soki only, with no partner and no partner-swap option for the rest of the stage. A Tunneler Genma burrows in and out of the ground; wait for it to surface before attacking.
10
Path to Daigo Temple: collect the FILE 25Daigo Temple Map, ITEM 5Secret Med LV1, the ACCESSORY 12Warrior’s Ring accessory, FILE 26Kiyomasa’s Memo, and another ITEM 6Power Jewel scattered along the switchback path.
11
Path to Daigo Temple: falling fireballs rain down on the open stretches near the top. Guard or sidestep them; getting hit here can chip a large chunk of health with no partner to revive you.
12
Juntei Hall: entering starts TEST OF VALOR 10Test of Valor #2 against a Don Gacha. Use an Oni Magic critical hit to stagger it and finish the combo before its own fireball barrage starts; the hall’s floor is littered with fire patches to avoid while you fight.
Test of Valor #2 — Juntei Hall
Target: Don Gacha | Time: 1:00 Gold: Black Rifle | Silver: Purple Ring | Bronze: Red Mushrooms
13
Stairs to Daigo Temple: pick up ITEM 7Secret Med LV2, then cross the narrow staircase while blocking the fireballs lobbed from the platform above — there’s no room to dodge sideways, so guarding is the reliable option.
14
Save at the final Mirror before the temple summit; from here you go straight into the Sakon, Genma General, and Hideyoshi fights back to back with no more save points until they’re over.
15
Boss: BOSSSakon Shima. Control switches to Tenkai for this fight.
BOSS Sakon Shima (fought as Tenkai)
the arena is large and open. Circle to stay behind or beside Sakon rather than in front of him — his spear thrusts have long reach and are dangerous head-on. Wait out his multi-hit spear combo, then close in during the opening it leaves and land a full combo. Repeat this pattern, keeping Oni Magic in reserve to interrupt him if he starts a longer combo string. Genma Generals (as Soki, transformed): Soki is invincible during this brief gauntlet fight against a group of armored Generals. There’s no need to block — just keep pressing the attack with Triangle-based heavy strikes to clear them quickly. Hideyoshi: in his first phase, Soki is still invincible from the transformation, so attack freely with heavy strikes. Once he powers up with lightning energy, that invincibility ends — guard immediately after each of your attacks, since his counters come out fast. Avoid the energy spheres he throws; attacking him aggressively while he’s charging a sphere causes it to disperse before it can be thrown. This phase runs long, so pace your Oni Meds.
16
Boss: immediately after Sakon falls, control returns to Soki, who is thrown into an Onimusha-powered clash against a squad of armored Genma Generals.
17
Boss: Hideyoshi, first phase, follows directly after.
18
Boss: Hideyoshi’s second, powered-up phase begins once his first-phase health is emptied.
19
After the credits scene, you return to the hideout. Note that Minokichi does not appear here — he sacrificed himself getting the party out of Nagoya Castle at the very end of the previous stage, so he is gone for the remainder of the game.
Items & Collectibleseverything you can pick up here
ITEM 1Oni Jewel — Main Street, behind the market carts
The True Tiger Eye and Kiyomasa’s Memo are easy to miss on the Path to Daigo Temple since the falling fireballs push players to rush through; the stage cannot be revisited with Soki’s stage-7 loadout until you return via the hideout’s revisit option later, at which point some pickups are still reachable but the puzzle box’s weapon reward is only awarded once.
Notes:
Soki has no partner for the entire climb from the Path to Daigo Temple onward, including all three closing boss fights — equip your best solo gear and consumables before leaving the last Mirror on the Path. The Juntei Hall area is a viable spot to farm souls before or after the Test of Valor by leaving and re-entering, since enemies here respawn on re-entry until the boss gauntlet is triggered.
STAGE 7 OF 17
ST 8Onimusha AwokenMount Hiei / Oni Mansion
Soki and Ohatsu climb Mount Hiei, working through its forest paths and ruins before descending into the shifting, five-floor Oni Mansion. The stage exists to unlock Soki’s Oni Awakening power and to free Ohatsu, who has been overtaken by Genma Insects and must be fought a second time before she can rejoin for good.
Playable: Soki is controlled throughout, partnered with Ohatsu for the entire outdoor Mount Hiei section and the Oni Mansion. Ohatsu is not yet a freely selectable roster member during this stage — she travels with Soki for story reasons but becomes a permanent, freely assignable partner only after you defeat her Genma-possessed form at the end of the stage.
Walkthroughevery step in play order
1
Forest Path: clear a Disc Thrower Genma and a Soldier Genma, then check near the fallen tree for ITEM 1Rare Mushrooms.
2
Ancient Forest: solve PUZZLE BOXPuzzle Box #1, then pick up ACCESSORY 87Charon’s Bell nearby.
How to read these. Inside the box is a grid of coloured gems. A move is picking a 2×2 block of four gems and rotating it one step clockwise — one action, not four presses. Each panel below is one move, in order, and the four squares marked * are the block you rotate. You win by lining matching colours up along the rows or columns marked at the edges, in exactly the number of moves the box allows. Solving it opens the box intact; smashing it still gives you the contents, but unidentified until you pay to have it appraised.
PUZZLE BOX 15 Ancient Forest (Reward: Charon’s Bell)
GRID 5×3 · ALIGN ROWS · 4 MOVES
MOVE 1
* * o
* * o
o o o
o o o
o o o
MOVE 2
o o o
* * o
* * o
o o o
o o o
MOVE 3
o o o
o o o
o * *
o * *
o o o
MOVE 4
o o o
o o o
o o o
* * o
* * o
3
Forest Clearing: grab ITEM 2Medicine LV2 and deal with a Soldier Genma. A Gacha and a Don Gacha ambush together here — this fight is TEST OF VALOR 11Test of Valor #1 (single Don Gacha target); focus the Don Gacha down first since the regular Gacha is comparatively harmless.
You can retry these as often as you like. Leave the room and come back and the orange sphere returns, and once stage revisiting opens up you can return to any earlier test at full strength. Never reload a save over a missed Gold.
Test of Valor #1 — Ruins
Target: Three Don Gachas | Time: 2:00 Gold: Ground Gloves | Silver: Secret Med LV2 | Bronze: Wildflower
4
Forest Clearing: solve PUZZLE BOX 16Puzzle Box #2 for the WEAPON 16Oni Cutter, Soki’s stage weapon.
Ruins: this room also holds TEST OF VALOR 12Test of Valor #2 — three Don Gachas at once. Take out the two on the right side first so you aren’t flanked, using Oni Magic critical chains to burst one down quickly before turning to the others.
BACKTRACK Test of Valor #2 — Lazuline Hall Courtyard (backtrack)
Requirement: Absorb 2,000 souls | Time: 3:00 Gold: Battle Rifle | Silver: Pearl Ring | Bronze: Red Mushrooms
7
Pagoda Remains: pick up KEY ITEM 4Mt. Hiei Legend 1 and more ITEM 3Rare Mushrooms, then open the chest for the WEAPON 73Guardian, Ohatsu’s stage weapon (she can’t wield it yet, but it’s ready for when she rejoins).
8
Pagoda Remains: save at the SAVEEnchanted Mirror and spend any accumulated materials to power up the newly found WEAPON 16Oni Cutter before pushing on.
9
BACKTRACK Temple Entrance / Lazuline Hall Courtyard: collect the ITEM 4Fossilized Bone, KEY ITEM 5Mt. Hiei Legend 2, and ITEM 5Secret Med LV1, then save at the Mirror — this courtyard is also where TEST OF VALORTest of Valor #3 becomes available later, but only by backtracking here after finishing the stage.
10
Enter the Oni Mansion. Its layout and monster placement randomize per playthrough, but the structure is fixed: five floors, sixteen rooms each, three look-alike portals per floor with only one leading onward. One room per floor is furnished differently from the rest — use it to work out which of the three exits is real rather than gambling on a wrong portal.
11
First Floor: collect the FILE 30Oni Mansion Map, an KEY ITEM 1Orange Key, ITEM 6Fangs, and ITEM 7Medicine LV2 while exploring, then head to the exit portal you identified as correct.
12
Second Floor: a Mushroom Genma here generates a field of electric spheres — kill it first to shut the spheres off before looting the room. Pick up ITEM 8Oni Med LV2 and another KEY ITEM 6Orange Key; the visually distinct room’s chest holds a ACCESSORY 61Wolf Necklace.
13
Third Floor: another KEY ITEM 7Orange Key and a Mushroom Genma to clear, then solve PUZZLE BOXPuzzle Box #4 and take the ITEM 9Ultra Med LV2 nearby. This floor’s distinct room also contains an SAVEEnchanted Mirror — save here.
PUZZLE BOX 18 Oni Mansion, Third Floor (Reward: Knight Ring)
GRID 3×3 · ALIGN COLUMNS · 4 MOVES
MOVE 1
* * o
* * o
o o o
MOVE 2
o o o
o * *
o * *
MOVE 3
o * *
o * *
o o o
MOVE 4
o o o
* * o
* * o
14
Fourth Floor: defeat the Mushroom Genma to get a KEY ITEM 2Purple Key, use it on the southern door, then pick up a second KEY ITEM 8Orange Key and the ITEM 11Invention Notes file. A second Mushroom Genma guards the ITEM 12Warrior’s Code — clear it and grab the item before heading to the exit.
15
Fifth Floor: save at the SAVEEnchanted Mirror first. Collect an KEY ITEM 9Orange Key and a KEY ITEM 10Purple Key, then solve PUZZLE BOXPuzzle Box #5 to open a path to the KEY ITEM 11Blue Key and KEY ITEM 12Green Key.
PUZZLE BOX 19 Oni Mansion, Fifth Floor (Reward: Blue Bell)
GRID 5×3 · ALIGN ROWS · 4 MOVES
MOVE 1
o * *
o * *
o o o
o o o
o o o
MOVE 2
o o o
* * o
* * o
o o o
o o o
MOVE 3
o o o
o o o
o o o
* * o
* * o
MOVE 4
o o o
o o o
o * *
o * *
o o o
16
Fifth Floor: solve PUZZLE BOX 20Puzzle Box #6 for the Dragon of Peace, then use the KEY ITEM 13Blue Key to reach ITEM 10Medicine LV3 behind a locked door before taking the correct exit portal out of the mansion.
PUZZLE BOX 20 Oni Mansion, Fifth Floor (Reward: Dragon of Peace)
GRID 3×3 · ALIGN ROWS · 3 MOVES
MOVE 1
o o o
* * o
* * o
MOVE 2
o o o
* * o
* * o
MOVE 3
o * *
o * *
o o o
17
Boss: BOSSGargant.
BOSS Gargant
use the Oni Cutter you found earlier in the stage. Avoid throwing out his full combo string — instead use short bursts (for example, a few quick strikes, a pause, then a forward-plus-strike) so you aren’t caught mid-animation by his counters. His force-field attack cannot be blocked, so watch for the tell and move out of the way rather than guarding. Landing an Oni Magic hit followed immediately by a critical attack can stagger him; keep Oni Meds on hand if you lean on this pattern repeatedly, since it drains your magic gauge fast. Genma Ohatsu: block her gunfire as you close the distance, then punish with combos or thrust attacks once you’re in range. Watch for and avoid her burst-round volleys, which deal heavy damage if you’re caught in the open. Once her health is emptied she becomes dazed and a Purify prompt appears — hold forward, press R2, and land the follow-up stab exactly on the prompt. If you miss the window, she recovers to full health and the fight resets, so don’t rush the input.
18
Boss: Genma Ohatsu, immediately after.
19
Return to the hideout. Ohatsu now joins as a full, freely selectable ally for every stage from here on. Minokichi is still absent — check the flame that now occupies his usual spot in the hideout to revisit past stages or enter the Dark Realm for the first time.
Items & Collectibleseverything you can pick up here
ITEM 1Rare Mushrooms — Forest Path, near the fallen tree
Puzzle Box #5 on the Fifth Floor gates off the Blue Key and Green Key, which in turn gate off Medicine LV3 and (via the Green Key) additional loot — skipping it means leaving items behind for the rest of the playthrough, since the Oni Mansion’s layout is not revisitable in the same form later.
Because the Oni Mansion regenerates its layout, item positions described above assume a typical run; keys and puzzle boxes are guaranteed to appear somewhere on their listed floor, but the exact room number can vary.
Notes:
Ohatsu accompanies you for the whole stage but cannot be freely selected as your permanent partner until after the Genma Ohatsu boss fight — treat her as a scripted ally for this stage rather than a normal partner-swap option. Minokichi does not return after his sacrifice at the end of the previous stage; from this point on, the presence that lets you revisit stages and enter the Dark Realm at the hideout takes the form of a flame in his usual spot rather than Minokichi himself. The Dark Realm (100 floors) becomes available for the first time once you’re back at the hideout after this stage, and it is the primary place to grind levels and equipment for the remainder of the game. Combining the Invention Notes and Warrior’s Code found in the mansion creates the Merchant Stamp accessory, which discounts hideout shop prices by 20% while equipped.
STAGE 8 OF 17
ST 9Storming AzuchiAzuchi Castle
Soki and Ohatsu assault the ruined Azuchi Castle to rescue the captured Jubei and confront Munenori Yagyu, fighting through cannon emplacements, trap-rigged towers, and an elevator shaft that has to be solved from both ends before the rooftop opens up.
Playable: Soki is controlled throughout with Ohatsu as his permanent partner for this stage — her grapple, ranged shots, and explosives are required repeatedly to progress, so she cannot be swapped out for most of the level’s puzzle sections.
Walkthroughevery step in play order
1
Gate: kick the Cannon Genma emplacements to redirect their line of fire into other enemies rather than fighting everything head-on. Destroy the Cannon Genma once it’s no longer useful to drop the force field blocking the way forward.
2
Gate: collect the ITEM 1Power Jewel and the FILE 32Azuchi Castle Grounds Map.
3
Open Area: entering starts TEST OF VALOR 13Test of Valor #1 against a Crab Walker. Keep Ohatsu at range plugging away with ranged attacks while Soki is set to All-out Attack, and stay clear of any Cannon Genma still active nearby so you aren’t hit while focused on the Crab Walker.
You can retry these as often as you like. Leave the room and come back and the orange sphere returns, and once stage revisiting opens up you can return to any earlier test at full strength. Never reload a save over a missed Gold.
Open Area: solve PUZZLE BOXPuzzle Box #1 after the test.
How to read these. Inside the box is a grid of coloured gems. A move is picking a 2×2 block of four gems and rotating it one step clockwise — one action, not four presses. Each panel below is one move, in order, and the four squares marked * are the block you rotate. You win by lining matching colours up along the rows or columns marked at the edges, in exactly the number of moves the box allows. Solving it opens the box intact; smashing it still gives you the contents, but unidentified until you pay to have it appraised.
PUZZLE BOX 21 Azuchi Castle, Open Area (Reward: Wolf Ring)
GRID 3×3 · ALIGN COLUMNS · 3 MOVES
MOVE 1
* * o
* * o
o o o
MOVE 2
o o o
o * *
o * *
MOVE 3
o * *
o * *
o o o
5
Old Battleground: a Mushroom Genma should be dealt with from range using Ohatsu before it can spread its spore effect; then clean up a Don Gacha.
6
Old Battleground: have Ohatsu grapple up to the upper ledge and lower the folding ladder for Soki. A second Mushroom Genma waits up top — defeat it, then head through the gate.
7
Mountain: entering starts TEST OF VALOR 14Test of Valor #2 — land five finishing blows within the time limit. Switch to your weakest weapon so enemies go down faster into finisher range, knock a Tunneler Genma down, and land finishers while it’s grounded.
Test of Valor #2 — Mountain
Technique: Finisher x5 | Time: 3:00 Gold: Flame Blade | Silver: Pearl Ring | Bronze: Red Mushrooms
8
Mountain: pick up the ITEM 2Oni Jewel, then continue into Azuchi Castle proper.
9
Castle Entrance: use Ohatsu to shoot the exposed shell that’s projecting the force field, clearing it. Fight off the Genma that appears, then have Ohatsu grapple you both across the gap.
10
Castle Entrance: step on the green floor switch to expose another shell, shoot it with Ohatsu, then pull both nearby levers together — one of you holds a lever while the other passes through the barred door before it closes again.
11
Elevator Room: collect ITEM 3Oni Med LV3 and the KEY ITEM 2Emergency Procedure file. Have Ohatsu plant a bomb on the sealed door to blow it open, then head into the East Rooftop.
12
East Rooftop: collect the FILE 32Azuchi Castle Map and the ACCESSORY 50Necklace of Peace. Have Ohatsu grapple up, unfold the ladder for Soki, then pull the lever to release the barred door ahead.
13
East Trap Room: stand on the yellow floor switch while Ohatsu shoots the shell from a raised position, then move through the swinging blade traps before the seal closes again. Grab ITEM 4Medicine LV2, then solve PUZZLE BOXPuzzle Box #2, and finally operate Machine 1.
PUZZLE BOX 24 Azuchi Castle, blade-trap room by Machine 1 (Reward: Rosary of Health)
GRID 5×3 · ALIGN ROWS · 4 MOVES
MOVE 1
o o o
o o o
* * o
* * o
o o o
MOVE 2
o o o
o * *
o * *
o o o
o o o
MOVE 3
o * *
o * *
o o o
o o o
o o o
MOVE 4
o o o
o o o
o o o
* * o
* * o
14
Return to the Elevator Room and take the second, mirrored path toward the West Rooftop.
15
West Rooftop / West Trap Room: clear an Armored Genma, shoot the shell with Ohatsu, cross the blade traps, and pick up the second ITEM 5Medicine LV2 before operating Machine 2.
16
With both machines operated, return to the Elevator Room and descend to the bottom floor.
17
Elevator Room, Bottom Floor: collect the KEY ITEM 1Toyotomi Crest and the ACCESSORY 73Lucky Charm. Solve PUZZLE BOX 22Puzzle Box #3 for the WEAPON 13Victory Gale, Soki’s stage weapon.
Take the KEY ITEM 3Toyotomi Crest up to the rooftop door and place it in the slot to unseal the final area. Save at the Mirror before going further — the Munenori fight follows shortly after.
BOSS Munenori (first encounter of this stage)
favor a weapon with a four-hit combo and stop before the fifth hit, since he reliably counters it. Guard immediately after your combo ends, then look for openings to land Oni Magic and an Issen (instant kill/critical finisher) when the prompt is available. Keep Ohatsu attacking from range throughout — she is not vulnerable to most of his melee patterns. Once he removes his eyepatch partway through the fight, he gains a teleporting dash that closes distance instantly; stay ready to guard the moment he vanishes. If you have Oni Awakening available, using it here shortens the fight considerably.
19
Push forward to the rooftop and confront Munenori. Jubei is being held here and is freed once the fight is won.
20
BACKTRACK Return to the hideout. Jubei rejoins the active roster with two new abilities, Demon Eye and Quick Draw, and Azuchi Castle unlocks new backtracking content accessible only with her along.
Backtrack — Return Here Laternot solvable on your first pass through this stage
PUZZLE BOX 23 Azuchi Castle, East Trap Room (Reward: Odenta)
Only appears when you backtrack to Azuchi Castle with Jubei in the party — it is not there during the main story pass.
GRID 3×3 · ALIGN COLUMNS · 3 MOVES
MOVE 1
o o o
o * *
o * *
MOVE 2
o o o
* * o
* * o
MOVE 3
o * *
o * *
o o o
BACKTRACK Test of Valor #3 — Rooftop of Azuchi Castle (backtrack)
Requirement: Absorb 2,000 souls | Time: 4:00 Gold: Horn of Susano | Silver: Ultra Med LV2 | Bronze: Lizard
Items & Collectibleseverything you can pick up here
WEAPON 13Victory Gale (Soki) — Puzzle Box #3, Elevator Room bottom floor
Do not leave without:
Puzzle Box #2 in the East Trap Room and Puzzle Box #3 in the Elevator Room bottom floor are both required to fully clear the stage’s puzzle boxes; skipping either is not fatal to progress but permanently forfeits that box’s contents for this playthrough until a New Game+ or replay.
A separate, fourth puzzle box (reward: Odenta, a weapon for Jubei) only appears in the East Trap Room when you backtrack to Azuchi Castle with Jubei in the party after this stage — it is not present during the main story path through this stage.
Notes:
Ohatsu is required for nearly every mechanical puzzle in this stage (shell-shooting, grappling, bombing doors) and cannot be freely swapped out through most of it — plan your equipment loadout around her rather than Soki alone. After finishing the stage and recovering Jubei, backtracking through Azuchi Castle with her unlocks additional content: crossing a game-board mechanism in the Castle Entrance with Jubei for a Drive Med LV2, pushing a block with Roberto and having Ohatsu bomb a door in the West Trap Room for an Oni of Peace and a Rosary of Health, having Tenkai examine a dead body in the East Rooftop for a Gem of Bravery, and solving the East Trap Room’s fourth puzzle box with Jubei present for the Odenta weapon. The Gem of Valor accessory is picked up during the backtrack Test of Valor #3 on the rooftop.
--
STAGE 9 OF 17
ST 10The Mad DoctorWestern Hospital
Soki and his partner push into a Genma-infested Western-style hospital, clearing Genma Mages and reanimated Zombies before confronting the deranged missionary Luis Frois. A mid-stage backtrack (unlocked once Hideout 8 / Lazuline Hall opens on the map) lets the party return with Roberto to break open two locked chests they couldn’t reach the first time through.
Playable: Soki is always active. Jubei is the natural partner for the initial push through the hospital (her Distract Enemy order is called out below), and Roberto is available as a swappable partner from the Enchanted Mirror for the backtracking segment, since only he can shove the blocks that free the Entrance and Surgery Corridor chests.
Walkthroughevery step in play order
1
Entrance: on arrival the ward branches into a locked left door and an open right door. Before moving on, clear the Genma Mage in the room — it’s the priority target, since leaving it alive lets it keep buffing/reviving the Zombie escorting it, so drop the mage first and mop up the Zombie second. The Zombie’s swings are slow and telegraphed; block or dodge them and punish the long recovery after each swing.
2
Still in the Entrance, pick up the FILEWestern Hospital Map and an ITEM 2Ultra Med LV2, and smash any crates/furniture along the walls for stray Medicine drops before moving on. The left door stays locked for now — you don’t have its key yet — so take the right door forward.
3
Push down the right-side corridor toward the Bedroom, clearing any additional Genma Zombies patrolling the hallway with the same block-then-punish approach.
4
Bedroom: this room is guarded by a Big Genma Zombie, a heavier variant that shrugs off light pokes — its overhead slam is unblockable (it flashes just before impact), so dodge it outright rather than guarding, then punish the long recovery with a full combo or an Oni Magic burst.
5
Once the Big Genma Zombie is down, clear the Bedroom of pickups: FILE 17Takuan’s Diary 7, the ITEM 7Warrior’s Code accessory, a ITEM 3Medicine LV2, and the KEY ITEM 2Power Room Key.
6
BACKTRACK Backtrack to the Patients Room, which connects the Bedroom to the Power Room. Grab the ITEM 4Power Jewel here.
7
Enter the Power Room using the KEY ITEM 3Power Room Key and press the device button inside to restore power to the wing — this is what unlocks the previously locked left door back at the Entrance.
8
Return to the Entrance and pull the handle beside the now-unlocked left/middle door to open the path onward toward Surgery.
9
Advance into the Surgery Corridor. Pick up the KEY ITEM 4Hospital Register file.
10
Save at the SAVEEnchanted Mirror in the Surgery Corridor — this is your last save before the boss, so top off supplies here if you’re carrying any.
BOSS Luis Frois
BOSS Phase 1 — Ground floor, visible
Luis teleports repeatedly around the arena while remaining visible. Attack immediately on entry and set your partner to All-out Attack to keep constant pressure on him and deny him room to reposition. He also fires slow-moving electric spheres between teleports; block or sidestep these rather than trading hits through them.
BOSS Phase transition (~25% health lost)
Luis drags your partner up to the hospital’s second floor and vanishes from the ground floor. From this point on you must actively split your attention between both floors.
BOSS Phase 2 — Invisible, dagger duel
while invisible, Luis throws knives that reveal his position — block or deflect an incoming knife and it rebounds into him, which is the only reliable way to damage him during this phase. Some knife throws are feints meant to bait a whiff; hold position at one end of the room and wait for the real telegraph before committing.
BOSS Floor-switching
whichever character Luis is currently threatening (ground floor or upstairs) needs your direct control; leave the other on Wait and Recover so it holds position and heals instead of wandering into danger.
BOSS Sudden Death (can trigger in either phase)
a glowing countdown ring appears around a character. You must land enough damage on Luis to break the effect before the timer expires, or that character dies outright — there is no defensive escape, so always answer it with aggression, never blocking.
11
Continuing deeper into the Surgery Corridor triggers TEST OF VALOR 16Test of Valor #1 (Two Dark Puppets, 3:00). The Dark Puppets take normal damage throughout, but only die for good if the killing blow is Soki’s Sword of Purification (his R2 special-attack set — R2 alone for Coil, Forward + R2 for Stab, Back + R2 for Flight); land any other finisher and they get back up at full health. It can be attempted immediately or skipped and re-attempted later from the stage revisit menu at Minokichi’s hideout, so don’t feel pressured to clear it on this pass.
You can retry these as often as you like. Leave the room and come back and the orange sphere returns, and once stage revisiting opens up you can return to any earlier test at full strength. Never reload a save over a missed Gold.
Test of Valor #1 — Surgery Corridor
Target: Two Dark Puppets | Time: 3:00 Gold: Meteor Shower | Silver: Indigo Ring | Bronze: Red Mushrooms
Dark Puppets encountered in Test of Valor #1 will fully heal unless the killing blow is Soki’s Sword of Purification (Coil/Stab/Flight, his R2 special-attack set) — always let Soki land the finishing hit rather than the partner.
12
Push past the Surgery Corridor into the boss antechamber — there are no further enemy packs or pickups between the Test of Valor and the boss door itself.
13
Enter the arena and defeat Luis Frois (full phase-by-phase strategy below).
14
BACKTRACK After the boss cutscene, Hideout 8 (Lazuline Hall) opens up on the world map. Minokichi runs this hideout — he’s the one who sells gear, lets you revisit any cleared stage, and (from this point on) opens the door to the Dark Realm, so check in with him before backtracking.
15
Use Minokichi’s stage-revisit option to re-enter Stage 10 with Roberto in your party. In the Entrance, have Roberto push the block that was sealing off a side alcove; this opens a chest holding the ITEM 5Red Soul Altar, the WEAPON 79Black Inferno firearm, and an ITEM 6Oni Jewel.
16
BACKTRACK Still backtracking, make your way to the Surgery Corridor. Have Roberto push the second block there to reveal a chest containing the WEAPON 96Light Gloves.
17
Interacting with that second chest area also opens TEST OF VALOR 17Test of Valor #2 (Diamond, 3:00) in the Surgery area.
For Test of Valor #2, the Diamond enemy counters ordinary sword strikes; rely on Oni Magic-empowered Critical attacks instead, and Jubei’s Distract Enemy order is a strong way to keep it from focusing the character you’re actively controlling.
18
The Diamond enemy in TEST OF VALOR 17Test of Valor #2 counters ordinary sword strikes outright, so don’t bother chipping away with basic combos — rely on Oni Magic-empowered Critical attacks instead, and consider bringing Jubei so her Distract Enemy order can hold its attention off whichever character you’re actively controlling.
19
Like the first Test of Valor, TEST OF VALOR 17Test of Valor #2 can be attempted now or left for later — the revisit system lets you re-enter Stage 10 and re-attempt either trial as many times as you want, so there’s no reason to reload a save to chase a better medal.
20
BACKTRACK Once both backtrack chests and both Tests of Valor are handled (in whatever order you prefer), Stage 10 is fully cleared out; everything remaining in this stage from here on is just re-attempting Tests of Valor for a better medal.
Puzzle Box Solutions
None in this stage.
Items & Collectibleseverything you can pick up here
WEAPON 79Black Inferno — firearm — Entrance backtrack chest (requires Roberto to move the block)
WEAPON 96Light Gloves — gauntlets — Surgery Corridor backtrack chest (requires Roberto to move the block)
Do not leave without:
The Entrance and Surgery Corridor backtrack chests (Black Inferno, Light Gloves, Red Soul Altar, Oni Jewel) are gated behind Roberto and behind Hideout 8 opening on the map — they cannot be reached on the first pass through the hospital.
Notes:
Both Tests of Valor in this stage remain accessible after the fact through the game’s stage revisit system, so there is never a need to reload an old save just to get another attempt at Gold. Minokichi, who runs the hideout, is very much alive at this point in the story — he’s your source for the shop, stage revisits, and (starting around this point) the Dark Realm; he doesn’t die until the end of Stage 16.
--
STAGE 10 OF 17
ST 11Dark CastleSawayama Castle
The party returns to a now Genma-corrupted Sawayama Castle, this time descending into hidden caves, a waterway, and a dungeon beneath the keep that weren’t accessible on the earlier visit. The stage revolves around swapping partners at Enchanted Mirrors to clear character-specific obstacles, and it ends with a rematch against a Genma Bug encountered earlier in the adventure.
Playable: Soki is always active. Roberto, Ohatsu, and Jubei are all required at different points and must be swapped in at Enchanted Mirrors as needed: Roberto pushes blocks, punches through iron doors, and operates levers; Ohatsu bombs cracked doors/gates and grapples gaps; Jubei crawls through narrow holes and crosses thin boards/ledges.
Walkthroughevery step in play order
1
Outside the Castle Walls: pick up a ITEM 1Medicine LV2. Bring in Roberto to shove the block out of the way, then swap to Ohatsu to bomb open the blocked door. Grab the ITEM 2Antler item behind it.
2
Back with Roberto, lower the bridge. Collect the KEY ITEM 1Floodgate Lever and use it, then pick up a ITEM 3Drive Jewel and the KEY ITEM 7Waterway Door Key.
3
Castle Courtyard: fight off a Tunneler Genma and a Don Gacha. Use Roberto to move the courtyard block, opening the way into Hidden Cave 1.
4
Hidden Cave 1: clear the Axeman enemy. Solve PUZZLE BOX 53Puzzle Box #1 to open Roberto’s gauntlets, WEAPON 105Brunnhilde.
How to read these. Inside the box is a grid of coloured gems. A move is picking a 2×2 block of four gems and rotating it one step clockwise — one action, not four presses. Each panel below is one move, in order, and the four squares marked * are the block you rotate. You win by lining matching colours up along the rows or columns marked at the edges, in exactly the number of moves the box allows. Solving it opens the box intact; smashing it still gives you the contents, but unidentified until you pay to have it appraised.
Castle Entrance / Folding Screen Room: defeat a Warrior Genma and a Door Guardian. Save at the SAVEEnchanted Mirror. Head to the second floor for the KEY ITEM 3Emergency Exit Key and use it to open the previously locked door.
7
Third Floor: bring Roberto to punch through the iron door, then use the lever to lower the gate. Grab a ITEM 5Drive Med LV2 on the way to the Third Floor Save Room.
8
In the Third Floor Save Room, save, then trigger TEST OF VALOR 18Test of Valor #1 (Green Genma General, 2:00). It can be attempted now or skipped and re-attempted later through the revisit system.
You can retry these as often as you like. Leave the room and come back and the orange sphere returns, and once stage revisiting opens up you can return to any earlier test at full strength. Never reload a save over a missed Gold.
Test of Valor #1 — Third Floor Save Room
Target: Genma General | Time: 2:00 Gold: Time Gem | Silver: Medicine LV3 | Bronze: Lizard
9
Castle Balcony / Secret Room / Lopsided Room / Kitchen: collect FILE 33Mitsunari’s Diary 1 on the Balcony, then examine the hole in the wall to proceed. Pick up a ITEM 6Power Jewel and FILE 34Mitsunari’s Diary 2 in the Lopsided Room, watching out for fireballs you’ll need to block. In the Kitchen, solve PUZZLE BOX 28Puzzle Box #3 to claim Soki’s sword WEAPON 19Enryu.
Climb down into Roberto’s Cell and collect KEY ITEM 4Roberto’s Pendant. Save at the SAVEEnchanted Mirror in front of the cell.
11
Just outside the cell, trigger TEST OF VALOR 19Test of Valor #2 (Chain Critical x10, 3:00) — chain criticals into enemies as they teleport in, keeping your partner on Wait so you don’t lose the combo to their interference.
Pick up KEY ITEM 5Copper Gear A. Head to Cave Lake and place the gear to lower the drawbridge there. Switch to Jubei to cross the narrow beam beyond it, then collect the ACCESSORY 62Pair Scarf. In the Stone Pillar Room, solve PUZZLE BOX 29Puzzle Box #4 for Jubei’s sword WEAPON 49Masamune.
PUZZLE BOX 29 Sawayama Castle, Stone Pillar Room (Reward: Masamune)
In the Waterway: use Roberto to shift the block, then have Jubei and Soki work the stone pillar together to open a path. Pick up a second ITEM 7Drive Jewel. Have Jubei crawl through the crack in the wall to grab KEY ITEM 6Copper Gear B, then lower the drawbridge. Send Jubei across to reach two chests, each holding a ITEM 9Small ITEMGold Nugget.
14
Cave Entrance: defeat the Menteith enemy blocking the force field. Use Roberto to move the last block. Collect the ACCESSORY 63Friendship Scarf.
15
Save before the final door, then defeat the Genma Bug to close out the stage.
Boss Strategies
BOSS Genma Bug (rematch) Use the same approach that worked the first time this boss was fought earlier in the game
keep your characters anchored in a doorway so the Genma Bug can’t easily flank or surround them, and let Ohatsu snipe it from range while Soki holds the chokepoint. Save All-out Attack orders for the windows when the boss is staggered/stunned rather than throwing them out on cooldown, since it punishes careless aggression outside those windows.
Items & Collectibleseverything you can pick up here
All four puzzle boxes are one-time pickups tied to this visit to the castle; their weapons (Brunnhilde, Embossed Mallet, Enryu, Masamune) aren’t obtainable any other way.
Both diary files (Mitsunari’s Diary 1 and 2) are easy to miss since they’re off the main path in the Castle Balcony and Lopsided Room.
Notes:
Both Tests of Valor in this stage can be re-entered and re-attempted later through the game’s revisit system, so treat a missed Gold as something to come back for rather than a reason to reload.
--
STAGE 11 OF 17
ST 12Mitsunari’s PrideSakai Facility
Soki’s party infiltrates Mitsunari Ishida’s fortified research facility to shut down four color-coded Control Devices before the Genma-empowered warlord can complete whatever he’s building there. The stage is a self-contained gauntlet of switch puzzles and experiment rooms that culminates in a direct confrontation with Mitsunari himself — the fight against Mitsunari’s true Genma form, Claudius, happens later, in a different facility, not here.
Playable: Soki is always active, with Ohatsu and Roberto both needed at points to clear obstacles (Ohatsu for the Mushroom Genma/ladder sequence, Roberto to punch through the door to the Yellow Control Device), swapped in as needed from Enchanted Mirrors.
Walkthroughevery step in play order
1
Research Facility Entrance: on entry you’re immediately met by a Warrior Genma and an Armored Genma. Take the plain Warrior Genma first — it telegraphs an overhead slash you can block and punish, or parry outright for a One-Hit Issen kill if it flashes white before swinging.
2
The Armored Genma is the tougher of the two: its plating shrugs off light pokes, so lean on heavier combo finishers or a ground finisher to crack its guard before it goes down.
3
With the entrance clear, pick up the FILE 37Sakai Facility Map, then push into the facility interior.
4
Research Lab: collect the KEY ITEM 1Sakai C. Tower key item from the terminal here. Interacting with it lays out the objective for the whole stage — four Control Devices, one apiece in the Red, Blue, Green, and Yellow rooms, all need to be destroyed to open the way to Mitsunari.
5
Head into the Control Device Red Room. Destroy the Red Control Device.
How to read these. Inside the box is a grid of coloured gems. A move is picking a 2×2 block of four gems and rotating it one step clockwise — one action, not four presses. Each panel below is one move, in order, and the four squares marked * are the block you rotate. You win by lining matching colours up along the rows or columns marked at the edges, in exactly the number of moves the box allows. Solving it opens the box intact; smashing it still gives you the contents, but unidentified until you pay to have it appraised.
PUZZLE BOX 25 Control Device Red Room (Reward: Phoenix Ring)
GRID 3×3 · ALIGN COLUMNS · 4 MOVES
MOVE 1
o o o
* * o
* * o
MOVE 2
o * *
o * *
o o o
MOVE 3
o * *
o * *
o o o
MOVE 4
* * o
* * o
o o o
7
Move on to the Control Device Blue Room. An Axeman guards it — its overhead axe chop is slow to start but hits hard and is unblockable on full charge, so dodge the swing itself and punish the long recovery afterward rather than trying to guard through it.
8
With the Axeman down, pick up the ITEM 3Warrior’s Code accessory and the KEY ITEM 3Green Crest key item. The Blue Control Device itself can’t be destroyed yet — its control panel is sealed behind a lock you don’t have the key for, so leave it for now and continue on.
9
Push on to the Control Device Green Room. Pick up FILE 18Takuan’s Diary 8 here before touching anything else.
10
Destroy the Green Control Device, then solve PUZZLE BOX 26Puzzle Box #2 for the WEAPON 102Class Zero Gloves (Roberto’s gauntlets).
PUZZLE BOX 26 Control Device Green Room (Reward: Class Zero Gloves)
GRID 5×3 · ALIGN ROWS · 4 MOVES
MOVE 1
o o o
o o o
o o o
* * o
* * o
MOVE 2
o o o
o o o
* * o
* * o
o o o
MOVE 3
o * *
o * *
o o o
o o o
o o o
MOVE 4
o o o
o * *
o * *
o o o
o o o
11
Still in the Green Room, pick up the KEY ITEM 4Purple Crest before moving on toward the Yellow Control Device.
12
On the path to Yellow, a Mushroom Genma blocks the way — it’s best killed at range or with a quick finisher rather than a melee combo, since getting caught next to it when it pops can tag you with its spore burst. Ohatsu’s ranged shots are the safe way to drop it from a distance.
13
With the Mushroom Genma cleared, lower the folding ladders it was guarding and continue forward.
14
A reinforced door blocks the last stretch to the Yellow Control Device; swap in Roberto here and have him punch straight through it.
15
Control Device Yellow Room: destroy the Yellow Control Device, then solve the puzzle box here for Ohatsu’s firearm, WEAPON 84Crag. (This room’s box keeps its original numbering as PUZZLE BOX 27Puzzle Box #4 — there is no separate Puzzle Box #3 in this stage; the numbering simply skips from #2 to #4.)
PUZZLE BOX 27 Control Device Yellow Room (Reward: Crag)
BACKTRACK Backtrack toward the Blue Room using the Green and Purple Crests collected so far; picking up the KEY ITEM 5Control Door Key along this route unlocks the Blue Control Device’s panel.
17
Use the KEY ITEM 6Control Door Key on the Blue Room’s locked panel, then destroy the Blue Control Device. Grab the ACCESSORY 63Friendship Scarf that appears once it’s down.
18
With all four devices destroyed, head for the Room to Experiments. Crossing it triggers TEST OF VALOR 20Test of Valor #1 (Six Yellow Genma Generals, 2:00) — Enryu’s reach and continuous Oni Magic help keep multiple Generals from ganging up while they summon reinforcements; don’t let any one General sit still long enough to finish a summon.
You can retry these as often as you like. Leave the room and come back and the orange sphere returns, and once stage revisiting opens up you can return to any earlier test at full strength. Never reload a save over a missed Gold.
Test of Valor #1 — Room to Experiments
Target: Six Genma Generals | Time: 2:00 Gold: Ortlinde | Silver: Oni Med LV3 | Bronze: Red Mushrooms
19
Experiment Room 1: a Mushroom Genma here is shielding a nearby Invisible Genma from view — kill the Mushroom Genma first (again, at range if you can) and the Invisible Genma becomes visible and vulnerable immediately afterward. A Door Guardian also blocks this room; it holds its ground rather than chasing, so approach and attack its front directly, blocking the counter-swing it throws out when you get close.
20
Experiment Room 2: pick up a ITEM 1Drive Jewel, then defeat the Boxer Genma stationed here — it throws quick punch combos you can block early, but watch for a red-flashing haymaker that must be dodged rather than guarded, then punish the opening it leaves.
21
Experiment Room 3: collect the ACCESSORY 77Gem of Bravery, ACCESSORY 56Blessed Oni Eye, and an ITEM 2Oni Jewel scattered through the room. This is also the room you’ll need to return to later for TEST OF VALOR 21Test of Valor #2, so note the location.
BACKTRACK Test of Valor #2 — Experiment Room 3 (backtrack)
Target: Genma General | Time: 3:00 Gold: Gem of Will | Silver: Medicine LV3 | Bronze: Salamander
22
Take the Control Room Stairway to find Jubei’s sword, the WEAPON 56Shishio.
23
Save at the SAVEEnchanted Mirror before the final corridor — your last chance before the boss — then advance to face BOSSMitsunari (full phase-by-phase strategy below). The stage ends once he falls; there is no second boss fight here.
BOSS Mitsunari
BOSS Opening phase
he punctuates his combos with a wide fan sweep that can be blocked outright, and he periodically vanishes and repositions before diving back in — hold your guard up and be ready to punish the moment he reappears rather than chasing him mid-teleport.
BOSS Essence phase (recurring)
Mitsunari periodically releases dark essence orbs around the arena. Absorb these for yourself rather than letting them sit — leaving them on the field lets him reabsorb them later to refill a large chunk of his health, so keeping the essence count low late in the fight denies him that recovery. Do not stand in the essence clouds themselves; contact poisons your character, so cure it with an Antidote if it lands.
BOSS Closing phase
once his health is low, keep the pressure constant so he can’t stall long enough to reabsorb essence and stabilize. Ohatsu is a strong partner for this fight thanks to her ranged damage, which keeps pressure on him even during his evasive phases; Soki’s Enryu is a good pick for melee windows, and switching Soki into his Onimusha transformation for the closing stretch speeds up the kill considerably.
24
BACKTRACK (Optional, post-story) Once Mitsunari is down and Hideout 10 opens up, use Minokichi’s stage-revisit option to return to Stage 12 and backtrack into Experiment Room 3 to unlock TEST OF VALOR 21Test of Valor #2 (Black Genma General, 3:00) — it can be attempted right away or come back to any time afterward, since it stays available through the revisit system.
Items & Collectibleseverything you can pick up here
WEAPON 56Shishio — Jubei’s sword — Control Room Stairway
Do not leave without:
The three puzzle boxes in this stage (Phoenix Ring, Class Zero Gloves, Crag) are tied to this single pass through the facility.
Test of Valor #2 only opens up after all four Control Devices are destroyed and is easy to walk past on the way to the boss door if you don’t backtrack for it.
Notes:
Both Tests of Valor here remain available to re-attempt afterward through the revisit system — there’s no need to reload a save to chase a better medal. Minokichi is still alive and running the hideout at this point in the story (he doesn’t die until the end of Stage 16), so the shop, stage revisits, and Dark Realm are all available through him after this stage. Mitsunari’s defeat closes out the stage outright; his transformation into the Genma Claudius, and that centipede boss fight, take place later at a different facility, not here.
--
STAGE 12 OF 17
ST 13Wild BoatrideCity of Sakai
Soki and the party fight their way through the harbor town of Sakai, working through two separate warehouse-district door-code puzzles to reach the docks, where Sakon — now fighting under mind control — makes his final stand.
Playable: Soki (required for the whole stage); Ohatsu, Roberto, and Jubei rotate in as needed for locked doors and grapple points. Tenkai is not available this stage (he rejoins at the following hideout).
Walkthroughevery step in play order
1
Entrance: grab the Town of Sakai Map from the barrel and Ultra Med LV1 from the boat. Push forward and clear the Genma ambush — watch for the Spear Genma guarding an Archer — then fight through more Soldier, Archer, and Axeman Genma on the bridge before the door.
2
Drawbridge Area: Bomber Genma and Disc Throwers attack as you enter. Push ahead to trigger TEST OF VALOR 22Test of Valor #1 (Four Hell Spiders, 2:00) — see TESTS OF VALOR.
You can retry these as often as you like. Leave the room and come back and the orange sphere returns, and once stage revisiting opens up you can return to any earlier test at full strength. Never reload a save over a missed Gold.
Test of Valor #1 — Drawbridge Area
Target: Four Hell Spiders | Time: 2:00 Gold: Orochi | Silver: Drive Med LV3 | Bronze: Wildflower
3
After the Test of Valor, save at the mirror, then open the chest to the left of the exit gate for a Contentment Charm.
4
Waterway: step onto the first boat for an Oni Jewel, then cross the line of boats, fighting a Disc Thrower and an Axeman. Two Soul Absorber Genma wait near the far exit gate — they close in and attack while you try to draw their souls, so be ready to block.
5
Near the exit-gate boat, solve PUZZLE BOX 30Puzzle Box #1 for Ohatsu’s weapon, WEAPON 87Twilight.
How to read these. Inside the box is a grid of coloured gems. A move is picking a 2×2 block of four gems and rotating it one step clockwise — one action, not four presses. Each panel below is one move, in order, and the four squares marked * are the block you rotate. You win by lining matching colours up along the rows or columns marked at the edges, in exactly the number of moves the box allows. Solving it opens the box intact; smashing it still gives you the contents, but unidentified until you pay to have it appraised.
PUZZLE BOX 30 City of Sakai, Waterway (Reward: Twilight)
Building Roof: clear the crouched Soldier Genma, grab the Historical Document off the crate, and solve PUZZLE BOX 31Puzzle Box #2 for the G. General Ring.
PUZZLE BOX 31 Building Roof (Reward: G. General Ring)
GRID 4×3 · ALIGN ROWS · 5 MOVES
MOVE 1
o o o
o o o
* * o
* * o
MOVE 2
o o o
o o o
o * *
o * *
MOVE 3
o * *
o * *
o o o
o o o
MOVE 4
o * *
o * *
o o o
o o o
MOVE 5
o o o
* * o
* * o
o o o
7
Near the Harbor: a Don Gacha and Soldier Genma ambush you. If you bait the Don Gacha behind the far Cannon Genma, the cannon will thin out the soldiers for you. Save at the mirror and head up the stairs into the buildings district.
8
Buildings Puzzle Area: clear the Warrior Genma, Cannon Genma, and interrupting Disc Throwers, then deal with the Bomber Genma that keep teleporting in. Grab Medicine LV2 near the entrance.
9
Pick up Unlocking Memo A from Building 7 (requires Ohatsu to plant a bomb on its door) — it explains how the door-code puzzle works. Explore every building in this district with Ohatsu and Roberto: Building 3 (Official’s Diary 1), Building 4 (Port of Sakai Map, plus a painting), Building 8 (Rare Antler and Lubricating Oil, requires Roberto to punch the door), plus two more buildings that each hold a painting. See BUILDINGS DOOR-CODE PUZZLE below for the full method.
10
Enter the code you worked out on the exit-gate keypad to open the way to the harbor bridge.
11
Above the Harbor: have your partner hold one lever while Soki pulls the other to lower the drawbridge — you need the Lubricating Oil from Building 8 for this to work. Cross the bridge and cut down the Machine Gunner Genma waiting on both sides before they can open fire.
12
Enter the building directly ahead of the bridge to find the Red Soul Altar (drain it) and pick up Unlocking Memo B.
13
Head to the mirror just outside and solve PUZZLE BOX 32Puzzle Box #3, next to it, for Jubei’s weapon, Ice Blade.
Pass through the gate into the second buildings district.
15
Buildings Puzzle Area 2: Spider Genma drop from the rooftops as you enter, and a Cannon Genma in the back will wake nearby Armored Genma — leave the Armored Genma alone once the cannon’s dead and they won’t bother you. Grab the Power Jewel by the mirror. Setting your partner to Wait and Recover avoids repeat Armored Genma fights every time you leave a building.
16
Explore all six buildings (labelled I through VI here) with Ohatsu and Roberto: Building IV holds Official’s Diary 2, Building V holds Invention Notes (Ohatsu bombs the door), and Building VI holds the Drive Jewel (Roberto punches the door). Every one of these six buildings has a painting — see BUILDINGS DOOR-CODE PUZZLE below.
17
Enter the second code on the exit-gate keypad using the method from Unlocking Memo B.
18
On the Docks: clear the lone Axeman Genma, then switch to Ohatsu and use her grapple move at the dock’s edge to swing across. Clear the Spear Genma on the far side and unlock the door so Soki can cross too.
19
Switch your partner to Roberto. Fight through Soldier and Archer Genma, open the left-hand chest for Medicine LV3, and solve PUZZLE BOX 33Puzzle Box #4 for the Rosary of Health — equip it immediately, since it carries you through the boss fight ahead.
PUZZLE BOX 33 On the Docks (Reward: Rosary of Health)
This is your third and final fight with Sakon, now on a dock with much less room to maneuver than his earlier arenas. His attack pattern hasn’t changed, but he now periodically clutches his head and freezes up mid-battle, fighting off the mind control — that’s your best opening. Equip a Contentment Charm if you have one; it shortens the charge time on Soki’s Sword of Purification special attack, which is the core of this strategy. Stand at mid-distance and wait for Sakon to raise his flame shield, then throw the Sword of Purification with the Stab input (Forward + R2). If it connects three times, immediately close the distance and land an Oni Magic critical attack, then follow up with normal combos while he’s stunned. Back off again as he starts to recharge his shield, let the purifying sword recharge too, and repeat. If the thrown sword only clips him once or twice, disengage and circle behind him rather than trading hits — getting cornered here is dangerous since his spear combo into flame damage adds up fast. Soki’s Oni Awakening trivializes this fight if you have the meter for it.
20
Punch open the iron door nearby with Roberto to find the Dock Key inside.
21
Return outside and save at the SAVEEnchanted Mirror. Let Soki heal fully (his Rosary of Health regenerates HP over time) before continuing — this is your last mirror before the boss.
22
Use the Dock Key on the large door and step through to the Dock for a cutscene.
23
Boss fight: BOSSSakon (see BOSS below). You fight this one alone as Soki, in a much tighter arena than his earlier appearances.
24
Hideout 11 (San Felipe): the whole party is reunited here. Tenkai rejoins at a low weapon/skill level compared to everyone else, so spend some points and red souls bringing him up to par before the next stage.
The Buildings Door-Code Puzzlehow to solve your own randomised code
Warehouse & Pictures Puzzle — Stage 13the method worked through on one playthrough’s code
The code is different in every playthrough. There is no fixed number to copy. What follows is the method, plus a worked example so you can see the method in action — read your own paintings and work out your own three digits.
Stage 13 has two separate warehouse districts, each locked behind an exit gate with a number-pad. Both puzzles are randomized every time you play — the animals, their counts, and which building holds which painting are reshuffled per save file. The in-game documents Unlocking Memo A and Unlocking Memo B (found inside the two districts) spell out the rules; the two codes are worked out in genuinely different ways, so read this in full even if you’ve solved one of them already.
District 1 — "Buildings Puzzle Area" (Unlocking Memo A)
This district has eight numbered buildings. Two are empty, two hold ordinary items (Official’s Diary 1 in Building 3, the Port of Sakai Map in Building 4), Building 7’s door must be bombed open by Ohatsu (Unlocking Memo A itself is inside), and Building 8’s door must be punched open by Roberto (Rare Antler and the Lubricating Oil you need later). Of the remaining six buildings, exactly three contain a wall painting of an animal — a different animal in each. You do not have to count anything. There are only six paintings in the whole puzzle and each animal always appears the same number of times, so the animal itself tells you the digit — see the key below.
•
Method: walk every building and note which three have paintings, and which animal is in each — the key below turns each animal into its digit.
•
Sort those three counts from LARGEST to SMALLEST.
•
The resulting three-digit sequence, typed in that order, is the code. Building numbers play no role in this code — only the counts themselves matter.
•
Worked example (yours will differ): a painting of 6 butterflies, a painting of 3 bears, and a painting of 2 elephants, in any three buildings. Sorted largest to smallest that’s 6, then 3, then 2 — you would enter 6-3-2 on the keypad. Do not use this number in your own game; read your own three paintings and sort them yourself.
District 2 — "Buildings Puzzle Area 2" (Unlocking Memo B)
This district has six buildings in a row, numbered/lettered I through VI left to right. Unlike District 1, every single building here has a painting — Building V’s door must be bombed by Ohatsu (Invention Notes inside), and Building VI’s door must be punched by Roberto (the Drive Jewel inside); the other four are open. Building IV additionally holds Official’s Diary 2.
•
Method: visit all six buildings and note which animal is in each, giving you six (building, animal) pairs. All six paintings appear here, one per building.
•
Sort those six pairs by count from SMALLEST to LARGEST.
•
Take only the building numbers from the first three pairs in that sorted order (i.e., the three buildings with the lowest counts) — discard the other three entirely.
•
Enter those three building numbers, in that order, on the keypad. Here the counts themselves are irrelevant to the final code; only the building numbers of the three lowest-count paintings matter.
•
Worked example (yours will differ): Building I shows 4 dogs, Building II shows 1 whale, Building III shows 2 elephants, Building IV shows 5 birds, Building V shows 6 butterflies, Building VI shows 3 bears. Sorted smallest to largest by count: Building II (1), Building III (2), Building VI (3), Building I (4), Building IV (5), Building V (6). Taking the first three building numbers from that order gives II, III, VI — you would enter 2-3-6 on the keypad. Again, do not reuse this number; sort your own six buildings.
Because both codes reset every playthrough, there is no shortcut to skip reading the paintings — but once you understand which puzzle uses raw counts (District 1) and which uses building numbers (District 2), each one takes under a minute to work out.
Backtrack — Return Here Laternot solvable on your first pass through this stage
BACKTRACK Test of Valor #2 — Dock (backtrack)
Target: Giga Menteith | Time: 2:00 Gold: Gundari | Silver: Oni Med LV3 | Bronze: Red Mushrooms
Items & Collectibleseverything you can pick up here
Town of Sakai Map (Entrance) Ultra Med LV1 (Entrance) Contentment Charm (Drawbridge Area) Oni Jewel (Waterway) G. General Ring (Puzzle Box #2, Building Roof) Medicine LV2 (Buildings Puzzle Area) Port of Sakai Map (Building 4) Rare Antler (Building 8) Lubricating Oil (Building 8) Power Jewel (Buildings Puzzle Area 2) Drive Jewel (Building VI, Buildings Puzzle Area 2) Invention Notes (Building V, Buildings Puzzle Area 2) Medicine LV3 (On the Docks) Rosary of Health (Puzzle Box #4) Dock Key (On the Docks)
Files & Documents
Historical Document (Building Roof) Official’s Diary 1 (Building 3) Official’s Diary 2 (Building IV, Buildings Puzzle Area 2) Unlocking Memo A (Building 7 — explains District 1’s code) Unlocking Memo B (Above the Harbor — explains District 2’s code) Port of Sakai Map (Building 4)
Nothing in City of Sakai is permanently missable — every area, chest, and building in this stage can be revisited later with any party member using the hideout’s revisit option, so there’s no need to rush collection on a single pass.
Notes:
The whole party (including Tenkai) is back together starting at Hideout 11 (San Felipe); spend some time catching Tenkai’s weapon and skills up to the rest of the group before Stage 14. Both district door-codes are randomized per save file — solve them yourself using the method above rather than looking up a number from someone else’s game.
--
STAGE 13 OF 17
ST 14Yodo’s ArrivalAbandoned Village
The San Felipe drops the party at Beppu Bay in Kyushu. The Abandoned Village they land in is a ruin from Hideyoshi’s earlier campaign, its dead risen as mindless Zombie Genma. At the top of the trail the party is confronted by Lady Yodo — in reality Ophelia, the Genma Triumvirate’s priestess, wearing Yodo’s face to get close to Ohatsu.
Playable: Soki throughout, with Tenkai, Jubei, Roberto, and Ohatsu all available as free partner picks (Tenkai rejoined the roster at Hideout 11). Unlike Stage 13, nothing here is gated behind a specific character’s ability — no locked doors, grapples, or punch/bomb doors — so pick whichever partner you want to level or whichever attack style covers you best.
Walkthroughevery step in play order
1
Village (landing): the party comes ashore in the rain and a Genma Zombie horde attacks immediately. Its Fist Attack combo is blockable (tell: the zombie yells, then charges); the danger is its Bite Attack, which only triggers if you’ve been knocked down and is not blockable — avoid staying on the ground near one.
2
Village: once it’s clear, open the chest to the right of the landing point for a Brotherly Scarf.
3
Village: before leaving the area, check the fallen corpse beside the house for the FILE 47Abandoned Village Map.
4
Village exit: an SAVEEnchanted Mirror sits at the top of the trail — you can enhance gear and swap partners here, but it is not a save point, so don’t count on it if you’re about to push into a fight.
5
Mountain Path: a Big Genma Zombie claws up out of the ground and immediately triggers TEST OF VALOR 24Test of Valor #1 (Chain Critical x5, 1:00) — see TESTS OF VALOR.
You can retry these as often as you like. Leave the room and come back and the orange sphere returns, and once stage revisiting opens up you can return to any earlier test at full strength. Never reload a save over a missed Gold.
After the Test of Valor, grab the Power Jewel near the dead tree and continue to the second SAVEEnchanted Mirror — this one is a full save point, so save and spend souls here before the next area.
7
Side of Mountain: a mixed horde of regular Genma Zombies and Big Genma Zombies attacks. Regular Zombies: block the Fist Attack, and don’t let yourself get knocked down (Bite follow-up is unblockable). Big Zombies: their Overhead Attack is blockable but can turn into a guard-breaking kick on later ones (tell: it leans its arm back first), their Vomit Attack is blockable (tell: vomit visibly building in its mouth), and its Zombie Throw — digging a corpse out of the ground to hurl at you — breaks your guard even if you block, so sidestep it instead. Oni Magic chains clear groups of these fast.
8
Side of Mountain: off to the left, solve PUZZLE BOX 34Puzzle Box #1 for Tenkai’s weapon, WEAPON 132Earth Lord.
How to read these. Inside the box is a grid of coloured gems. A move is picking a 2×2 block of four gems and rotating it one step clockwise — one action, not four presses. Each panel below is one move, in order, and the four squares marked * are the block you rotate. You win by lining matching colours up along the rows or columns marked at the edges, in exactly the number of moves the box allows. Solving it opens the box intact; smashing it still gives you the contents, but unidentified until you pay to have it appraised.
Cave Entrance: entering the area immediately triggers TEST OF VALOR 25Test of Valor #2 (Menteith, 1:30) — see TESTS OF VALOR.
Test of Valor #2 — Cave Entrance
Target: Menteith | Time: 1:30 Gold: Star Killer | Silver: Azure Ring | Bronze: Wildflower
10
After the Test of Valor, grab Secret Med LV3 to the side of the cave mouth.
11
Cave Entrance: the SAVEEnchanted Mirror here is the last one on the entire level — there is no mirror anywhere in Side of the Cave, including before or between the two boss phases. Save, fully enhance your gear, and stock up here before heading in.
12
Enter the cave and follow the path up into Side of the Cave, the stage’s final area (a wide plateau) — reaching the top triggers the confrontation cutscene.
13
Cutscene: Yodo appears and taunts the party. She manipulates a horrified Ohatsu into convincing the others to lower their weapons, refusing to fight her own sister.
14
Combat beat: Yodo summons a group of Zombie Genma to attack while the party’s guard is down — clear them using the same Genma Zombie counters as before (block the Fist Attack, avoid getting knocked down).
15
Cutscene/boss transition: once the summoned Zombies are down, Soki strikes at "BOSSYodo." A dark puddle wells up and Ophelia erupts from it in her true Genma form — this starts the real boss fight (see BOSS below for both of her phases).
16
Aftermath cutscene: Ophelia is beaten down and appears to die; Ohatsu, distraught, briefly unloads on her corpse before breaking down, believing she’s killed her sister. Soki reassures her that Yodo is likely still alive, and the party presses on toward Shimabara.
17
Hideout 12 (Higo Outpost): the whole party regroups here; new stock is available at the shop.
18
Hideout 12: if Jubei has fallen behind in level, catch her up now — an under-levelled Jubei becomes a real liability from Stage 16 onward.
19
Hideout 12: consider maxing out Soki’s H. Splitter skill before leaving — it makes the following stage’s boss noticeably easier.
20
BACKTRACK Backtrack only: TEST OF VALOR 26Test of Valor #3, back at Side of the Cave, is not available on this first pass — it only opens up when you revisit the Abandoned Village later from a hideout (see TESTS OF VALOR).
BACKTRACK Test of Valor #3 — Side of the Cave (backtrack)
Requirement: Protect the target | Time: 1:30 Gold: Ice Lord | Silver: Crimson Ring | Bronze: Red Mushrooms
Boss Strategies
BOSS BOSS Yodo / Ophelia (fought as one continuous encounter, in four beats) Phase 1 — The confrontation
Yodo (Ophelia in disguise) talks the party down, and a group of ordinary Zombie Genma she summons attacks while everyone’s guard is lowered. This is a plain horde fight — use the same counters as the rest of the stage (block the Fist Attack, stay off the ground so you can’t be Bitten). Clearing this group triggers the transition into Ophelia’s true fight; there is no mirror between this beat and the next. Phase 2 — Essence-absorption: Ophelia surrounds herself with drifting dark essence that you must absorb (same input as absorbing souls) before you can land hits on her — touching it without absorbing poisons you instead. While you work on draining it, she attacks directly and continually summons Ninja Genma (all three of their attacks — Jumping Attack, Rushing Stab, Horizontal Slash — are blockable; their tell is rubbing their claws together before jumping or slashing). Watch for Ophelia’s own flying kick: she plants both insect arms into the ground beside you as a wind-up, then flies at you. It’s technically blockable, but blocking still staggers you into her follow-up, so sidestep it instead. Once you’ve drained all of the essence she’s stunned — but kill off any remaining Ninja Genma first, then unload on her (chaining an Oni Magic critical off a nearby Ninja Genma into her works well if you’re already adjacent). Phase 3 — Combo/rage phase: once she recovers, Ophelia runs an aggressive melee combo string. The opening hits of each string are blockable, but she always finishes with a guard-breaking hit, so hold left or right while blocking to sidestep out of the string before the breaker lands, then punish her from behind as the combo ends. She telegraphs her next essence summon by laughing — that’s your cue to disengage and get ready to absorb again (back to Phase 2’s rules). This is not a solo fight: whichever partner you brought fights alongside you and can take real damage, so swap to them if you’re low, or set them to Wait and Recover and use them to bait her combos while you punish. Soki’s Oni Awakening is especially strong here since it absorbs her dark essence automatically and lets you keep hitting her even while the essence cloud is still up. Phase 4 — Down but not out: Ophelia goes down hard enough to look dead, but she is not purified or killed outright here — she survives by collapsing into a dark puddle and slipping away undetected, setting up her later reappearances. There’s no extra mechanical step for you in this beat; it plays out in the following cutscene.
Items & Collectibleseverything you can pick up here
Brotherly Scarf (Village) Abandoned Village Map (Village) Power Jewel (Mountain Path) Secret Med LV3 (Cave Entrance)
WEAPON 132Earth Lord — Tenkai’s weapon (Puzzle Box #1, Side of Mountain)
Do not leave without:
Nothing in the Abandoned Village is permanently missable — every pickup, chest, and puzzle box in this stage remains reachable through the hideout’s revisit option. The one true first-visit-only content gate is Test of Valor #3 at Side of the Cave, which runs the other direction — it’s unavailable until you backtrack, not lost if you don’t do it now.
Notes:
There are only three Enchanted Mirrors on this level: one at the top of Village (enhance/swap only, not a save point), one at the end of Mountain Path (full save), and one at Cave Entrance — the last mirror of any kind before the Yodo/Ophelia fight, so treat it as your final prep stop. Aside from the one chest in Village (Brotherly Scarf) and the puzzle box in Side of Mountain (Earth Lord), this stage has no other destructible containers documented. Jubei is worth leveling up at Hideout 12 if she’s lagging, and maxing Soki’s H. Splitter skill here pays off against the next stage’s boss.
--
STAGE 14 OF 17
ST 15Shimabara AssaultShimabara Facility
Soki’s party pushes into the Shimabara Facility, the Genma Triumvirate’s research complex, to shut down its four elemental Control Devices before confronting the facility’s overseer, Mitsunari Ishida — secretly the host of the Genma lord Claudius.
Playable: Soki, with Jubei as the primary partner. Ohatsu and Tenkai join Soki at specific gated points (ladder grapple, spirit retrieval) to reach otherwise inaccessible items, then return to the party roster.
Walkthroughevery step in play order
1
Courtyard: pick up Secret Med LV2 and two Medicine LV1. Trigger TEST OF VALOR 27Test of Valor #1 (Target: Genma General). Set Jubei to All-out Attack, use Enryu, kill the Genma Mages quickly to avoid their magic seals, and knock the General down with Oni Magic before finishing him.
You can retry these as often as you like. Leave the room and come back and the orange sphere returns, and once stage revisiting opens up you can return to any earlier test at full strength. Never reload a save over a missed Gold.
Test of Valor #1 — Courtyard
Target: Genma General Gold: Raphael's Gauntlets | Silver: Secret Med LV3 | Bronze: Salamander
2
Entrance: open the chest for the Bishop Ring. Defeat the Machine Gunner and Armored Genma guarding the hallway, then grab the Rook Ring.
3
Research Lab: collect FILE BOSSMitsunari’s Diary 3 and the Shimabara Facility Map. Note the four Control Device rooms (Green, Yellow, Red, Blue) that must be destroyed before the boss gate opens.
BOSS Mitsunari
he periodically floods the arena with dark essence — absorb it (X) rather than standing in it, since contact poisons you. Block his centipede-arm swipe and his sweeping fan attack. When he starts a life-refill animation, interrupt it immediately or he heals back a large chunk of health. Soki’s Enryu and Ohatsu’s ranged shots (Twilight, if unlocked) chip him down efficiently; Oni Awakening can end the fight early if you’re struggling. Claudius (Centipede): once Mitsunari falls, Claudius reveals his true form — a giant Genma Gigapede that spits toxic acid and moves at high speed. Block his charging rush. He periodically burrows and vanishes; more dark essence spills out where he was — absorb it for souls, but watch for the portal that opens next. Attack his head the instant it emerges from the portal. If only his tail surfaces on its own, hit that instead — it’s a guaranteed opening. Block his laser sweep rather than trying to dodge past it. Habakiri and a maxed H. Splitter deal heavy damage during his head/tail openings; keep pressure on him whenever he’s out of the portal so he can’t reset the pattern.
4
Green Room / Blue Room: switch to Ohatsu to lower the folding ladder. Pick up the 1F Electric Plug and Red Crest. Switch to Tenkai to speak with a spirit and retrieve the Blue Crest. Place the 1F Electric Plug in the Lift Control Room to power the elevator, then grab the Commander’s Ring and FILE 1st Floor Device.
5
Puzzle Box Room: use Ohatsu’s grapple to cross the gap. Solve PUZZLE BOX 51Puzzle Box #1 for WEAPON WEAPON 86Moon Gaze (Ohatsu’s twin blades).
How to read these. Inside the box is a grid of coloured gems. A move is picking a 2×2 block of four gems and rotating it one step clockwise — one action, not four presses. Each panel below is one move, in order, and the four squares marked * are the block you rotate. You win by lining matching colours up along the rows or columns marked at the edges, in exactly the number of moves the box allows. Solving it opens the box intact; smashing it still gives you the contents, but unidentified until you pay to have it appraised.
Control Device Green Room: pick up S. Drive Med LV2, destroy Control Device (Green), then grab the Brotherly Scarf and FILE 2nd Floor Device.
7
Control Device Yellow Room: destroy Control Device (Yellow), pick up the 2F Electric Plug, and drain the Red Soul Altar for a burst of red souls.
8
Control Device Red Room: destroy Control Device (Red), then solve PUZZLE BOX 36Puzzle Box #2 for the Fudo Horn.
PUZZLE BOX 36 Control Device Red Room (Reward: Fudo Horn)
GRID 3×3 · ALIGN COLUMNS · 3 MOVES
MOVE 1
* * o
* * o
o o o
MOVE 2
o * *
o * *
o o o
MOVE 3
o o o
* * o
* * o
9
Control Device Blue Room: use the Backup Power Key and have Jubei crawl through the vent to reach the switch. Destroy Control Device (Blue), then solve PUZZLE BOX 35Puzzle Box #3 for the War Charm.
PUZZLE BOX 35 Control Device Blue Room (Reward: War Charm)
Wooden Floor Room: open the chest here for WEAPON Habakiri (one of Soki’s strongest mid-game swords). Trigger TEST OF VALOR 28Test of Valor #2 (Absorb 3,000 souls, 5:00) — kill the Soul Absorber immediately so it cannot steal your progress, use Oni Magic to drop Don Gacha fast, clear the Genma Mage, and absorb souls the instant enemies fall rather than letting them pile up.
Test of Valor #2 — Wooden Floor Room
Requirement: Absorb 3,000 souls | Time: 5:00 Gold: Wolf Fang | Silver: Secret Med LV3 | Bronze: Wildflower
11
Cherry Tree Room 1: defeat the Invisible Genma, then collect the Power Jewel and Oni Jewel.
12
Cherry Tree Room 2: collect two Antidotes, the Warrior’s Code, and a third Antidote further in.
13
Cherry Tree Room 3: defeat the Boxer Genma and Gacha, then pick up the Rare Antler and FILE Luis Frois’ Diary.
14
Control Room Stairway: clear the last Genma, open the chest for WEAPON Jubei’s Shishio, and save. Spend souls here to upgrade Habakiri and Soki’s H. Splitter skill before the boss gate — both matter for the fight ahead.
15
Boss gate: defeat BOSSMitsunari first. Once he falls, Claudius abandons his host body and reveals his true Genma Gigapede form — fight him immediately afterward in the same arena.
Items & Collectibleseverything you can pick up here
Secret Med LV2, Medicine LV1 x2 (Courtyard); Bishop Ring, Rook Ring (Entrance); 1F Electric Plug, Red Crest, Blue Crest, Commander’s Ring (Green/Blue Room); S. Drive Med LV2, Brotherly Scarf (Control Device Green Room); 2F Electric Plug (Control Device Yellow Room); Power Jewel, Oni Jewel (Cherry Tree Room 1); Antidote x3, Warrior’s Code (Cherry Tree Room 2); Rare Antler (Cherry Tree Room 3)
Files & Documents
Mitsunari’s Diary 3, Shimabara Facility Map (Research Lab); 1st Floor Device (Green/Blue Room); 2nd Floor Device (Control Device Green Room); Luis Frois’ Diary (Cherry Tree Room 3)
Weapons Found Here
WEAPON 86Moon Gaze — Ohatsu, Puzzle Box #1 (Puzzle Box Room) Habakiri — Soki, chest in Wooden Floor Room Jubei’s Shishio — Jubei, chest in Control Room Stairway
Do not leave without:
Point of no return: entering the boss gate at the Control Room Stairway locks you into the Mitsunari/Claudius fight — grab Rare Antler, Luis Frois’ Diary, and every Cherry Tree Room item first, and finish upgrading Habakiri/H. Splitter before stepping through, since you can’t casually return to farm this stage’s earlier rooms mid-fight. Ohatsu- and Tenkai-gated pickups (Moon Gaze via grapple, Blue Crest via spirit dialogue) require having those characters active; if you missed either on a first pass, Shimabara Facility remains backtrack-accessible from the hideout afterward.
Notes:
Clearing this stage opens Hideout 13 (Higo Outpost), which restocks the shop with new gear, including Soki’s Onyx Sword, Ohatsu’s Blizzard, and Tenkai’s Gongoyasha. Spend time leveling Jubei here — his Wooden Floor Room reward (Wolf Fang) and the upcoming Nagoya Castle stage lean on him heavily. Put a magic-boosting accessory plus a War Charm or Contentment Charm on Jubei before moving on.
--
STAGE 15 OF 17
ST 16One Way OutNagoya Castle
The party storms Nagoya Castle to corner Munenori Yagyu, Jubei’s former clansman-turned-traitor, who has been gorging on Genma insects to fuse Oni and Genma power. Seven puzzle boxes are scattered through the castle grounds, rewarding some of the best mid-to-late weapons and rings in the game. This is also the stage where Minokichi, the party’s hideout guide, dies covering their escape.
Playable: Soki with Jubei as primary partner for the entire stage — no partner swap is needed to reach any item or solve any puzzle box here, and the game locks you to Jubei alone for the boss fight itself.
Walkthroughevery step in play order
1
Entrance (castle gate): a Spear Genma guards the gate. It fights at range with a long thrusting jab — block the thrust rather than trying to out-range it, then punish the recovery; a guard-break kick opens a clean Issen counter window.
2
Entrance (castle gate): a Door Guardian blocks the inner doorway. It’s a stationary armored construct that won’t chase you off its spot — batter it down directly (Oni Magic speeds up the stagger) rather than trying to slip past.
3
Entrance (castle gate): open the chest here for the General’s Choker.
4
BACKTRACK Entrance (castle gate): TEST OF VALOR 29Test of Valor #1 triggers in this same courtyard — Target: Three Dark Crows. See TESTS OF VALOR below; clear or skip it before moving on, since it doesn’t reappear until you backtrack.
You can retry these as often as you like. Leave the room and come back and the orange sphere returns, and once stage revisiting opens up you can return to any earlier test at full strength. Never reload a save over a missed Gold.
Test of Valor #1 — Castle Gate
Target: Three Dark Crows Gold: Ususama The Crows break off and circle rather than staying grounded. Punish each one as it dives instead of chasing, and keep magic in reserve for the last of the three.
5
Dried Up Well Area: pick up Medicine LV3 and the Nagoya Grounds Map from the dry well basin.
6
Dried Up Well Area: solve PUZZLE BOX 37Puzzle Box #1 for WEAPON WEAPON 115Uriel’s Gauntlets (Roberto’s weapon, added to his inventory even though he isn’t in your active party this stage).
How to read these. Inside the box is a grid of coloured gems. A move is picking a 2×2 block of four gems and rotating it one step clockwise — one action, not four presses. Each panel below is one move, in order, and the four squares marked * are the block you rotate. You win by lining matching colours up along the rows or columns marked at the edges, in exactly the number of moves the box allows. Solving it opens the box intact; smashing it still gives you the contents, but unidentified until you pay to have it appraised.
PUZZLE BOX 37 Dried Up Well Area (Reward: Uriel’s Gauntlets)
Castle Courtyard Entrance: Menteith holds the yard. He blocks head-on attacks, so kick the nearby Cannon Genma to swing its barrel onto him (or lure him into its firing line) rather than trading hits directly — this staggers him for a full combo. Pick up the Drive Jewel.
Castle Entrance: a Warrior Genma and an Armored Genma fight together here. Strip the Armored Genma’s plating with sustained hits, then back off right before it drops — its death throws a damaging explosion you don’t want to be standing in. The Warrior Genma hits hard but telegraphs its swing clearly; guard-break it with a kick and finish with an Issen counter. Pick up the Nagoya Castle Map.
10
Castle Entrance: solve PUZZLE BOX 39Puzzle Box #3 for the Low King Ring.
PUZZLE BOX 39 Castle Entrance (Reward: Low King Ring)
BACKTRACK Top Floor: only reachable by backtracking here after the ground floor is clear — TEST OF VALOR 30Test of Valor #2 (Protect the target) triggers on this return visit. See TESTS OF VALOR below.
BACKTRACK Test of Valor #2 — Top Floor (backtrack)
Requirement: Protect the target | Time: 2:00 Gold: Lucifer's Gauntlets | Silver: Diamond Ring | Bronze: Rare Salamander
18
Top Floor: an SAVEEnchanted Mirror sits just before the boss chamber. Save here, confirm Jubei is your active partner and fully upgraded, since the fight ahead locks you to him alone with no partner support.
19
Boss gate: Jubei fights BOSSMunenori alone.
BOSS Munenori (Jubei alone), in three beats
BOSS Opening — Image Clones
he starts throwing up decoy images of himself immediately, with no warm-up. Don’t guess — use Oni Magic to chain through the field and separate the real Munenori from the false copies before committing to an attack string.
BOSS Sustained Exchange
once you’re on the real one, his weapon dictates your approach. If he’s read as using Masamune-style heavier strikes, expect a five-hit combo — the fifth hit must be countered correctly or you eat a big punish. Jubei’s own Sky Blade is the safer tool for this exchange since it knocks him down after only four hits, cutting the exchange short before the dangerous fifth swing ever lands.
BOSS Knockdown Window
every knockdown is your real damage window — commit your hardest combo the instant he’s down, then reset to reading for the next image-clone opener rather than over-extending. Keep a magic-boosting accessory (Blessed Oni Eye or similar) equipped throughout so Jubei’s Oni Magic recharges fast enough to keep answering the image-clone opener every time it comes back.
20
Escape to Kyoto: with Munenori driven off, the party flees Nagoya Castle toward Kyoto. Munenori ambushes them a second time on the way out, and Minokichi throws himself into the attack to cover the party’s escape. He is consumed by it, his spirit settling into a small white flame rather than surviving the encounter.
21
BACKTRACK Regroup: the party reaches the road to Kyoto. Minokichi is gone, but Mino Goro’s Thread — the item he handed you before this stage — now channels his white flame to keep running hideout access, the shop, backtracking, and the Dark Realm for the rest of the game.
22
BACKTRACK Hideout 14: your last full backtracking stop before Stage 17. See NOTES and MISSABLES below for what to finish here.
Items & Collectibleseverything you can pick up here
General’s Choker (Entrance); Medicine LV3, Nagoya Grounds Map (Dried Up Well Area); Drive Jewel (Castle Courtyard Entrance); Nagoya Castle Map (Castle Entrance); Low King Ring (Puzzle Box #3); High King Ring (Puzzle Box #4); Yellow Bell (Puzzle Box #6)
WEAPON 115Uriel’s Gauntlets — Roberto, Puzzle Box #1 (Dried Up Well Area) Tizona — Soki, Puzzle Box #2 (Castle Courtyard Entrance) Class Zero — Ohatsu, Puzzle Box #5 (Stairwell, Left) Kamudo — Jubei, Puzzle Box #7 (Third Floor) Ususama — Tenkai, Test of Valor #1 Gold (Entrance / Castle Gate)
Do not leave without:
Point of no return: once Jubei enters the boss chamber on the Top Floor, you’re committed to the Munenori fight and the escape sequence that follows — finish every puzzle box (all seven), both Tests of Valor, and every FILE/pickup on the ground floor and Stairwell first, since none of Nagoya Castle’s rooms are revisitable before Minokichi’s death changes how backtracking works. Test of Valor #2 (Top Floor) and its Lucifer’s Gauntlets are only reachable by backtracking to the Top Floor after clearing the rest of the castle — don’t leave for the boss chamber before you’ve made that return trip if you want the reward. Test of Valor #1’s Ususama is a one-time Gold reward tied to this specific test; missing it or skipping the stage means your only other path to the weapon is grinding Tenkai to a high Dark Realm level far later. Hideout 14 (reached after Minokichi’s death, once the party regroups on the road to Kyoto) is the last full backtracking stop before the endgame — keep a separate save here. Buy Tenkai’s Fudo spear and any other newly stocked gear (Anguish for Soki, Garnet Edge for Jubei, Resolution for Ohatsu, Cassiel’s Gauntlets for Roberto) now, finish upgrading armor toward roughly Level 35-40, and pick up every Rosary from the shop — Stage 17 has several of its own points of no return once you commit, and Minokichi’s white flame is your last stop before them.
Notes:
Recommended character level going into Stage 17 is roughly Soki around Level 70, with Jubei leveled from this stage’s fights. Equip Jubei with the Blessed Oni Eye or another magic-boosting item for the Munenori fight and beyond. After this stage, every hideout interaction (shop, backtracking, Dark Realm) is handled through Mino Goro’s Thread and Minokichi’s white flame rather than Minokichi in person — functionally identical to before, but he no longer appears as a character.
--
STAGE 16 OF 17
ST 17Twisted KyotoTwisted Kyoto / Fushimi Castle
The finale. Reality itself has warped around Kyoto as the Genma Triumvirate and Hideyoshi make their final stand at Fushimi Castle. The party splits up one member at a time, each facing their own piece of the enemy’s leadership before Soki confronts Hideyoshi, Yodo/Cha-Cha, and finally Fortinbras himself.
Playable: Soki, choosing between Tenkai or Ohatsu as his starting partner; Roberto and Tenkai are pulled from the active roster at fixed story points to fight their own boss battles solo, and Jubei and Ohatsu do the same later.
Walkthroughevery step in play order
1
Main Street: choose Tenkai or Ohatsu as your partner for the opening stretch. Defeat the Armored Genma and Archers, then pick up Secret Med LV2.
2
Connecting Road: defeat the Warrior Genma and grab the Tao Master’s Ring.
3
Bridge: sneak up on Menteith from behind for a critical opener, then clear the Dark Crows. Solve PUZZLE BOX 45Puzzle Box #1 for WEAPON 112Michael’s Gauntlets (Roberto) and Puzzle Box #2 for WEAPON Ithuriel (Tenkai).
How to read these. Inside the box is a grid of coloured gems. A move is picking a 2×2 block of four gems and rotating it one step clockwise — one action, not four presses. Each panel below is one move, in order, and the four squares marked * are the block you rotate. You win by lining matching colours up along the rows or columns marked at the edges, in exactly the number of moves the box allows. Solving it opens the box intact; smashing it still gives you the contents, but unidentified until you pay to have it appraised.
Connecting Road / Alleyway: Zombies and Big Zombies respawn continuously here — this is the best soul- and experience-farming spot in the stage. Pick up the General’s Ring and save.
5
BACKTRACK Cherry Tree Road: Roberto splits off from the party here (point of no return for using him directly this stage). Backtrack briefly to the previous area if you still need anything Roberto-specific, then continue: pick up the Oni of Fate charm, clear the Genma Beetle and Cannon Genma, and solve PUZZLE BOX 46Puzzle Box #3 for the Prosperity Charm.
PUZZLE BOX 46 Cherry Tree Road (Reward: Prosperity Charm)
Juntei Hall: save. Tenkai stays behind here (second point of no return — grab any Tenkai-gated items before advancing). Continue toward Daigo Temple, pick up the Fushimi Castle Map, and save again.
7
Road to Fushimi 1: clear the Axemen, Soldiers, and Archers. Solve PUZZLE BOX 47Puzzle Box #4 for the Rosary of Magic.
PUZZLE BOX 47 Road to Fushimi 1 (Reward: Rosary of Magic)
Road to Fushimi 2: fight through the Dark Puppets here — normal attacks alone aren’t enough. Once a Dark Puppet’s health is depleted, finish it with Soki’s Sword of Purification special-attack set (Coil = R2, Stab = forward + R2, Flight = back + R2), or it recovers full health and you have to start that fight over. Solve PUZZLE BOX 48Puzzle Box #5 for WEAPON Durandal (Soki) and grab FILE Claudius Memo 1.
Castle Interior: save. Look for a crack in the wall hiding a Red Soul Altar and drain it for souls. Pick up FILE Claudius Memo 2 and Medicine LV3. Clear the Hell Spiders, then solve the final puzzle box (Box #6) for the Rosary of Heart.
PUZZLE BOX 49 Twisted Kyoto, Second Floor (Reward: Rosary of Heart)
Boss gate 1: Roberto fights BOSSRosencrantz alone.
BOSS Rosencrantz (Roberto alone)
he periodically summons a Soldier Genma — kill it fast, since Rosencrantz is invulnerable until it dies. Avoid standing in his poison gas clouds and block his electric shots. When he leaps and comes crashing down toward you, move out from underneath him; once he lands and gets stuck in the ground, that’s your damage window. Oni Awakening lines up well right as he lands. Claudius (Tenkai alone): this is the same Genma Gigapede from Shimabara, now fought with Tenkai’s spear — the Fudo spear you bought at Hideout 14 hits hardest here. Attack the instant his head emerges from a portal. If only his tail shows up on its own, hit that instead. Block his laser sweep rather than dodging it. Munenori (Jubei alone): he starts using his image-clone attack immediately this time, with no warm-up — lean on Oni Magic to chain through the decoys and isolate the real one. A four-hit weapon like Sky Blade knocks him down reliably; if you’d rather use Masamune for the higher damage, you must counter his fifth-hit response correctly or eat a big punish. Ophelia (Ohatsu alone): absorb her dark essence the moment she releases it rather than letting it linger. Sidestep her flying kick instead of blocking it. Keep her under sustained fire with a laser or shotgun-type weapon to prevent her from resetting the fight. If she summons a Ninja Genma, clear it first so it doesn’t interrupt your damage window. Hideyoshi (Mech): block his gunfire bursts and his kicks. Retreat immediately when he winds up his sword slice, and get clear of his rocket volleys. Focus one leg at a time — both legs need to go down before he’s vulnerable up top. Once he’s staggered, switch to H. Splitter on the exposed upper body for big damage, then retreat again when he charges his power shockwave. Yodo/Cha-Cha: bring your strongest partner and set them to All-out Attack. In the opening phase, run in wide circles to avoid her twin laser beams. When she shifts into the tentacle phase, switch your partner to Wait and Recover instead, lean on Oni Magic Critical Chains, and stay off the spots where tentacles are about to erupt from the ground. In the final phase, stay out of the purple fire puddles — if your partner gets hit by a purple fireball, they can be turned against you temporarily. Tenkai with an upgraded Fudo spear is the strongest partner pick for this fight if you kept him leveled. Fortinbras — Genma Form: Soki gains access to Ultimate Attacks (Triangle) for this fight. Most of his moves are unblockable, so plan to move rather than guard: sidestep his fire breath, and get out from under his energy waves by moving toward him rather than away. Block his physical punches normally. Dodge his ice shots — if you get frozen right before his charging punch, burn an Ultimate Attack to break free in time. During his Ultimate Smackdown sequence, block the opening punches, dodge the ice shots and fire breath mixed in, and get clear before the final two-handed slam. He’s wide open during his long recovery afterward — that’s your best damage window in the fight. Fortinbras — Human Form: pick your strongest partner and set them to Wait and Recover. Equip all three Rosaries (Health, Magic, Heart) beforehand — their slow regen adds up over this long fight. When he announces he’s building power, absorb what you can, then watch for the meteor: deflect it with an uppercut or a well-timed sword swing rather than eating the hit. Destroy the magma rocks that follow, then punish him while he floats back down. Attack-boosting accessories shorten the fight noticeably. His last 25% of health is the hardest stretch of the whole game — keep Oni Awakening and recovery items in reserve for it rather than spending them earlier.
11
Boss gate 2: Tenkai fights Claudius alone.
12
Boss gate 3: Jubei fights Munenori alone.
13
Boss gate 4: Ohatsu fights Ophelia alone.
14
Outside Fushimi Castle: the whole party regroups. Open the chest to the right of the tree for the Dragon of Fate, then enter the castle keep — this is the final point of no return before the boss gauntlet.
15
Boss gate 5: Soki fights Hideyoshi in his Mech.
16
Boss gate 6: Soki fights Yodo/Cha-Cha.
17
Boss gate 7: Soki fights Fortinbras (Genma/demon form).
18
Boss gate 8: Soki fights the Human Form of Fortinbras. Watch the ending and credits — an extra scene plays after the credits roll. Save when prompted afterward to carry weapons, levels, and unlocks into New Game+.
Tests of Valorgold-grade targets
You can retry these as often as you like. Leave the room and come back and the orange sphere returns, and once stage revisiting opens up you can return to any earlier test at full strength. Never reload a save over a missed Gold.
Test of Valor #1 (St. 3, Front Road)
Target: Axeman | Time: 1:00 Gold: Secret Med LV2 | Silver: Medicine LV1 | Bronze: Grass
Set Jubei to All-out Attack. Use the strongest weapon. Knock down the Axeman with Oni Magic. Use a finisher while he is grounded. Block when he raises his axe.
Test of Valor #1 (St. 4, Front of Warehouse)
Requirement: Eradicate the Genma | Time: 3:00 Gold: Black Sword | Silver: Secret Med LV1 | Bronze: Mushrooms
Use Oni Magic to cut through groups.
Test of Valor #1 (St. 7, Bridge)
Target: Genma General | Time: 2:00 Gold: Ice Sword | Silver: Medicine LV2 | Bronze: Wildflower
Rush the Genma General. Set the partner to All-out Attack. Use Oni Magic Critical Chains.
Test of Valor #1 (St. 8, Ruins)
Target: Three Don Gachas | Time: 2:00 Gold: Ground Gloves | Silver: Secret Med LV2 | Bronze: Wildflower
Use Oni Magic Critical Chains. Defeat the two Don Gachas on the right first. Keep the partner guarding if necessary.
Use Ohatsu to attack from long range. Set Soki to All-out Attack. Keep distance from Cannon Genma. Defeat within ~2 minutes for Gold.
Test of Valor #1 (St. 10, Surgery Corridor)
Target: Two Dark Puppets | Time: 3:00 Gold: Meteor Shower | Silver: Indigo Ring | Bronze: Red Mushrooms
Damage Dark Puppets normally. Finish each one with Soki's Sword of Purification. If not purified, they regain all health. Jubei's Distract Enemy is especially useful.
Test of Valor #1 (St. 11, Third Floor Save Room)
Target: Genma General | Time: 2:00 Gold: Time Gem | Silver: Medicine LV3 | Bronze: Lizard
Use Oni Magic. Attack while the General summons Spear Genma. Keep attacking without giving him time to recover.
Test of Valor #1 (St. 12, Room to Experiments)
Target: Six Genma Generals | Time: 2:00 Gold: Ortlinde | Silver: Oni Med LV3 | Bronze: Red Mushrooms
Use Enryu. Use continuous Oni Magic. Attack while Generals summon reinforcements.
Test of Valor #1 (St. 13, Drawbridge Area)
Target: Four Hell Spiders | Time: 2:00 Gold: Orochi | Silver: Drive Med LV3 | Bronze: Wildflower
Use Oni Magic chains. One Hell Spider appears at a time. Save before leaving.
Use the weakest weapon. Use Oni Magic Critical Chains. Set partner to Wait and Recover.
Test of Valor #1 (St. 15, Courtyard)
Target: Genma General Gold: Raphael's Gauntlets | Silver: Secret Med LV3 | Bronze: Salamander
Use Enryu. Defeat Genma Mages quickly. Avoid their magic seals. Use Oni Magic to knock down the General.
Test of Valor #2 (St. 3, Back Road)
Requirement: Eradicate the Genma | Time: 1:00 Gold: Oni Jewel | Silver: Medicine LV1 | Bronze: Grass
Set Jubei to All-out Attack. Defeat the Archer first. Use chained Oni Magic against the Axemen.
BACKTRACK Test of Valor #2 (St. 4, Rooftop (backtrack))
Technique: Chain Critical x5 | Time: 3:00 Gold: Naga Ring | Silver: Secret Med LV1 | Bronze: Mushrooms
Use a weak weapon. Use Oni Magic Critical Chains. A chain involving only one enemy does not count.
BACKTRACK Test of Valor #2 (St. 5, 4R Room (backtrack, after Hideout 4))
Requirement: Protect the two guards | Time: 3:00 Gold: Horin | Silver: Purple Ring | Bronze: Mushrooms
Set the partner to Guard. Kill each Gacha immediately. Jubei's Distract Enemy order can draw enemies away from the guards.
Test of Valor #2 (St. 7, Juntei Hall)
Target: Don Gacha | Time: 1:00 Gold: Black Rifle | Silver: Purple Ring | Bronze: Red Mushrooms
Use Oni Magic to knock down Don Gacha. Watch the fireballs. Stay locked on to Don Gacha.
BACKTRACK Test of Valor #2 (St. 8, Lazuline Hall Courtyard (backtrack))
Requirement: Absorb 2,000 souls | Time: 3:00 Gold: Battle Rifle | Silver: Pearl Ring | Bronze: Red Mushrooms
Use Oni Magic Critical Chains on Soldier Genma. Absorb souls before Soul Absorber Genma can steal them. A partner is not recommended because the partner may disrupt chains.
Test of Valor #2 (St. 9, Mountain)
Technique: Finisher x5 | Time: 3:00 Gold: Flame Blade | Silver: Pearl Ring | Bronze: Red Mushrooms
Use the weakest weapon. Knock down Tunneler Genma. Use finishers while grounded. Roberto's ground attacks count as finishers.
BACKTRACK Test of Valor #2 (St. 10, Surgery (backtrack))
Use Oni Magic. Keep the partner waiting. Chain through enemies as they teleport in.
BACKTRACK Test of Valor #2 (St. 12, Experiment Room 3 (backtrack))
Target: Genma General | Time: 3:00 Gold: Gem of Will | Silver: Medicine LV3 | Bronze: Salamander
The General summons Elite Ninja Genma. His vortex attack is devastating and cannot be safely blocked. Defeat him in ~30 seconds for Gold using Oni Awakening and attack-boosting accessories.
BACKTRACK Test of Valor #2 (St. 13, Dock (backtrack))
Target: Giga Menteith | Time: 2:00 Gold: Gundari | Silver: Oni Med LV3 | Bronze: Red Mushrooms
Use Oni Magic to knock him down. Use attack-boosting equipment. Set partner to All-out Attack after the knockdown.
Test of Valor #2 (St. 14, Cave Entrance)
Target: Menteith | Time: 1:30 Gold: Star Killer | Silver: Azure Ring | Bronze: Wildflower
Use Oni Magic. Chain through Zombies into Menteith. Grab Secret Med LV3.
Test of Valor #2 (St. 15, Wooden Floor Room)
Requirement: Absorb 3,000 souls | Time: 5:00 Gold: Wolf Fang | Silver: Secret Med LV3 | Bronze: Wildflower
Defeat the Soul Absorber quickly. Use Oni Magic on Don Gacha. Defeat Genma Mage. Absorb souls immediately.
BACKTRACK Test of Valor #2 (St. 16, Top Floor (backtrack))
Requirement: Protect the target | Time: 2:00 Gold: Lucifer's Gauntlets | Silver: Diamond Ring | Bronze: Rare Salamander
Two Genma Soldiers must be protected. Use Oni Awakening. Defeat Grenade Launcher Genma quickly. Then concentrate on the Genma General. A target can die from one hit, making this test easy to fail.
Test of Valor #3 (St. 3, Old Temple)
Target: Gacha | Time: 3:00 Gold: Kogarasu | Silver: Secret Med LV1 | Bronze: Mushrooms
Set Jubei to All-out Attack. Concentrate on the Gacha. Use Oni Magic.
BACKTRACK Test of Valor #3 (St. 9, Rooftop of Azuchi Castle (backtrack))
Requirement: Absorb 2,000 souls | Time: 4:00 Gold: Horn of Susano | Silver: Ultra Med LV2 | Bronze: Lizard
Equip a weak weapon. Use Oni Magic Critical Chains. Genma Mages appear if the test takes too long. Pick up Gem of Valor afterward.
BACKTRACK Test of Valor #3 (St. 14, Side of the Cave (backtrack))
Requirement: Protect the target | Time: 1:30 Gold: Ice Lord | Silver: Crimson Ring | Bronze: Red Mushrooms
Protect the two soldiers. Use Oni Magic Critical Chains against the normal Zombies.
Items & Collectibleseverything you can pick up here
Secret Med LV2 (Main Street); Tao Master’s Ring (Connecting Road); General’s Ring (Alleyway); Oni of Fate (Cherry Tree Road); Medicine LV3 (Castle Interior); Dragon of Fate (Outside Fushimi Castle, chest right of the tree)
Files & Documents
Claudius Memo 1 (Road to Fushimi 2); Claudius Memo 2 (Castle Interior, Second Floor); Fushimi Castle Map (Juntei Hall)
Point of no return #1: Cherry Tree Road pulls Roberto from your active party for the rest of the stage — grab anything Roberto-specific before this point. Point of no return #2: Juntei Hall leaves Tenkai behind — same rule, get his items first. Point of no return #3: entering the Fushimi Castle keep after the "Outside Fushimi Castle" chest locks you into the final boss gauntlet with no way back to the overworld or hideout until the credits roll. Minokichi died during Stage 16’s escape to Kyoto, sacrificing himself to cover the party’s retreat from Munenori. The Mino Goro’s Thread he gave you before that stage now channels his spirit — a small white flame — to keep hideout access, the shop, and the Dark Realm running one last time before you commit to Stage 17; use it, because none of that is available again until after the credits. Puzzle Box #6’s Rosary of Heart, together with the Rosary of Magic from Box #4, are your last chances to complete the Rosary of Health/Magic/Heart set before the Fortinbras fights where all three matter most.
Notes:
Saving after the credits (and the post-credits scene) carries your weapon collection, character levels, and unlocked accessories into New Game+, where you keep everything and can immediately re-equip your strongest gear from the start. Clearing the game on Normal difficulty also unlocks a harder difficulty setting for subsequent playthroughs, with a further, even harder mode unlocked by clearing that one in turn — each clear also feeds the completion checklist for full Special Outfit unlocks if you’ve been chasing every Test of Valor Gold rank. The Connecting Road/Alleyway zombie loop in step 4 remains the single best souls/experience farm in the stage if you want to grind before the boss gauntlet.
--
STAGE 17 OF 17
Puzzle Solutions
Every puzzle in Dawn of Dreams in one place: the grid solution for each puzzle box, stage by stage, and the two randomised door codes in Stage 13. Nothing here is spread across the walkthrough — if you are standing in front of a box and just want the answer, it is on this page.
Two kinds of puzzle, two kinds of answer. The puzzle boxes are fixed — the same grid works on every playthrough, so the solutions below are exact. The Stage 13 door codes are re-rolled per save file, so what you get for those is the method rather than a number.
Stage 13 — The Buildings Door-Code Puzzle
The Buildings Door-Code Puzzlehow to solve your own randomised code
Warehouse & Pictures Puzzle — Stage 13the method worked through on one playthrough’s code
The code is different in every playthrough. There is no fixed number to copy. What follows is the method, plus a worked example so you can see the method in action — read your own paintings and work out your own three digits.
Stage 13 has two separate warehouse districts, each locked behind an exit gate with a number-pad. Both puzzles are randomized every time you play — the animals, their counts, and which building holds which painting are reshuffled per save file. The in-game documents Unlocking Memo A and Unlocking Memo B (found inside the two districts) spell out the rules; the two codes are worked out in genuinely different ways, so read this in full even if you’ve solved one of them already.
The Six Paintings — Animal to Digit Key
This is the whole trick. There are only six paintings in the game and each one always shows the same number of animals, so the animal is the digit — identify the species and you already have the number, without counting. The only thing reshuffled per save file is which building holds which painting, which is why the two codes differ every playthrough.
Digit
Animal
What you see
1
Whale
a single large whale
2
Elephants
a pair of elephants
3
Bears
three bears
4
Dogs
four dogs
5
Birds
five birds
6
Butterflies
six butterflies — the busiest of the six paintings
The key is used differently in each district. In District 1 you enter the three digits, largest first. In District 2 you enter the three building numbers that hold the whale, the elephants and the bears — in that order. The dog, bird and butterfly buildings are decoys there.
District 1 — "Buildings Puzzle Area" (Unlocking Memo A)
This district has eight numbered buildings. Two are empty, two hold ordinary items (Official’s Diary 1 in Building 3, the Port of Sakai Map in Building 4), Building 7’s door must be bombed open by Ohatsu (Unlocking Memo A itself is inside), and Building 8’s door must be punched open by Roberto (Rare Antler and the Lubricating Oil you need later). Of the remaining six buildings, exactly three contain a wall painting of an animal — a different animal in each. You do not have to count anything. There are only six paintings in the whole puzzle and each animal always appears the same number of times, so the animal itself tells you the digit — see the key below.
•
Method: walk every building and note which three have paintings, and which animal is in each — the key below turns each animal into its digit.
•
Sort those three counts from LARGEST to SMALLEST.
•
The resulting three-digit sequence, typed in that order, is the code. Building numbers play no role in this code — only the counts themselves matter.
•
Worked example (yours will differ): a painting of 6 butterflies, a painting of 3 bears, and a painting of 2 elephants, in any three buildings. Sorted largest to smallest that’s 6, then 3, then 2 — you would enter 6-3-2 on the keypad. Do not use this number in your own game; read your own three paintings and sort them yourself.
District 2 — "Buildings Puzzle Area 2" (Unlocking Memo B)
This district has six buildings in a row, numbered/lettered I through VI left to right. Unlike District 1, every single building here has a painting — Building V’s door must be bombed by Ohatsu (Invention Notes inside), and Building VI’s door must be punched by Roberto (the Drive Jewel inside); the other four are open. Building IV additionally holds Official’s Diary 2.
•
Method: visit all six buildings and note which animal is in each, giving you six (building, animal) pairs. All six paintings appear here, one per building.
•
Sort those six pairs by count from SMALLEST to LARGEST.
•
Take only the building numbers from the first three pairs in that sorted order (i.e., the three buildings with the lowest counts) — discard the other three entirely.
•
Enter those three building numbers, in that order, on the keypad. Here the counts themselves are irrelevant to the final code; only the building numbers of the three lowest-count paintings matter.
•
Worked example (yours will differ): Building I shows 4 dogs, Building II shows 1 whale, Building III shows 2 elephants, Building IV shows 5 birds, Building V shows 6 butterflies, Building VI shows 3 bears. Sorted smallest to largest by count: Building II (1), Building III (2), Building VI (3), Building I (4), Building IV (5), Building V (6). Taking the first three building numbers from that order gives II, III, VI — you would enter 2-3-6 on the keypad. Again, do not reuse this number; sort your own six buildings.
Because both codes reset every playthrough, there is no shortcut to skip reading the paintings — but once you understand which puzzle uses raw counts (District 1) and which uses building numbers (District 2), each one takes under a minute to work out.
All 53 Puzzle Boxes — Reward Index
There are 53 puzzle boxes across the game, counting the ones that only open on a return visit with the right partner. Listed here in the order a completion run reaches them. The grid solution for each one sits in its own stage in the Story Walkthrough — and every row below also opens our own run at the exact second that box is solved, so you can watch any of the 53 instead of reading the grid.
All 53 Puzzle Boxesthe full run, every box, in completion order
#
Reward
What it does
Watch the solve
1
Fire Dance
Soki, broadsword · AP 22, Fire, 4-hit combo · maxed: +50% damage to ice enemies
What a puzzle box actually is. Inside the box is a grid of coloured gems. A move means picking a 2×2 block of four gems and rotating that block one step clockwise — it is one action, not four button presses. You solve it by lining matching colours up along the rows or columns marked at the edges of the grid, and you have to do it in exactly the number of moves the box gives you.
How to read the panels below. Each panel is one move, in order. The four squares marked * are the block you rotate on that move. Grids are not always 3×3 — later boxes get wider and taller, and the number of moves goes up with them.
Solving a box opens it intact. You can smash it instead and still get the contents, but the item stays unidentified until you pay to have it appraised.
Stage 3 — Jubei Has Arrived!
PUZZLE BOX 1 Plains Highway, Behind the Buildings (Reward: Fire Dance)
GRID 3×3 · ALIGN ROWS · 2 MOVES
MOVE 1
* * o
* * o
o o o
MOVE 2
o o o
* * o
* * o
PUZZLE BOX 2 Plains Town, Under the Bridge (Reward: Tiger Eye)
GRID 3×3 · ALIGN ROWS · 2 MOVES
MOVE 1
o * *
o * *
o o o
MOVE 2
o o o
o * *
o * *
PUZZLE BOX 3 Plains Town, Back Road (Reward: Dojigiri)
GRID 3×3 · ALIGN ROWS · 2 MOVES
MOVE 1
o o o
o * *
o * *
MOVE 2
o * *
o * *
o o o
BACKTRACKPUZZLE BOX 13 Plains Highway (backtrack), Rooftops (Reward: Stone Cutter)
GRID 3×3 · ALIGN ROWS · 3 MOVES
MOVE 1
* * o
* * o
o o o
MOVE 2
o * *
o * *
o o o
MOVE 3
o o o
o * *
o * *
PUZZLE BOX 50 Plains Highway, Front Road (Reward: Sky Rifle)
GRID 3×3 · ALIGN COLUMNS · 4 MOVES
MOVE 1
o * *
o * *
o o o
MOVE 2
o o o
* * o
* * o
MOVE 3
o o o
o * *
o * *
MOVE 4
* * o
* * o
o o o
Stage 4 — Ohatsu’s Tears
PUZZLE BOX 4 Fortress at Suruga, Cliffside (Reward: Gem of Valor)
GRID 3×3 · ALIGN ROWS · 2 MOVES
MOVE 1
o o o
* * o
* * o
MOVE 2
o * *
o * *
o o o
PUZZLE BOX 5 Fortress at Suruga, Side of Warehouse (Reward: Glacier Song)
Onimusha: Dawn of Dreams features five playable characters. Soki is always in the party; you select one partner at a time at Enchanted Mirrors or hideouts. Each character has unique traversal abilities required to reach certain items, an exclusive partner command, and a personal Dark Realm.
This page tells the whole story. Each character below has their mechanics first, then a full account of who they are, what they want and how their thread ends — including the two reveals the game saves for the very end. If you are still playing, read the tables and stop at the purple boxes.
Soki — The Oni
Detail
Info
Role
Main protagonist
Weapon Type
Sword
Bears the soul of the Oni. After Stage 8 he gains Oni Awakening (L3+R3) and Ultimate Attacks in the final stage. His exclusive partner order is Absorb Souls.
Traversal uses: Always in the party. Transforms into Onimusha form during key battles.
The story of Soki
The Oni of the Ash · the Blue Demon · playable in every stage
Soki is the name he chose. He was born Hideyasu Yuki, raised inside Toyotomi Hideyoshi’s household as a hostage-son of a rival house — a political guarantee wearing the clothes of a family member. He served in Hideyoshi’s campaigns, saw what was done in them, and walked away from the name and the man together.
By the time the game opens he has spent about two years as a one-man problem for the regent. Japan is being covered in what the army calls cherry trees, hauled to Kyoto by the convoy-load, and Soki has been burning them. Ordinary people call him the Blue Demon, or the Oni of the Ash — partly for the ash he leaves behind, partly because of what he looks like when he stops holding back. His only companion is Minokichi.
The trees are not trees. They are grown from human bodies, and they produce the insects that let the Genma take a person over from the inside. Working that out is the first half of Soki’s story; the second half is working out that Hideyoshi is not the one in charge. The regent has been handled all along by three intelligent Genma, and the thing growing in his chest is not a blessing but an egg.
What Soki is takes even longer to land. The Oni are an ancient race that lost their war against the Genma and scattered; the power runs in his mother’s blood. He is not merely an Oni. He is the return of the Oni god itself, which is why nothing in the game can stand in front of him for long once he stops restraining it.
How it ends. He fights his adoptive father, and Hideyoshi dies asking his forgiveness and meaning it. He goes through the last of the Genma leadership, then Fortinbras. Then he uses everything he has left to burn the Omen Star and the remaining trees out of the sky — and does not come back down. His last word to Jubei is that when the blossom comes back next year, she should think of him.
Jubei Yagyu — The Blue Demon
Detail
Info
Role
Ninja girl (joins Stage 3)
Weapon Type
Sword
Recruited after defeating her in Stage 3. Can crawl through holes and cross narrow boards. Her exclusive order is Distract Enemy, which draws enemy attention away from other targets (great for protecting-guard Tests of Valor).
Traversal uses: Required for narrow-board crossings, hole crawling, and combining certain weapons (Juzumaru, Muramasa, Phoenix Claw).
The story of Jubei
Real name Akane Yagyu · joins in Stage 3
“Jubei” is not her name either. It is the name of the Yagyu clan’s most famous swordsman, and she carries it the way you would carry a standard. Her own name is Akane.
Her uncle Munenori destroyed his own family to cut himself loose from it. He killed her father in front of her. The clan sent her out to find him and settle it, and that is the only reason she is on the road at all — she hears about a man called the Blue Demon, decides he sounds like her problem, attacks Soki on sight, and loses. She joins him about four minutes later.
Under the eyepatch is a Demon Eye, an Oni trait that runs in the Yagyu bloodline and almost never surfaces. Munenori has one too, which is a large part of why he is what he is.
Hers is the least heroic arc in the party and the most human one. She loses to Munenori the first time. She gets captured. She gets used as bait. For most of the game she is chasing a man who is straightforwardly better than she is, and the gap only closes at the very end — when the party splits up and she takes him alone.
How it ends. She survives. She was in love with Soki the whole way and he never once noticed; she begs him not to go through with the last thing he does, and it does not work. Afterwards she hears that someone she thought was dead may not be, and goes back out on the road.
Ohatsu — The Gunner
Detail
Info
Role
Firearm specialist (joins Stage 4)
Weapon Type
Rifle/Gun
Recruited after the Stage 4 boss fight. Can grapple across gaps using anchor points and bomb gates, rocks, and doors. Her ranged attacks are excellent against bosses from a distance.
Traversal uses: Required for grappling gaps, bombing obstacles, and shooting shells/ropes. Unavailable for backtracking to earlier stages until after Stage 8.
The story of Ohatsu
Middle daughter of the Azai · joins in Stage 4
Ohatsu is the middle of the three Azai sisters and a niece of Oda Nobunaga. Her elder sister is Lady Yodo, Hideyoshi’s consort; her family sits at the centre of the court Soki walked out of. She serves the Toyotomi as a go-between with the Tokugawa, and she has known Soki since they were children.
She does not start as an ally. She starts as the person sent to bring him home, and she means it — she is not pretending, she genuinely wants him back on the right side of the wall. The first time you meet her she is shooting at you.
What is actually happening to her is worse than a disagreement. Munenori has forced Genma insects into her and can set them off whenever he likes. Everything she does for the enemy, she does with that held over her. When it finally goes all the way and she turns, the party has to put her down — and Soki, rather than finishing it, purifies the corruption out of her and brings her back.
From there her thread runs at her own sister. The Yodo at court is not Yodo. She is Ophelia, a Genma priestess wearing her face, and she has been standing next to Ohatsu for the entire game. The real Yodo has been turned into the mother of every Genma tree in the country.
How it ends. Ohatsu takes Ophelia herself in the final assault. Her sister survives and is restored. Ohatsu lives, marries her cousin Takatsugu of the Kyogoku, helps raise Hideyoshi’s son — and never quite gets over the first one.
Roberto — The Boxer
Detail
Info
Role
Western fighter (joins Stage 6)
Weapon Type
Gauntlets
Recruited after the Stage 6 boss fight (Roberto). Can move blocks into floor indentations and punch iron doors. His ground attacks count as finishers (useful for Finisher x5 Tests of Valor).
Traversal uses: Required for block-pushing puzzles and punching iron doors.
The story of Roberto
Half-Japanese, raised by a European missionary · joins in Stage 6
Roberto grew up as one of a house full of orphans taken in by the missionary Luis Frois, who raised them as his own children. Then the other children started disappearing into a laboratory, and the man running the laboratory was Luis.
That is the whole of what Roberto knows when you meet him, and it is enough. He is not fighting the Genma. He is walking toward one specific man to kill him, and the party finds him locked in a cell because that walk went badly.
He speaks a language nobody in the party understands. Tenkai is the only one who can talk to him, and that is how he ends up recruited rather than left behind.
The thing he has wrong. Luis was never willing. He was taken over by Rosencrantz, the Genma who ran the research programme, and spent years watching his own hands do it. In one of the few moments he got himself back, he did the only thing left to him: he put prayer beads into Roberto’s arms. That is why Roberto punches through iron, and it is the only thing in the game that can break the dark stones powering Hideyoshi.
How it ends. The laboratory at Shimabara goes up and takes Luis and Rosencrantz with it. Rosencrantz comes back; Roberto puts him down for good in Kyoto, in his true shape. Roberto survives, gets on a ship home, and never tells Ohatsu how he felt about her.
Tenkai — The Monk
Detail
Info
Role
Spearmaster monk (joins Stage 5)
Weapon Type
Spear
Recruited after the Stage 5 boss fight (Tenkai). Can talk to dead bodies to receive items, clues, and codes. His exclusive partner order is Pray, which boosts Soki's damage output for a stretch of the fight. Separately, Thunderclap (Square + X) is an ordinary Tenkai move that detonates every Genma soul on screen — it damages nearby enemies but forfeits those souls, so save it for crowds you were not going to absorb from anyway.
Traversal uses: Required for speaking to dead bodies throughout the game (many yield weapons, keys, and codes).
The story of Tenkai
The Red Demon · joins in Stage 5 · the game’s last reveal
A white-haired monk in red armour, living in a ruined temple on Mount Hiei, who knows more about the Oni and the Genma than anyone else alive. The countryside calls him the Red Demon, which is how you get a game with a blue one and a red one in the same party.
He is not recruited — he does the recruiting. He worked out what Hideyoshi was doing before anyone else did, and then spent his time looking for a person carrying enough Oni power to end it. Soki is what he was looking for. He tests him, joins him, and quietly runs the strategy for the rest of the game.
At Daigo Temple, Hideyoshi throws something at Soki and Ohatsu that would have killed them both, and Tenkai steps into it. He is gone for a long stretch of the game. When he comes back he says only that he was sent back — and he is wearing an Oni Gauntlet he did not have before.
What is sealed inside that gauntlet is the power of Nobunaga Oda. Before the last fight Tenkai hands it to Soki and pours his own strength in after it, and that is what lets Soki become what he finally becomes.
The reveal. The end credits say it outright: Tenkai is Samanosuke Akechi, the hero of the first and third games, roughly fifteen years older and no longer using his name. His small companion Arin is Ako. He is the man who killed Fortinbras the first time — which is why he, of all people, recognised what was coming back.
How it ends. He survives, and leaves with Arin to find somewhere to seal the gauntlet, and Nobunaga’s soul inside it, for good.
Partner holds position and regains health up to half their bar.
Tip: If a partner dies, the game does not end — the partner eventually revives with a small amount of health.
The other side
Everyone Soki fights is somebody’s father, uncle, sister or lord. That is the shape of this game’s villain list — almost none of it is monsters, and almost all of it is people who were taken.
Who
What they actually are
Whose story they belong to
Toyotomi Hideyoshi
The regent who unified Japan, and the man everyone assumes is behind all of it. He is not. He was promised he would become the vessel of a god; what he actually is, is the place the egg was put. He dies knowing it, and apologises.
Soki
Claudius
The strategist of the three. He took Mitsunari Ishida by agreement — Mitsunari wanted the power and handed his body over for it — and then ate him from the inside until there was nothing of Mitsunari left driving. A centipede, underneath.
Soki, then Tenkai
Rosencrantz
The scientist of the three, and mad with it. He took Luis Frois by force and used his laboratories and his adopted children. A fly, underneath.
Roberto
Ophelia
The priestess of the three. She took the place of Lady Yodo and stood in Hideyoshi’s court wearing her face, nursing the seed in his chest.
Ohatsu
Munenori Yagyu
Not a servant — an opportunist. He butchered his own clan, eats Genma insects to make himself a hybrid of both bloodlines, and at the end tries to murder Fortinbras and take the Genma for himself. That attempt is what completes the resurrection.
Jubei
Sakon Shima
Mitsunari’s retainer, and the one villain who gets out. He is under a mask Ophelia put on him. Break the mask and he comes back to himself, frees his lord from Claudius, and helps.
Soki and Tenkai
Lady Yodo
Ohatsu’s elder sister. Sacrificed and grown into the mother tree that every other Genma tree in the country came from. She is still in there — and when she surfaces, the first thing she does is kill Ophelia.
Ohatsu
Fortinbras
The god the Genma serve, and the one who made them — and made people for them to eat. He spends the game as a blond man in a white suit checking a pocket watch while the resurrection runs to schedule.
Soki, and Tenkai before him
Genma, Oni, and the rest of the series
The Genma are a demon race that Fortinbras made out of chaos — and he made people in the same breath, as something for them to feed on. Most of them are animals. A handful are not: those few have names, personalities and a chain of command, and they take human bodies because a body with a position at court is more useful than a monster in a field.
The Oni are older, and they lost. They fought the Genma, were broken, and scattered — which is why there are so few of them left in this story and why the power turns up in bloodlines rather than in armies. They are on humanity’s side. The Oni Gauntlet is theirs: it takes the souls out of dead Genma and turns them into something the wearer can spend.
Where this sits in the series. Dawn of Dreams takes place about fifteen years after the end of the third game. Nobunaga Oda made a bargain with the Genma and was destroyed for it; Hideyoshi, his general, has since made the same bargain and told himself it will go differently. Fortinbras was the final boss of the very first game, and Samanosuke killed him there — so the whole plot of this one is the Genma spending years engineering the return of a god the party’s own monk already put down once.
Two more threads reach back. Ohatsu and Yodo are Nobunaga’s nieces, which puts the original antagonist’s family inside the party. And the name Jubei belonged to the hero of the second game before Akane picked it up.
Weapons — All 141
There are 141 weapons in the game: 31 each for Soki, Jubei and Ohatsu, and 24 each for Roberto and Tenkai. Each character's final entry is a joke weapon unlocked by code. Weapons come from starting inventory, shop purchases (after specific bosses), Test of Valor Gold rewards, puzzle boxes, enemy drops, weapon combinations (using Warrior's Code + materials), Dark Realm rewards, and secret codes for joke weapons.
Missable: Test of Valor Gold rewards are one-time opportunities — if you do not earn Gold, you miss that weapon. Some shop weapons only appear after specific bosses. Rare drops (Balmunk, Fallen Angel, Dainslief, Onimaru, Kasen, Nio, Light Rifle) require grinding specific enemy types.
Soki Weapons (31)
#
Weapon Name
Location
1
Lamentation
Starting weapon
2
Broadsword
Shop after Stage 2 boss
3
Black Sword
Test of Valor #1 Gold, Fortress at Suruga
4
Light Sword
Shop after Stage 4 boss
5
Flame Sword
Shop after Stage 6 Wasp boss
6
Sky Sword
Test of Valor #2 Gold, Sawayama Castle, Front of Cell
7
Ice Sword
Test of Valor #1 Gold, Kyoto Bridge
8
Earth Sword
Shop after Stage 3 boss
9
Red Sting
Shop after Stage 10 boss
10
Raizan
Shop after Stage 11 boss
11
Gleam
Test of Valor #1 Gold, Azuchi Castle Open Area
12
Fire Dance
Plains Highway Puzzle Box #1
13
Victory Gale
Azuchi Castle Elevator Room bottom floor Puzzle Box #2
14
Glacier Song
Fortress at Suruga Side of Warehouse Puzzle Box #2
15
Dragon Offer
Shop after Stage 8 boss
16
Oni Cutter
Mount Hiei Forest Clearing Puzzle Box #2
17
Onyx Sword
Shop after Stage 15 boss
18
Habakiri
Shimabara Facility Wooden Floor Room chest
19
Enryu
Sawayama Castle Kitchen Puzzle Box #3
20
Cutting Wind
Sawayama Dungeon Lift Room 1 Puzzle Box #1
21
Leviathan
Shop after Stage 13 boss
22
Star Killer
Test of Valor #2 Gold, Abandoned Village Cave Entrance
23
Tizona
Nagoya Castle Castle Courtyard Entrance Puzzle Box #2
24
Balmunk
Rare drop from Black Genma Generals
25
Excalibur
Soki Level 50 Dark Realm item
26
Fallen Angel
Rare drop from Blue Genma Generals
27
Durandal
Twisted Kyoto Road to Fushimi 2 Puzzle Box #5
28
Dainslief
Rare drop from Warrior Genma
29
Anguish
Shop after Stage 16 boss
30
Gokumonji
Soki Level 100 Dark Realm item
31
Steel Pipe
Secret code (joke weapon)
Jubei Weapons (31)
#
Weapon Name
Location
32
Miike Tenta
Starting weapon
33
Martial Blade
Shop after Stage 12 boss
34
Black Blade
Fortress at Suruga Cliffside Puzzle Box #1
35
Light Blade
Shop after Stage 5 Genma Bug
36
Flame Blade
Test of Valor #2 Gold, Azuchi Castle Mountain
37
Sky Blade
Test of Valor #1 Gold, Abandoned Village Mountain Path
38
Ice Blade
City of Sakai Above the Harbor Puzzle Box #3
39
Earth Blade
Kyoto Bridge Puzzle Box #1
40
Kogarasu
Test of Valor #3 Gold, Plains Town Old Temple
41
Odenta
Azuchi Castle East Trap Room Puzzle Box #4
42
Semimaru
Shop after Stage 3 beetle boss
43
Onimaru
Dropped by Ninja Genma and Hell Spiders
44
Mikazuki
Sawayama Castle Town 3B Puzzle Box #1
45
Dojigiri
Plains Town Back Road Puzzle Box #3
46
Juzumaru
Combine Warrior's Code + Antler
47
Usumidori
Shop after Stage 9 boss
48
Muramasa
Combine Warrior's Code + Rare Shell
49
Masamune
Sawayama Castle Stone Pillar Room Puzzle Box #4
50
Oni Devourer
Shop after Stage 11 boss
51
Raving Moon
Shop after Stage 9 boss
52
Ice Shade
Shop after Stage 8 boss
53
Stone Cutter
Plains Highway Rooftops Puzzle Box #4
54
Wolf Fang
Test of Valor #2 Gold, Shimabara Wooden Floor Room
Sakai Facility Yellow Control Device Room Puzzle Box #4
85
Class Zero
Nagoya Castle Stairwell Puzzle Box #5
86
Moon Gaze
Shimabara Puzzle Box Room Puzzle Box #1
87
Twilight
City of Sakai Waterway Puzzle Box #1
88
Resolution
Shop after Stage 16 boss
89
Flying Dragon
Shop after Stage 14 boss
90
Ice Fang
Shop after Stage 10 boss
91
Orochi
Test of Valor #1 Gold, City of Sakai Drawbridge
92
Supremacy
Ohatsu Level 100 Dark Realm
93
Piggy Bank
Secret code (joke weapon)
Roberto Weapons (24)
#
Weapon Name
Location
94
Knuckle Guards
Starting weapon
95
Enma Gloves
Test of Valor #2 Gold, Western Hospital Surgery
96
Light Gloves
Western Hospital backtracking chest
97
Flame Gloves
Shop after Stage 12 boss
98
Sky Gloves
Shop after Stage 10 boss
99
Ground Gloves
Test of Valor #1 Gold, Mount Hiei Ruins
100
Spine Tinglers
Combine Warrior's Code + Rare Antler
101
Gloves of Hades
Shop after Stage 5 Genma Bug
102
Class Zero Gloves
Sakai Facility Green Control Device Room Puzzle Box #2
103
Redemption
Combine Warrior's Code + Fossilized Bone
104
Ortlinde
Test of Valor #1 Gold, Sakai Facility Room to Experiments
105
Brunnhilde
Sawayama Castle Hidden Cave 1 Puzzle Box #1
106
Schwertleite
Combine Warrior's Code + Fangs
107
Helmwige
Combine Warrior's Code + Antler
108
Siegrune
Shop after Stage 14 boss
109
Cassiel's Gauntlets
Shop after Stage 16 boss
110
Lucifer's Gauntlets
Test of Valor #2 Gold, Nagoya Castle Top Floor
111
Metatron's Gauntlets
Roberto Level 50 Dark Realm
112
Michael's Gauntlets
Twisted Kyoto Bridge Puzzle Box #1
113
Raphael's Gauntlets
Test of Valor #1 Gold, Shimabara Courtyard
114
Gabriel's Gauntlets
Combine Warrior's Code + Rare Shell
115
Uriel's Gauntlets
Nagoya Castle Dried Up Well Puzzle Box #1
116
Gloves of Covenant
Roberto Level 100 Dark Realm
117
Boxing Gloves
Secret code (joke weapon)
Tenkai Weapons (24)
#
Weapon Name
Location
118
Kurama
Starting weapon
119
Horin
Test of Valor #2 Gold, Sawayama Castle backtrack
120
Dragonfly
Fortress at Suruga backtracking chest
121
Kasen
Dropped by Spear Genma
122
Yama
Dead body at Stage 6 Cave Entrance
123
Indra
Combine Warrior's Code + Fossilized Bone
124
Vaisravana
Shop after Stage 5 Genma Bug
125
Raksasa
Shop after Stage 13 boss
126
Varuna
Shop after Stage 13 boss
127
Isana
Combine Warrior's Code + Fangs
128
Brahma
Combine Warrior's Code + Antler
129
Bright Star
Shop after Stage 14 boss
130
Monument
Combine Warrior's Code + Rare Antler
131
Ice Lord
Test of Valor #3 Gold, Abandoned Village
132
Earth Lord
Abandoned Village Side of Mountain Puzzle Box #1
133
Fudo
Shop after Stage 16 boss
134
Ususama
Test of Valor #1 Gold, Nagoya Castle
135
Gozanze
Combine Warrior's Code + Rare Shell
136
Gongoyasha
Shop after Stage 15 boss
137
Gundari
Test of Valor #2 Gold, City of Sakai backtrack
138
Ithuriel
Twisted Kyoto Bridge Puzzle Box #2
139
Gae Bolga
Tenkai Level 50 Dark Realm
140
Clarity
Tenkai Level 100 Dark Realm
141
Microphone Stand
Secret code (joke weapon)
Weapon Combinations
Several weapons are created by combining Warrior's Code with a material at a hideout. The combining character matters for some recipes.
Material
Soki
Jubei
Ohatsu
Roberto
Tenkai
Antler
—
Phoenix Claw
Aurora
Helmwige
Brahma
Rare Antler
—
Stone Cutter*
Ice Break
Spine Tinglers
Monument
Fangs
—
—
Red Pyre
Schwertleite
Isana
Fossilized Bone
—
—
Flame Rifle
Redemption
Indra
Rare Shell
—
Muramasa
Divine Spark
Gabriel's Gauntlets
Gozanze
* Stone Cutter is from a puzzle box, not a combination. Phoenix Claw uses Antler.
Weapon Elements & Oni Magic
Weapon elements determine the type of Oni Magic available: Fire, Ice, Light, Dark, Wind, and Earth. Weapons without an element cannot use Oni Magic. Some weapons draw out specific soul types more effectively: Red Sting and Ortlinde draw more red souls; Oni Devourer draws more yellow souls; Monument draws more blue souls.
Items & Accessories
Items include rings, necklaces, charms, and supplies. Many are purchased from the shop at hideouts; others are found in chests, puzzle boxes, Test of Valor rewards, or enemy drops. Equipping all four Oni Charms grants unlimited MP; equipping all four Dragon Charms grants unlimited OP (Overdrive).
Rings
#
Item
Effect / Location
1
Phoenix Ring
Sakai Facility Red Control Device Room Puzzle Box; shop
2
Tortoise Ring
Shop
3
Tiger Ring
Shop
4
Dragon Ring
Shop
5
Unicorn Ring
Shop
6
Enma's Ring
Shop
7
Footsoldier's Ring
Soldier/Spear Genma drop; shop
8
Sergeant's Ring
Axeman/Spear Genma drop; shop
9
Samurai's Ring
Invention Notes + Fangs with Jubei or Roberto; shop
10
Commander's Ring
Shimabara Lift Control Room chest; Genma General drop; shop
11
General's Ring
Twisted Kyoto Alleyway chest; Blue Genma General drop
Twisted Kyoto Puzzle Box; combine; shop; slow OP regen
91
Rosary of Spirit
Soki Level 90 Dark Realm
92
Dragon of Peace
Oni Mansion Puzzle Box
93
Dragon of War
Roberto Level 90 Dark Realm
94
Dragon of Fate
Twisted Kyoto chest
95
Dragon of Joy
Tenkai Level 90 Dark Realm
96
Horn of Susano
Azuchi Test of Valor
97
Time Gem
Sawayama Test of Valor; Soki Level 40 Dark Realm
98
Gem of Will
Sakai Test of Valor; Soki Level 80 Dark Realm
Unlimited MPcollecting all four Oni Charms
Unlimited OPcollecting all four Dragon Charms
Charm sets: Equipping all four Oni Charms (Oni of War, Oni of Joy, Oni of Peace, Oni of Fate) grants unlimited MP. Equipping all four Dragon Charms (Dragon of War, Dragon of Joy, Dragon of Fate, Dragon of Peace) grants unlimited OP.
Supplies & Materials
Item
Locations / Effects
Medicine LV1/LV2/LV3
Found in areas, mixtures, shops; LV3 is each character's Level 10 Dark Realm item
Secret Med LV1/LV2/LV3
Areas, chests, mixtures, Test of Valor rewards, Door Guardian/Invisible Genma drops
Ultra Med LV1
City of Sakai Entrance
Ultra Med LV2
Various areas and Test of Valor rewards
Ultra Med LV3
Twisted Kyoto, Test of Valor rewards; Level 60 Dark Realm item for each character
Oni Med LV1/LV2/LV3
Areas, shops, mixtures, Test of Valor rewards
Drive Med LV1/LV2/LV3
Mixtures, areas, Test of Valor rewards, shops
S. Drive Med LV1/LV2/LV3
Mixtures and areas
Power Jewel
Areas, shops, Dark Realm
Oni Jewel
Areas, shops, Dark Realm
Drive Jewel
Areas, shops, Dark Realm
Antidote
Areas, Mushroom Genma, Genma Mage, Genma Zombie
Small Gold Nugget
Sawayama and Fireball drops
Gold Nugget
Fortress at Suruga, Sawayama chest, Level 80 second-time Dark Realm
Large Gold Nugget
Level 100 second-time Dark Realm
Grass / Wildflower / Sweet Herb / Mushrooms / Rare Mushrooms / Red Mushrooms
Areas, Dark Realm, elite Tunneler/Disc Thrower/Dark Crow drops
Rare Shell
Areas, Dark Realm, Dark Crow/Machine Gunner/Disc Thrower drops
Warrior's Code
Areas, Dark Realm, Spear/Armored/General/Grenade Launcher drops
Invention Notes
Areas/chests, Dark Realm, Soldier/Spider Genma drops
All 53 Puzzle Boxes
The full reward index, every grid solution and the Stage 13 door-code method now live together in the Puzzle Solutions tab.
Dark Realm — 100 Levels
The Dark Realm (also called the Phantom Realm) is available after Stage 8 through Minokichi at the hideout. It contains 100 levels of Genma battles. A special item is awarded at every tenth level. You may exit after clearing a level through the portal. Keep a backup hideout save before a long Dark Realm run.
Important: Dark Realm rewards beyond Level 50 are available only after completing the appropriate levels. Reach Level 100 with all five characters for their final weapons.
Reward Structure (All Characters)
Level
Reward
10
Medicine LV3
20
Character-specific Jewel
30
Character-specific Jewel
40
Character-specific Bell
50
Character-specific weapon
60
Ultra Med LV3
70
Character-specific Ring
80
Character-specific Charm/Ring
90
Character-specific Oni/Dragon charm
100
Character-specific final weapon
Soki — Dark Realm Rewards
Level
Reward
10
Medicine LV3
20
Power Jewel
30
Drive Jewel
40
Time Gem
50
Excalibur
60
Ultra Med LV3
70
High King Ring
80
Gem of Will
90
Rosary of Spirit
100
Gokumonji
Soki — the full Dark Realm runlevels 1 to 100, every reward picked up on the way
Strategy: Use Oni Magic Critical Chains. Use Excalibur or a high-power weapon. Use Purifying Sword Coil during Oni Awakening. Equip Charon's Bells carefully. Use elemental weapons against corresponding Genma Generals.
Jubei — Dark Realm Rewards
Level
Reward
10
Medicine LV3
20
Oni Jewel
30
Power Jewel
40
Yellow Bell
50
Arondight
60
Ultra Med LV3
70
Low King Ring
80
War Charm
90
Oni of War
100
Moonlight
Jubei — the full Dark Realm runlevels 1 to 100, every reward picked up on the way
Strategy: Use Onimaru or Arondight. Use Oni Magic Critical Chains. Demon Eye slows other characters but may be wasted against flying enemies. Use magic-boosting items and Oni Awakening during difficult later levels.
Tenkai — Dark Realm Rewards
Level
Reward
10
Medicine LV3
20
Drive Jewel
30
Oni Jewel
40
Purple Bell
50
Gae Bolga
60
Ultra Med LV3
70
G. General Ring
80
Tao Master's Ring
90
Dragon of Joy
100
Clarity
Tenkai — the full Dark Realm runlevels 1 to 100, every reward picked up on the way
Strategy: Use level-3 Light Magic. Use Thunderclap when many souls are near enemies (forfeits the souls used). Keep Charon's Bell equipped before death if relying on its revival.
Roberto — Dark Realm Rewards
Level
Reward
10
Medicine LV3
20
Power Jewel
30
Oni Jewel
40
Red Bell
50
Metatron's Gauntlets
60
Ultra Med LV3
70
Rook Ring
80
Prosperity Charm
90
Dragon of War
100
Gloves of Covenant
Roberto — the full Dark Realm runlevels 1 to 100, every reward picked up on the way
Strategy: Use Light Magic and Critical attacks.
Ohatsu — Dark Realm Rewards
Level
Reward
10
Medicine LV3
20
Oni Jewel
30
Drive Jewel
40
Blue Bell
50
Oni Rage
60
Ultra Med LV3
70
Bishop Ring
80
Art Charm
90
Oni of Joy
100
Supremacy
Ohatsu — the full Dark Realm runlevels 1 to 100, every reward picked up on the way
Strategy: Use Guardian against early flying enemies. Use laser weapons at higher levels. Shoot and dodge. Use Demon Blood to prevent death when necessary.
Second Completion Rewards (All Characters)
On a second full clear of the Dark Realm with any character, these rewards replace the first-time rewards:
Level
Reward
20
Character-exclusive Jewel
30
Character-exclusive Jewel
40
Rare Antler
50
Invention Notes
60
Ultra Med LV3
70
Warrior's Code
80
Gold Nugget
90
Rare Shell
100
Large Gold Nugget
Street Fighter Music Easter Egg
Wear a character's Street Fighter costume in the Dark Realm. The corresponding character's Street Fighter II music plays during the first 20 and final 20 Dark Realm levels.
Tests of Valor
Tests of Valor are time-limited challenges that appear at specific points during the stages. Each has Gold, Silver, and Bronze reward tiers. Gold provides the listed weapon or rare item; Silver provides a recovery item, ring, or accessory; Bronze provides a material or common recovery item. There are 30 of them. Completing all 30 unlocks Special Outfits 1; earning Gold on all 30 unlocks Special Outfits 2.
You can retry a Test of Valor as often as you like. Leave the room and come back and the challenge reappears, and once stage revisiting opens up at the hideout you can return to any earlier test later at a far higher level. Never reload a save over a missed Gold.
#
Stage
Test
Location
Requirement
Rewards
1
St. 3
Test of Valor #1
Front Road
Target: Axeman | Time: 1:00
Gold: Secret Med LV2 | Silver: Medicine LV1 | Bronze: Grass
2
St. 3
Test of Valor #2
Back Road
Requirement: Eradicate the Genma | Time: 1:00
Gold: Oni Jewel | Silver: Medicine LV1 | Bronze: Grass
3
St. 3
Test of Valor #3
Old Temple
Target: Gacha | Time: 3:00
Gold: Kogarasu | Silver: Secret Med LV1 | Bronze: Mushrooms
4
St. 3
Test of Valor #4
Plains Highway, Monster Show (backtrack)
Requirement: Eradicate the Genma within the time limit
Gold: Red Bell
5
St. 4
Test of Valor #1
Front of Warehouse
Requirement: Eradicate the Genma | Time: 3:00
Gold: Black Sword | Silver: Secret Med LV1 | Bronze: Mushrooms
6
St. 4
Test of Valor #2
Rooftop (backtrack)
Technique: Chain Critical x5 | Time: 3:00
Gold: Naga Ring | Silver: Secret Med LV1 | Bronze: Mushrooms
7
St. 5
Test of Valor #1
2R Room
Technique: Critical x5 | Time: 3:00
Gold: Ice Rifle
8
St. 5
Test of Valor #2
4R Room (backtrack, after Hideout 4)
Requirement: Protect the two guards | Time: 3:00
Gold: Horin | Silver: Purple Ring | Bronze: Mushrooms
9
St. 7
Test of Valor #1
Bridge
Target: Genma General | Time: 2:00
Gold: Ice Sword | Silver: Medicine LV2 | Bronze: Wildflower
10
St. 7
Test of Valor #2
Juntei Hall
Target: Don Gacha | Time: 1:00
Gold: Black Rifle | Silver: Purple Ring | Bronze: Red Mushrooms
All 30 Tests of Valor — Goldevery challenge cleared at the top tier
Ranking System
Test of Valor requirements vary by test: destroy a target within a time limit, eradicate a specified group of Genma, carry out a technique (Chain Critical x5, Chain Critical x10, Finisher x5), absorb a specified number of souls, or protect a target.
Tier
Reward Type
Gold
The listed weapon or rare item
Silver
A recovery item, ring, or accessory
Bronze
A material or common recovery item
Detailed Strategies
Test of Valor #1 (St. 3, Front Road)
Target: Axeman | Time: 1:00 Gold: Secret Med LV2 | Silver: Medicine LV1 | Bronze: Grass
Set Jubei to All-out Attack. Use the strongest weapon. Knock down the Axeman with Oni Magic. Use a finisher while he is grounded. Block when he raises his axe.
Test of Valor #2 (St. 3, Back Road)
Requirement: Eradicate the Genma | Time: 1:00 Gold: Oni Jewel | Silver: Medicine LV1 | Bronze: Grass
Set Jubei to All-out Attack. Defeat the Archer first. Use chained Oni Magic against the Axemen.
Test of Valor #3 (St. 3, Old Temple)
Target: Gacha | Time: 3:00 Gold: Kogarasu | Silver: Secret Med LV1 | Bronze: Mushrooms
Set Jubei to All-out Attack. Concentrate on the Gacha. Use Oni Magic.
Test of Valor #4 (St. 3, Plains Highway, Monster Show)
Requirement: Eradicate the Genma within the time limit Gold: Red Bell
Backtrack only, and a crowd-clearing job rather than a duel — bring a wide-arc weapon and chain Oni Magic through the packs instead of picking enemies off one at a time.
Test of Valor #1 (St. 4, Front of Warehouse)
Requirement: Eradicate the Genma | Time: 3:00 Gold: Black Sword | Silver: Secret Med LV1 | Bronze: Mushrooms
Use Oni Magic to cut through groups.
BACKTRACK Test of Valor #2 (St. 4, Rooftop (backtrack))
Technique: Chain Critical x5 | Time: 3:00 Gold: Naga Ring | Silver: Secret Med LV1 | Bronze: Mushrooms
Use a weak weapon. Use Oni Magic Critical Chains. A chain involving only one enemy does not count.
Only Criticals count, so ordinary damage does nothing for the tally. Bait an attack and land the counter-timed strike; setting your partner to hold enemies in place makes the window far easier to hit five times running.
BACKTRACK Test of Valor #2 (St. 5, 4R Room (backtrack, after Hideout 4))
Requirement: Protect the two guards | Time: 3:00 Gold: Horin | Silver: Purple Ring | Bronze: Mushrooms
Set the partner to Guard. Kill each Gacha immediately. Jubei's Distract Enemy order can draw enemies away from the guards.
Test of Valor #1 (St. 7, Bridge)
Target: Genma General | Time: 2:00 Gold: Ice Sword | Silver: Medicine LV2 | Bronze: Wildflower
Rush the Genma General. Set the partner to All-out Attack. Use Oni Magic Critical Chains.
Test of Valor #2 (St. 7, Juntei Hall)
Target: Don Gacha | Time: 1:00 Gold: Black Rifle | Silver: Purple Ring | Bronze: Red Mushrooms
Use Oni Magic to knock down Don Gacha. Watch the fireballs. Stay locked on to Don Gacha.
Test of Valor #1 (St. 8, Ruins)
Target: Three Don Gachas | Time: 2:00 Gold: Ground Gloves | Silver: Secret Med LV2 | Bronze: Wildflower
Use Oni Magic Critical Chains. Defeat the two Don Gachas on the right first. Keep the partner guarding if necessary.
BACKTRACK Test of Valor #2 (St. 8, Lazuline Hall Courtyard (backtrack))
Requirement: Absorb 2,000 souls | Time: 3:00 Gold: Battle Rifle | Silver: Pearl Ring | Bronze: Red Mushrooms
Use Oni Magic Critical Chains on Soldier Genma. Absorb souls before Soul Absorber Genma can steal them. A partner is not recommended because the partner may disrupt chains.
Use Ohatsu to attack from long range. Set Soki to All-out Attack. Keep distance from Cannon Genma. Defeat within ~2 minutes for Gold.
Test of Valor #2 (St. 9, Mountain)
Technique: Finisher x5 | Time: 3:00 Gold: Flame Blade | Silver: Pearl Ring | Bronze: Red Mushrooms
Use the weakest weapon. Knock down Tunneler Genma. Use finishers while grounded. Roberto's ground attacks count as finishers.
BACKTRACK Test of Valor #3 (St. 9, Rooftop of Azuchi Castle (backtrack))
Requirement: Absorb 2,000 souls | Time: 4:00 Gold: Horn of Susano | Silver: Ultra Med LV2 | Bronze: Lizard
Equip a weak weapon. Use Oni Magic Critical Chains. Genma Mages appear if the test takes too long. Pick up Gem of Valor afterward.
Test of Valor #1 (St. 10, Surgery Corridor)
Target: Two Dark Puppets | Time: 3:00 Gold: Meteor Shower | Silver: Indigo Ring | Bronze: Red Mushrooms
Damage Dark Puppets normally. Finish each one with Soki's Sword of Purification. If not purified, they regain all health. Jubei's Distract Enemy is especially useful.
BACKTRACK Test of Valor #2 (St. 10, Surgery (backtrack))
Use Oni Magic. Keep the partner waiting. Chain through enemies as they teleport in.
Test of Valor #1 (St. 12, Room to Experiments)
Target: Six Genma Generals | Time: 2:00 Gold: Ortlinde | Silver: Oni Med LV3 | Bronze: Red Mushrooms
Use Enryu. Use continuous Oni Magic. Attack while Generals summon reinforcements.
BACKTRACK Test of Valor #2 (St. 12, Experiment Room 3 (backtrack))
Target: Genma General | Time: 3:00 Gold: Gem of Will | Silver: Medicine LV3 | Bronze: Salamander
The General summons Elite Ninja Genma. His vortex attack is devastating and cannot be safely blocked. Defeat him in ~30 seconds for Gold using Oni Awakening and attack-boosting accessories.
Test of Valor #1 (St. 13, Drawbridge Area)
Target: Four Hell Spiders | Time: 2:00 Gold: Orochi | Silver: Drive Med LV3 | Bronze: Wildflower
Use Oni Magic chains. One Hell Spider appears at a time. Save before leaving.
BACKTRACK Test of Valor #2 (St. 13, Dock (backtrack))
Target: Giga Menteith | Time: 2:00 Gold: Gundari | Silver: Oni Med LV3 | Bronze: Red Mushrooms
Use Oni Magic to knock him down. Use attack-boosting equipment. Set partner to All-out Attack after the knockdown.
Use the weakest weapon. Use Oni Magic Critical Chains. Set partner to Wait and Recover.
Test of Valor #2 (St. 14, Cave Entrance)
Target: Menteith | Time: 1:30 Gold: Star Killer | Silver: Azure Ring | Bronze: Wildflower
Use Oni Magic. Chain through Zombies into Menteith. Grab Secret Med LV3.
BACKTRACK Test of Valor #3 (St. 14, Side of the Cave (backtrack))
Requirement: Protect the target | Time: 1:30 Gold: Ice Lord | Silver: Crimson Ring | Bronze: Red Mushrooms
Protect the two soldiers. Use Oni Magic Critical Chains against the normal Zombies.
Test of Valor #1 (St. 15, Courtyard)
Target: Genma General Gold: Raphael's Gauntlets | Silver: Secret Med LV3 | Bronze: Salamander
Use Enryu. Defeat Genma Mages quickly. Avoid their magic seals. Use Oni Magic to knock down the General.
Test of Valor #2 (St. 15, Wooden Floor Room)
Requirement: Absorb 3,000 souls | Time: 5:00 Gold: Wolf Fang | Silver: Secret Med LV3 | Bronze: Wildflower
Defeat the Soul Absorber quickly. Use Oni Magic on Don Gacha. Defeat Genma Mage. Absorb souls immediately.
Test of Valor #1 (St. 16, Castle Gate)
Target: Three Dark Crows Gold: Ususama
The Crows break off and circle rather than staying grounded. Punish each one as it dives instead of chasing it around the gate, and keep magic in reserve for the last of the three.
BACKTRACK Test of Valor #2 (St. 16, Top Floor (backtrack))
Requirement: Protect the target | Time: 2:00 Gold: Lucifer's Gauntlets | Silver: Diamond Ring | Bronze: Rare Salamander
Two Genma Soldiers must be protected. Use Oni Awakening. Defeat Grenade Launcher Genma quickly. Then concentrate on the Genma General. A target can die from one hit, making this test easy to fail.
Files & Documents
Throughout the game you collect files and documents that provide story context, clues, and codes. Many are missable if you do not explore thoroughly. Maps are also listed here as they function as collectible key items.
#
File / Document
Location
1
Drunkard's Diary 1
Plains Highway, Wrecked Road left
2
Drunkard's Diary 3
Plains Highway, Behind the Buildings
3
Plains Outpost Map
Plains Highway, Back Road
4
Takezo Confession
Plains Town, Old Temple forest path
5
Lantern Trick
Plains Town, Old Temple
6
Sentry's Diary 1
Fortress at Suruga, Front of Warehouse
7
Sentry's Diary 2
Fortress at Suruga, Inside the Wall
8
Framework Memo
Fortress at Suruga, Side of Warehouse framework
9
Mountain Fortress Map
Fortress at Suruga, Mountain Road
10
Warrior's Code
Fortress at Suruga backtracking Mountain Road
11
Takuan's Diary 1
Sawayama Castle Town, 4R Room
12
Takuan's Diary 2
Sawayama Castle Town, 5B Room
13
Takuan's Diary 3
Sawayama Dungeon, Cave Lake
14
Takuan's Diary 4
Sawayama Dungeon, Above the Prison
15
Takuan's Diary 5
Kyoto, Alleyway
16
Takuan's Diary 6
Azuchi Castle, Old Battleground
17
Takuan's Diary 7
Western Hospital, Bedroom
18
Takuan's Diary 8
Sakai Facility, Green Control Room
19
Takuan's Diary 9
Nagoya Castle, Stairwell Right
20
Elevator Notes
Sawayama Dungeon, Castle Entrance
21
Stone Pillars
Sawayama Dungeon, Stone Pillar Room 2
22
S. Castle Grounds Map
Sawayama Castle Town, Fox Gate
23
S. Castle Dungeon Map
Sawayama Dungeon, Cave Entrance
24
Kyoto Area Map
Kyoto, Main Street
25
Daigo Temple Map
Kyoto, Path to Daigo Temple
26
Kiyomasa's Memo
Kyoto, Path to Daigo Temple continued
27
Mt. Hiei Map
Mount Hiei, Ruins
28
Mt. Hiei Legend 1
Mount Hiei, Pagoda Remains
29
Mt. Hiei Legend 2
Mount Hiei, Lazuline Hall Courtyard
30
Oni Mansion Map
Oni Mansion First Floor
31
Emergency Procedure
Azuchi Castle, Elevator Room
32
Azuchi Castle Map
Azuchi Castle, East Rooftop
33
Mitsunari's Diary 1
Sawayama Castle, Castle Balcony
34
Mitsunari's Diary 2
Sawayama Castle, Lopsided Room
35
Mitsunari's Diary 3
Shimabara Facility, Research Lab
36
Hospital Register
Western Hospital, Surgery Corridor
37
Sakai Facility Map
Sakai Facility, Research Facility Entrance
38
Sakai C. Tower
Sakai Facility, Research Lab
39
1st Floor Device
Shimabara Facility, Lift Control Room
40
2nd Floor Device
Shimabara Facility, Control Device Green Room
41
Historical Document
City of Sakai, Building Roof
42
Port of Sakai Map
City of Sakai, Buildings Puzzle Area
43
Official's Diary 1
City of Sakai, Building 3
44
Official's Diary 2
City of Sakai, Buildings Puzzle Area 2, Building IV
45
Unlocking Memo A
City of Sakai, Building 7
46
Unlocking Memo B
City of Sakai, Above the Harbor
47
Abandoned Village Map
Abandoned Village, Village
48
Shimabara Facility Map
Shimabara Facility, Research Lab
49
Shimibara C. Tower
Shimabara Facility, Path to Lift Room
50
Claudius Memo 1
Twisted Kyoto, Road to Fushimi 2
51
Claudius Memo 2
Twisted Kyoto, Castle Interior, Second Floor
52
Luis Frois' Diary
Shimabara Facility, Cherry Tree Room 3
53
Fushimi Castle Map
Twisted Kyoto, Road to Fushimi 1
54
Emergency Exit Key
Sawayama Castle, Second Floor
55
Floodgate Lever
Sawayama Castle, Castle Dam
56
Control Door Key
Sakai Facility, Main Lift/Control Device route
57
Copper Gear
Sawayama Dungeon, Cave Entrance
58
Copper Gear A
Sawayama Castle, Front of Cell
59
Copper Gear B
Sawayama Castle, Waterway
60
Mountain Shrine Key
Fortress at Suruga backtracking, Mountain Road
61
Ancient Key
Plains Town, Back Road Entrance
62
Castle Gate Key
Fortress at Suruga, Back of Warehouse
63
1F East Door Key
Sawayama Dungeon, Castle Entrance
64
2F Central Door Key
Sawayama Dungeon, Second Floor
65
3F Central Door Key
Sawayama Dungeon, Third Floor
66
Power Room Key
Western Hospital, Bedroom
67
Toyotomi Crest
Azuchi Castle, Elevator Room bottom floor
68
Dock Key
City of Sakai, On the Docks
69
Roberto's Pendant
Sawayama Castle, Roberto's Cell
70
Crow Feather
Fortress at Suruga, Side of Warehouse
71
Oni Orb
Obtained after Gargant; story-related
72
Mino Goro's Thread
Given by Minokichi before Stage 16; restores hideout/travel options
Note: The Crow Feather is primarily for story purposes. The Oni Orb is story-related and used in Soki's Onimusha awakening sequence. Mino Goro's Thread restores Minokichi's hideout, stage-revisit, and Dark Realm options before Stage 17.
Unlockables & Secrets
Onimusha: Dawn of Dreams features costumes, joke weapons, difficulty modes, Onimusha Arena, two-player mode, and Street Fighter music easter eggs. Most codes are entered from the main menu's Special menu.
Costumes
Costume
Unlock Condition
Special Outfits 1
Complete all Tests of Valor
Special Outfits 2
Complete every Test of Valor with a Gold Rank
Special Outfits 3
Collect all ten hidden Oni Charms scattered through the stages
On the title screen: hold L1 + R2 on both controllers, then press Start on the second controller. The second player controls the partner after the code is entered.
Difficulty Modes
Mode
Unlock Condition
Hard Mode
Beat the game on Normal
Oni Mode
Beat the game on Hard
Street Fighter Music in Dark Realm
Wear a character's Street Fighter costume in the Dark Realm. The corresponding character's Street Fighter II music plays during the first 20 and final 20 Dark Realm levels.
Secrets & Easter Eggs
The Crow Feather is primarily for story purposes.
The Oni Orb is story-related and used in Soki's Onimusha awakening sequence.
Mino Goro's Thread restores Minokichi's hideout, stage-revisit, and Dark Realm options before Stage 17.
Ohatsu is unavailable for backtracking to earlier stages until after Stage 8.
Dark Puppet enemies must be finished with Soki's Sword of Purification — his R2 special-attack set — or they fully recover their health.
Genma Ohatsu must be purified immediately after her health is depleted; missing the prompt restores her health.
Soul farming spots: Kyoto's Juntei Hall, Twisted Kyoto's Connecting Road, and the Dark Realm.
Keep a separate save at Hideout 14 (before the final battles of Stage 16) — it is the last normal backtracking point.
100% Completion Checklist
Use this checklist to track your progress toward 100% completion. Most items require backtracking via Minokichi at hideouts and using the correct partner for partner-locked items.
Story & Difficulty
Complete all 17 stages on Normal difficulty
Beat the game on Normal (unlocks Hard Mode)
Beat the game on Hard Mode (unlocks Oni Mode)
Beat the game on Oni Mode
Save after the final boss to preserve weapons and levels for New Game+
Tests of Valor
Complete all 30 Tests of Valor (unlocks Special Outfits 1)
Earn Gold rank on every Test of Valor (unlocks Special Outfits 2)
St. 3: Test of Valor #1 Gold (Secret Med LV2)
St. 3: Test of Valor #2 Gold (Oni Jewel)
St. 3: Test of Valor #3 Gold (Kogarasu)
St. 3: Test of Valor #4 Gold (Red Bell) — backtrack only
St. 4: Test of Valor #1 Gold (Black Sword)
St. 4: Test of Valor #2 Gold (Naga Ring)
St. 5: Test of Valor #1 Gold (Ice Rifle)
St. 5: Test of Valor #2 Gold (Horin)
St. 7: Test of Valor #1 Gold (Ice Sword)
St. 7: Test of Valor #2 Gold (Black Rifle)
St. 8: Test of Valor #1 Gold (Ground Gloves)
St. 8: Test of Valor #2 Gold (Battle Rifle)
St. 9: Test of Valor #1 Gold (Gleam)
St. 9: Test of Valor #2 Gold (Flame Blade)
St. 9: Test of Valor #3 Gold (Horn of Susano)
St. 10: Test of Valor #1 Gold (Meteor Shower)
St. 10: Test of Valor #2 Gold (Enma Gloves)
St. 11: Test of Valor #1 Gold (Time Gem)
St. 11: Test of Valor #2 Gold (Sky Sword)
St. 12: Test of Valor #1 Gold (Ortlinde)
St. 12: Test of Valor #2 Gold (Gem of Will)
St. 13: Test of Valor #1 Gold (Orochi)
St. 13: Test of Valor #2 Gold (Gundari)
St. 14: Test of Valor #1 Gold (Sky Blade)
St. 14: Test of Valor #2 Gold (Star Killer)
St. 14: Test of Valor #3 Gold (Ice Lord)
St. 15: Test of Valor #1 Gold (Raphael's Gauntlets)
St. 15: Test of Valor #2 Gold (Wolf Fang)
St. 16: Test of Valor #1 Gold (Ususama)
St. 16: Test of Valor #2 Gold (Lucifer's Gauntlets)
Weapons (All 5 Characters)
Collect all Soki weapons (31) — including Excalibur (Lv 50 DR) and Gokumonji (Lv 100 DR)
Collect all Jubei weapons (31) — including Arondight (Lv 50 DR) and Moonlight (Lv 100 DR)
Collect all Ohatsu weapons (31) — including Oni Rage (Lv 50 DR) and Supremacy (Lv 100 DR)
Collect all Roberto weapons (24) — including Metatron's Gauntlets (Lv 50 DR) and Gloves of Covenant (Lv 100 DR)
Collect all Tenkai weapons (24) — including Gae Bolga (Lv 50 DR) and Clarity (Lv 100 DR)
Obtain all combination weapons (Juzumaru, Muramasa, Phoenix Claw, Aurora, etc.)