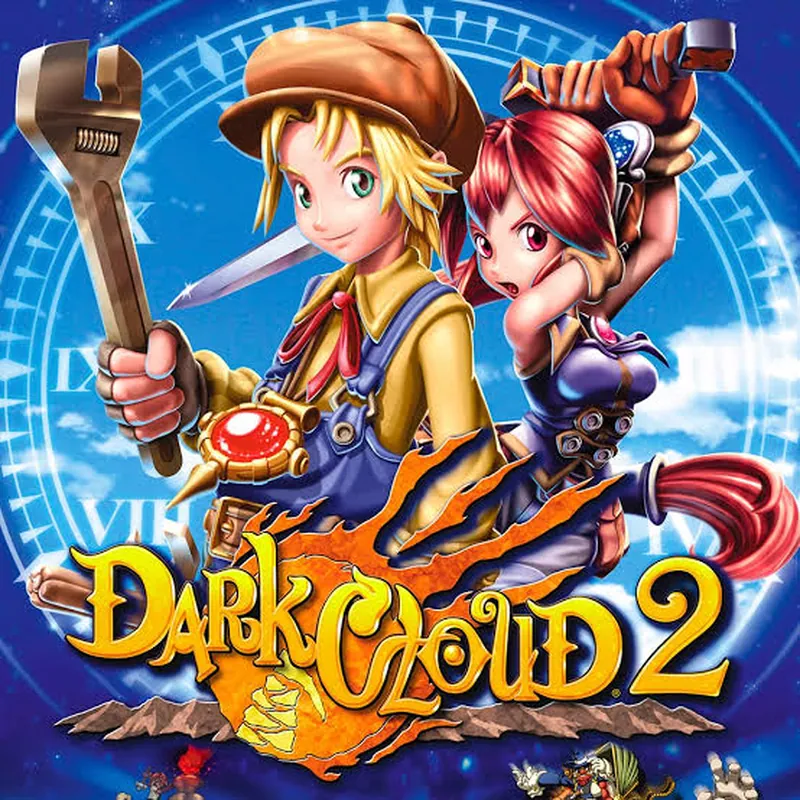
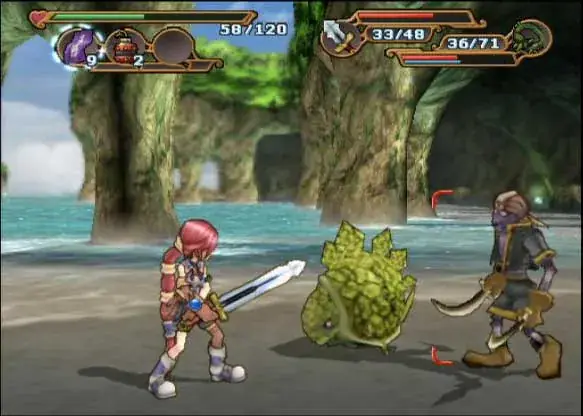
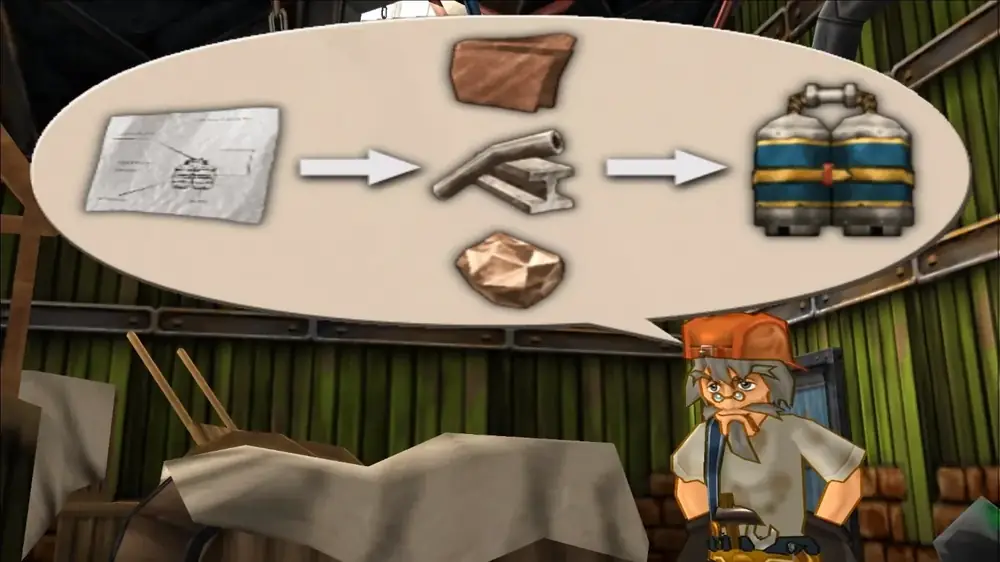
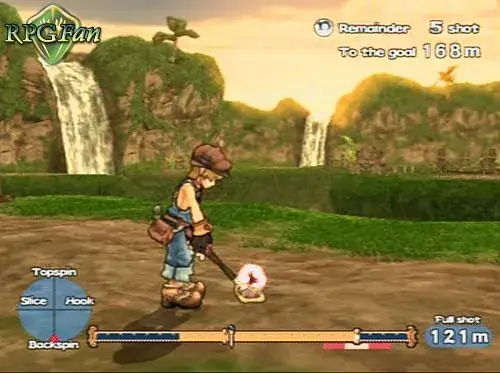
Dark Cloud 2 (known as Dark Chronicle in Europe) is an action RPG developed by Level-5 for the PlayStation 2, later re-released on PS4 and Steam. You play as Max, an inventor who wields a gun and wrench, and Monica, a swordswoman with a magic armband, as they travel through time to stop the villainous Emperor Griffon from destroying the world. The game blends dungeon crawling, town building (the Georama system), an invention system, photography, fishing, and the golf-like Spheda minigame into a massive 100+ hour adventure.
Detail
Info
Title
Dark Cloud 2 · Dark Chronicle in Europe
Release
November 2002 (JP) · 2003 (NA/EU) on PlayStation 2 · PlayStation 4 emulated re-release 2016 · PlayStation 5 via backward compatibility
Developer / Publisher
Level-5 · Sony Computer Entertainment
Genre
Action RPG / Dungeon Crawler
Playable characters
Max — inventor with a gun and wrench · Monica — swordswoman with a magic armband
Chapters (in play order)
Palm Brinks → Sindain → Balance Valley → Veniccio → Heim Rada → Kazarov Stonehenge, Moon Flower Palace & Star Paths → Moon Flower Palace → Chapter 8, The Forgotten Adventure (Zelmite Mine, post-game)
100% playthrough
Roughly 100 hours, at about 5/10 difficulty
Read This Before You Start
Five decisions shape the whole run.
Decision
Why it matters
Stop at the door in Chapter 7
Beating the Dark Element at the end of Chapter 7 is the one true point of no return: it permanently seals Moon Flower Palace and Kazarov Stonehenge. Every medal, photo and Spheda hole inside them has to be finished first, or the Medalhead trophy and several inventions are lost for that save.
Recruit Lin before the Chapter 3 boss
Lin leaves the party for good once the Chapter 3 boss dies — sign her up before that fight. Other recruitable characters also require specific conditions, so check recruit requirements for each region.
Photograph everything, in every chapter
Many Ideas and Scoops are one-time and missable — several boss scoops (Brave Little Linda, Clown Robo’s Attack, Fire Squall, Griffon’s Real Face, Legend of the Moon) give you exactly one chance. Take photos in every chapter before moving on.
Finish each Georama before leaving its region
You cannot return to a region’s Georama after progressing the story past it, and 100% completion rewards give rare weapons — complete each region before leaving.
Stock up before Chapter 8
Chapter 8 cuts you off from most shops and towns — anything you did not buy or build earlier is sealed away. Finish your weapon build-up and max your Fruit of Eden HP and defence items first.
Roadmap to 100%
The roadmap below follows a clean three-stage order.
Fighting for Fun is 200 kills in a single life — not “attack with every weapon type”, and it is not missable. Most players get it naturally by mid-game.
Stage 2 — Finish the Story: Defeat the Dark Element and clear the Chapter 7 bosses to complete the main story and unlock the first ending.
Stage 3 — Endgame Cleanup: Work through the Zelmite Mine post-game dungeon. Raise fish for the Finny Frenzy, collect remaining medals, invent remaining items, obtain Monster Transform Badges, gather remaining Ideas/Scoops, and beat the Zelmite Mine final boss.
Tip: A full 100% run takes roughly 100 hours, at about 5/10 difficulty.
100% by the Numbers
What a full completion actually covers.
Category
Count
Dungeon floors
127 medal floors across seven dungeons, carrying 396 medals between them
Georamas
5 regions to rebuild (Sindain, Balance Valley, Veniccio, Heim Rada, Moon Flower Palace)
Inventions
100+ recipes
Photos / Scoops
294 collectible photographs
Recruitable characters
26
Trophies
31 on the PlayStation re-release — 1 Platinum, 4 Gold, 17 Silver, 9 Bronze
Tips & Tricks
Habits that pay off across the whole run.
Tip
Detail
Save often
Dungeons are randomly generated, and a bad run can cost you progress.
Keep weapons repaired
Use Repair Powder — a broken weapon loses its upgrade progress.
Spectrumize items
Create Synth Spheres that upgrade weapon stats.
Always carry Resurrection Powder
Essential in the late game to avoid game overs.
Take photos of EVERYTHING
Many Ideas and Scoops are one-time and missable.
Check every dungeon floor
Each floor has its own medal completion condition.
Fighting for Fun
200 kills in a single life — not “attack with every weapon type”, and it is not missable. Most players get it naturally by mid-game.
Georama 100% rewards
They give rare weapons — complete each region before leaving.
Support characters
They give +1 synth point per level: Cedric (wrenches), Gerald (guns), Milane (swords), Lin (armlets).
Spectrumize weapons at +5
Gives 60% stat transfer to the target weapon.
Fishing
Raise fish in an aquarium and feed them to boost stats for races.
Spheda
Learn the wall-bounce angles and practice on early dungeons.
Missables Warning
CRITICAL: Dark Cloud 2 has several missable trophies and collectibles. Read this section carefully before starting.
The one true point of no return: beating the Dark Element at the end of Chapter 7 permanently seals Moon Flower Palace and Kazarov Stonehenge. Every medal, photo and Spheda hole inside them has to be finished first, or the Medalhead trophy and several inventions are lost for that save. Separately, Lin leaves the party for good once the Chapter 3 boss dies — recruit her before that fight.
Item
Detail
MISSABLE Photos / Scoops
Many photos/scoops are one-time only — take photos in every chapter before moving on. See the Photos & Scoops tab for a complete checklist.
MISSABLE Recruits
Some recruitable characters require specific conditions — check recruit requirements for each region.
Fighting for Fun
Fighting for Fun is 200 kills in a single life — not “attack with every weapon type”, and it is not missable. Most players get it naturally by mid-game.
MISSABLE Brave Little Linda
Scoop (Ch.1) — take photo during Linda boss fight when she stomps. One chance only!
MISSABLE Clown Robo’s Attack
Scoop (Ch.1) — take photo during Halloween boss fight when it fires missiles. One chance only!
MISSABLE Fire Squall
Scoop (Ch.5) — must be photographed before you blow it up.
MISSABLE Griffon’s Real Face
Scoop (Ch.6) — take photo at the start of the Griffon fight.
MISSABLE Legend of the Moon
Scoop (Ch.7) — at the top of the Dream Spiral during the final boss fight.
Georama
Georama must be completed before leaving each area — you cannot return to a region’s Georama after progressing the story past it.
Story Walkthrough
Dark Cloud 2 runs to 8 chapters — seven story chapters plus Chapter 8, The Forgotten Adventure, the optional post-game descent into the Zelmite Mine. Each chapter introduces a new dungeon, a new Georama region to rebuild, and new recruits. This walkthrough gives you a numbered route for every chapter on top of the floor-by-floor detail.
How to read floor cards: Each floor card shows the floor name, time limit (if any), medal condition, enemies, Geostone unlocks (if any), and available scoops. Seal badges indicate floors with sealed exits that require specific conditions.
Pick a chapter below, then use the Previous / Next buttons at the bottom of each chapter to move through the game.
CH 1The Escape from Palm Brinks
Max works at Cedric's workshop in the town of Palm Brinks and receives a circus ticket. He overhears Flotsam and Mayor Need's conversation about the outside world. After being attacked by Flotsam's clown army, Max hides in the sewers.
Before you start: Before you drop into the sewers, walk every street in Palm Brinks with the camera. The Milk Can, Pipe and Belt photos combine into the Energy Pack that powers the Ridepod, and synthesis material spent on the Battle Wrench and Classic Gun now pays off for the whole chapter.
Chapter Route
1
Work the Palm Brinks streets Before the circus plot starts, photograph everything in town. The Milk Can, Pipe and Belt trio is what lets Cedric build the Energy Pack the Ridepod runs on.
Dark Cloud 2 - Monica in battle
2
Escape into the channel After Flotsam's men come for Max's red stone, follow the rooftop chase down into the Underground Water Channel. Buy bread and mineral water first — there is no shop underground.
3
Clear the first three floors Push through To the Outside World, Battle with Rats and Ghost in the Channel. Each floor posts its own medal conditions on the entry screen, so read them and play to whichever ones you can hit on the way.
4
Feed the wrench and gun Break every barrel and crate for synthesis material and pour Attack into the Battle Wrench so it can build toward the Drill Wrench. Do the same for the Classic Gun on the Trumpet Gun path.
5
Assemble Steve the Ridepod Give Cedric the three Energy Pack photos so he can finish the mech. Steve burns his own fuel gauge, so save his charge for the boss room instead of spending it on trash.
6
Beat Linda in the Pump Room The Channel Pump Room holds Linda the circus elephant. Take the rearing-up photo early, then work the Ridepod's fists in from behind her, land about three hits, and reverse out of her counter-swing.
7
Push to the Reservoir Continue through Steve's Battle and Sweet, Scary Treasure Chest — watch for the King Mimic on the latter, which pays well if you can survive it.
8
Finish off the Clown Robo In the Channel Reservoir, Flotsam's robot fires clown noses you can scoop up and throw back to stun it. Photograph it mid-launch before you finish it.
Missable / point of no return: Two photos exist only here: Brave Little Linda (shoot her as she rears onto her hind legs) and Clown Robo's Attack (shoot the Halloween robot in the act of firing a missile). Both fights happen once.
Underground Water Channel — every floor
Five floors carry medals. The entrance, the two boss rooms and the exit do not, and are shown in place so the running order is the real one. There are no fishing goals and no Geostones in this dungeon — you have neither a rod nor Georama yet.
Channel Entranceno medals
Donny's camp. He hands Max the pistol and the communicator, and this is where you trade photography levels for rewards later. No medals.
01To the Outside World3 medals
Time Attack
Kill everything within 2:35
Spheda
Close the distortion — first win pays Treasure Chest Key ×2
Clear goal
Without healing
Enemies
Clown ×6, Froggy ×6, Sewer Rat ×6 (key)
ABS / Gilda
108 / 108
02Battle with Rats3 medals
Time Attack
Kill everything within 2:40
Spheda
Close the distortion — first win pays Diamond
Clear goal
Items only
Enemies
Baron Balloon ×4, Bat ×5, Clown ×2, Froggy ×4, Sewer Rat ×3 (key)
ABS / Gilda
116 / 120
03Ghost in the Channel3 medals
Time Attack
Kill everything within 3:00
Spheda
Close the distortion — first win pays Improved Bomb ×4
Clear goal
Max's wrench only
Enemies
Bat ×3, Night Stalker ×3, Turtle ×4, Baron Balloon ×4 (key)
ABS / Gilda
98 / 105
Channel Pump Roomno medals
Boss: Linda. She is invulnerable until Cedric hands you the Ridepod. Missable scoop — photograph her as she rears up on her hind legs, before smashing down. No medals.
04Steve's Battle3 medals
Time Attack
Kill everything within 2:45
Spheda
Close the distortion — first win pays Level Up Powder ×2
Clear goal
Ridepod only
Enemies
Bat ×5, Clown ×2, Mimic ×3, Night Stalker ×4, Vanguard ×4 (key)
ABS / Gilda
162 / 170
05Sweet, Scary Treasure Chest3 medals
Time Attack
Kill everything within 2:30
Spheda
Close the distortion — first win pays Treasure Chest Key
Clear goal
Without healing
Enemies
Darkness ×4, Froggy ×4, King Mimic ×1, Vanguard ×3 (key)
ABS / Gilda
122 / 126
Channel Reservoirno medals
Boss: Halloween, the clown robot. Missable scoop — photograph it in the act of firing a missile, with the eye plates visible. That photo unlocks the Clown Foot and the clown Ridepod parts. No medals.
Channel Exitno medals
Not really a dungeon floor. Cedric picks Max up, Flotsam attacks the train in the P-3000, and Monica reveals herself. No medals.
BOSS Linda
Linda is a large elephant enemy. Attack her with Max's wrench from behind while she's stunned. Dodge her charge attacks and keep your distance when she rears up. Use the Ridepod if available for extra firepower.
Story Events
Recruit Cedric at his shop in Palm Brinks — joins automatically.
Learn the inventing system — take photos and combine them to create items.
BOSSFlotsam (on the train) — dodge his bombs and attack when he pauses.
Monica appears and saves the party, joining your team.
Take Blackstone One photo at the Train Station (available Ch.1-5, not Ch.6-7, again Ch.8).
Chapter 1 of 8
CH 2The Rebirth of SindainRainbow Butterfly Wood
Arrive at Sindain and meet the Firbits — you need grape juice to gain their trust. The dungeon is the Rainbow Butterfly Wood with 11 floors. This chapter introduces the Georama system and fishing.
Before you start: Recruit as many Palm Brinks townsfolk as you can before leaving — Sindain's Georama score depends on having bodies to move in, and Gordon has to be housed there before the story will advance past the chapter boss.
Chapter Route
1
Open the forest floors Frightening Forest, Strange Tree and Rolling Shells introduce Himarras, Tores and Tortoises. This is the first dungeon where a support character tags along — bring one and let them soak hits while your weapons gain experience.
2
Grab the rod at the swamp Fish Monster Swamp on floor four hands you the fishing rod and opens the Georama system. Bait with a Poison Apple for Priscleen, and keep fishing until King Mardan surfaces for his one-time photo.
3
Bank the Geostones Geostones appear from floor five onward and each one unlocks Sindain building parts. Sweep every floor rather than rushing the exit — a missed stone means the village cannot be finished later.
4
Lay out Sindain Run a line of 15 river pieces, ring the Firbits' house with about 15 fence sections, and set the Nose Tree between the two Eye Trees so the lake forms Jurak's face. Then move Gordon, Adel, Aunt Polly and Milane into their matching houses.
5
Handle the specialist floors Floors five through eight lock you into single tools — Ridepod only, Max's gun only, items only — so top up Ridepod fuel and stock throwables before you go in.
6
Collect seed and Sundrop You need the Lafrescia Seed and a Sundrop to make the giant flower bloom. Have Monica transform into a Himarra, then talk to another Himarra in the wood to get the Sundrop handed over.
7
Bloom the Lafrescia Plant the seed in the swamp and apply the Sundrop to grow the stem that carries you up to Rainbow Falls. The Rainbow Butterfly will not appear until Sindain's Georama targets are met, so finish the village first.
8
Climb to Rainbow Falls Clear I'm a Pixie, Legendary Killer Snake, Grotesque Spider Lady and Rainbow Falls Entrance. Heal fully and fuel the Ridepod before floor eleven.
Missable / point of no return:King Mardan is missable — you have to hook the fish king in the swamp and photograph him. R. Butterfly United is one-time too: shoot it in the closing moment of the boss fight when the seven butterflies merge back together.
Floor-by-Floor Walkthrough
01Frightening Forest4 medals
Time Attack
Kill everything within 4:45
Fishing
Land a fish of 70 cm or longer
Spheda
Close the distortion — first win pays Treasure Chest Key ×3
The floor that starts everything. Give the fishing Firbit Grape Juice for the Fishing Rod and bait, then fish King Mardan out of the big swamp using a Poison Apple, and bring him a Priscleen. That frees the Firbits and unlocks Georama. No medals.
SCOOP Master Utan
Meet Master Utan. Catch Priscleen fish, use Poison Apple bait to catch King Mardan.
Return to Sindain
Meet Carpenterion (the helicopter building device). First Time Gate tutorial. Get Georama materials from the Firbit elder.
05This is a Geostone?4 medals
Time Attack
Kill everything within 5:00
Fishing
Land a fish of 50 cm or longer
Spheda
Close the distortion — first win pays Level Up Powder ×2
Clear goal
Ridepod only
Enemies
Face of Prajna ×4, Moler ×6, Mimic ×2, Pumpkinhead ×6 (key)
ABS / Gilda
188 / 236
Sindain Georama: First Steps
Forest Lake restored: Place 15 River Parts.
Glowing Mushrooms restored: Revive Elder Jurak by placing 10 Trees.
06Noise in the Forest4 medals
Time Attack
Kill everything within 4:10
Fishing
Land a fish of 60 cm or longer
Spheda
Close the distortion — first win pays Stamina Drink ×2
Clear goal
Max's gun only
Enemies
Fire Element ×2, Sonic Bomber ×4, Himarra ×6, Tore ×5 (key)
ABS / Gilda
240 / 276
07I'm a PixieBLUE SEAL4 medals
Time Attack
Kill everything within 4:16
Fishing
Land a fish of 66 cm or longer
Spheda
Close the distortion — first win pays Armband Repair Powder ×4
Clear goal
Items only
Enemies
Face of Prajna ×4, Mimic ×2, King Mimic ×1, Pixie ×6 (key)
ABS / Gilda
132 / 200
08Legendary Killer Snake4 medals
Time Attack
Kill everything within 4:40
Fishing
Land a fish of 49 cm or longer
Spheda
Close the distortion — first win pays Gun Repair Powder ×4
Clear goal
Ridepod only
Enemies
Killer Snake ×2, Sonic Bomber ×3, Fire Element ×6, Ice Element ×6, Gyumo ×5 (key)
ABS / Gilda
352 / 392
SCOOP Gyumo's Yell (howling Gyumo)
Star exit found but locked for now.
Sindain Georama: Continued
Build fence around the Firbits' house.
Place 5+ trees (need 10 total for Elder Jurak).
Place Eye Trees on either side of Nose Tree.
Surround with river.
Go to the future to collect Fruits of Eden and Potato Pie.
Recruit Gordon
Go to Palm Brinks, find the gardener at Max's house garden. Give Holy Water (invent it: Bottle + Holy Emblem + The Sun) to heal the sick tree. Build a Straw House in Sindain and move Gordon in. Go to the future: Jurak appears, gives Lafrescia Seed and Badge Box. Search golden eggs for Gold Paint.
Scoop: Find the Golden Egg!
Complete the last Sindain Georama condition, then go to Future Sindain. Go up the stairs and across the wooden branches and bridges until you see golden eggs in a nest. Take their picture.
09Grotesque Spider Lady4 medals
Time Attack
Kill everything within 4:26
Fishing
Land a fish of 50 cm or longer
Spheda
Close the distortion — first win pays Gift Capsule ×3
Clear goal
Without healing
Enemies
Spider Lady ×6, Tigriff ×1, King Mimic ×1, Hunter Fox ×6 (key)
ABS / Gilda
194 / 216
10Rainbow Falls EntranceWHITE SEAL4 medals
Time Attack
Kill everything within 4:00
Fishing
Land a fish of 68 cm or longer
Spheda
Close the distortion — first win pays Treasure Chest Key ×3
Clear goal
Monica's sword only
Enemies
Tigriff ×2, Sonic Bomber ×3, Gyumo ×5, Hunter Fox ×4 (key)
ABS / Gilda
236 / 272
Rainbow Fallsno medals
Boss: Rainbow Butterfly. She will not appear until Sindain's Georama is done — plant the Lafrescia Seed, then speed it up with a Sundrop taken from a Himarra using Monica's transformation. No medals.
SCOOP Lafrescia Stem
PUZZLE TO REACH BOSS: Toss Lafrescia Seed into pool. Use Himarra badge to transform, speak to Himarra to get Sundrop. Use Sundrop on Lafrescia sprout. Scoop: Lafrescia Stem. Climb the rope-like thing to reach boss.
Puzzle: Reaching the Rainbow Butterfly
1. Toss the Lafrescia Seed into the pool on Floor 11. 2. Use the Himarra Monster Badge to transform into a Himarra. 3. Speak to the Himarra to obtain Sundrop. 4. Use the Sundrop on the Lafrescia sprout. 5. A rope-like vine grows — climb it to reach the boss arena.
BOSS Rainbow Butterfly
Hit the tentacles on the flower center. When all 7 stand erect, the butterfly splits into 7 colored butterflies. Hit them in rainbow order: Red, Orange, Yellow, Green, Blue, Indigo, Violet. Use projectiles (Max's gun). Each butterfly must be hit in the correct order or they reset.
SCOOP Rainbow Butterfly United (when all 7 forms unite)
After the Boss
Get the Teal Envelope.
Return to Sindain. Jurak tells you about Griffon.
Ride the train to Balance Valley.
Chapter 2 of 8
CH 3Balance ValleyStarlight Canyon
The dungeon is Starlight Canyon with 16 floors. This chapter introduces the Spheda minigame.
Before you start: Come in with a ranged arm on the Ridepod and a well-fed Monica sword, stock Anti-Curse Amulets for the masked enemies, and leave bag space for Geostones — Balance Valley needs far more parts than Sindain did.
Chapter Route
1
Start the canyon run Headlong Dash and Fire and Ice Don't Mix open the canyon, where rams charge in straight lines and elemental enemies punish the wrong weapon. Carry one fire and one chill option so you are never fully resisted.
2
Level the four plateaus Balance Valley's Georama is a weight puzzle — the four platform icons only turn blue when all four heights match. Trees are the cheapest ballast, so plant them to nudge a light plateau up without disturbing a finished building.
3
Fill the valley's culture You need roughly 40 culture points, about 15 trees and 4 pot torches placed before the valley counts as finished. Build the Brick House, Church, Chinese Stand and Warehouse from the Geostones as they come in.
4
Place the residents right Each recruit only counts in the correct building — Priest Bruno in the church, Stewart in the wooden house, Ferdinand at the Chinese Stand, Parn in the straw house. Sheriff Blinkhorn also wants fences and a gate around his home.
5
Play Spheda for medals Distortions appear on cleared floors and let you play Spheda. Winning ten rounds brings Mena onto the roster, so treat every distortion you find as a required stop, not an optional one.
6
Track down the Memo Eater The Memo Eater swallowed Lin's memories. It only has a jumping shockwave and a slow green spit, so keep your distance and chip it with Ridepod fire — and photograph the memory-extraction scene while it plays.
7
Feed Lin and press on Once Lin recovers and the Miracle Dumpling changes hands she joins as a temporary partner. Use her through Cursed Mask, Dragon Slayer and Nature's Threat, and keep Anti-Curse Amulets equipped.
8
Defend the lighthouse Lighthouse Appears leads into a two-part fight against Gaspard and then the Evil Flames. Repair the Ridepod and restock healing first — there is no break between the halves.
Missable / point of no return: Two scoops vanish with the chapter: Phantom Memo Eater, caught during the cutscene where the beast draws out Lin's memories, and Flying Battleship, which only appears while you defend the lighthouse at the end. Lin herself leaves the party permanently after the chapter boss — recruit her first.
Close the distortion — first win pays Indestructible Coin
Clear goal
Items only
Enemies
Ivanoff ×4, Wind Element ×4, Crescent Baron ×6, King Mimic ×2, Dragon ×5 (key)
ABS / Gilda
778 / 922
The Lighthouse
Use the Starglass at the top of the lighthouse.
BOSS Gaspard
Phase 1 — Monica vs. Gaspard on battleship: Defend his attacks, then attack after he does 2 hits. Time your blocks carefully. Phase 2 — Max defends Lin from Evil Flames: Destroy all flames before they touch Lin. If Lin is hit even once, it's Game Over! Use Max's gun for ranged attacks.
SCOOP Flying Battleship
After the Boss
Moon Crystal restored.
100% Georama prize: Serpent Slicer sword.
Scoop: Moon Crystal (purple crystal in center of future town).
Chapter 3 of 8
CH 4VeniccioOcean's Roar Cave
Meet Pau (a rabbit creature) and Shingala in the cave. The dungeon is Ocean's Roar Cave with 14 floors. Everything in Veniccio Georama is built on water!
Before you start: Fit the Ridepod with a Hammer Arm and a sturdier body before you sail, put Monica's sword on the Dark Viper path, and carry plenty of Repair Powder — nearly every floor here forces one specific tool on you.
Chapter Route
1
Enter the pirate caves Pirates! and Tons of Fish start the cave with Monster Transformation-only and Ridepod-only conditions. Learn a couple of useful monster forms in advance so the transformation floor is not a slog.
2
Respect the tool locks Floors three through eight rotate through no-healing, Monica's magic only, Max's gun only and items only. Check the condition at the entrance and back out to re-equip rather than forfeiting the medal.
3
Lay the Veniccio piers Veniccio is built out over open water, so place all 8 pier blocks first and hang everything else off them. Stock four colours of paint before you start — you need roughly 10 units of each.
4
House Claire and Donny Claire has to live in the red Iron House and Donny in the blue one. Getting these pairings wrong is the usual reason the region's percentage stalls.
5
Win the Finny Frenzy Take first place in any Finny Frenzy class to bring Olivie onto the team — she then sells every lure in the game. Raise a fish in the aquarium beforehand, because a weak entrant simply cannot place.
6
Explore Luna Lab Future Veniccio's Luna Lab is a multi-room puzzle that gates progress in the cave. Photograph the yellow symbol on its roof while you are up there, plus the Veniccio sunset and the ghost soldier in the cave.
7
Free Shingala with a fish Shingala wears a mind-control device and killing it ends the run. Shoot it with Max's gun to make it open its mouth, grab the electrified fish, back off until it freezes mid-lunge, then throw the fish down its throat.
8
Clear the Ancient Murals The Cave of Ancient Murals runs from Wandering Zappy to Sea of Atrocity with more single-tool conditions. Photograph the wall mural on the way, then heal up and drop into Shigura Village for Jaming.
Missable / point of no return:Puppet Shingala can only be photographed during the controlled-beast fight, and Doctor Jaming only while he is riding his hover platform in the final battle. Neither comes back.
Floor-by-Floor Walkthrough
01Pirates!3 medals
Time Attack
Kill everything within 6:35
Fishing
Land a fish of 48 cm or longer
Spheda
None on this floor — the third medal is the fishing goal
Clear goal
Monster transformation only
Enemies
Corsair ×12, Fintol ×6, Geron ×4 (key)
ABS / Gilda
1,000 / 540
02Tons of Fish3 medals
Time Attack
Kill everything within 6:20
Fishing
Land a fish of 50 cm or longer
Spheda
None on this floor — the third medal is the fishing goal
Clear goal
Ridepod only
Enemies
Goyone ×12, Sea Bat ×6, Statue ×2, Geron ×4 (key)
ABS / Gilda
1,040 / 960
03Tank and BossBLUE SEAL3 medals
Time Attack
Kill everything within 6:09
Fishing
Land a fish of 68 cm or longer
Spheda
None on this floor — the third medal is the fishing goal
Clear goal
Without healing
Enemies
Pirate Tank ×1, Corsair ×6, Captain ×4, Beach Rat ×4 (key)
ABS / Gilda
798 / 459
Veniccio Georama
Everything built on water! Need Piers first.
Build 8 Piers, 2 Shop Boats, 4 Iron Houses (red/green/blue/purple).
Claire in red house, Donny in blue house.
04Water Monster3 medals
Time Attack
Kill everything within 6:40
Fishing
Land a fish of 46 cm or longer
Spheda
None on this floor — the third medal is the fishing goal
Clear goal
Monica's magic only
Enemies
Fintol ×4, Aqua Element ×4, Sea Bat ×4, Statue ×4, Mimic ×2, Beach Rat ×4 (key)
ABS / Gilda
996 / 660
05Scary Auntie Medusa3 medals
Time Attack
Kill everything within 7:00
Fishing
Land a fish of 50 cm or longer
Spheda
None on this floor — the third medal is the fishing goal
Clear goal
Max's gun only
Enemies
Auntie Medusa ×6, Shiva ×2, Aqua Element ×4, King Mimic ×1, Geron ×6 (key)
ABS / Gilda
1,044 / 854
06Sand Molers3 medals
Time Attack
Kill everything within 6:25
Spheda
Close the distortion — first win pays Stamina Drink ×2
Close the distortion — first win pays Chill Stone ×5
Clear goal
Ridepod only
Enemies
Pirate Tank ×6, Corsair ×3, Captain ×10, King Mimic ×1, Shiva ×2 (key)
ABS / Gilda
1,294 / 1,006
Cave of Ancient Murals
Shingala is violent due to a mind-control device.
Puzzle: Curing Shingala
1. Travel to Luna Labs future, Lab 1 (red) to get the Electric Worm from Dr. Osmond. 2. Invent the Aquarium (Fountain + Windows + Wooden box). 3. Put a fish in the aquarium, feed it the Electric Worm. 4. Return to the Cave of Ancient Murals. 5. Shoot Shingala until his mouth opens, then toss the electrified fish in. Don't kill him!
BOSS Shingala
Shoot him until his mouth opens, then toss the electrified fish in. Do NOT kill him! He's being controlled — you need to cure him, not defeat him.
SCOOP Puppet Shingala
Return to Luna Labs Lab 2 (blue), get Shell Talkie from Dr. Nobb. Talk to Shigura to get Secret Dragon Remedy. Use on Shingala to cure him.
09Wandering ZappyWHITE SEAL3 medals
Time Attack
Kill everything within 6:30
Spheda
Close the distortion — first win pays Level Up Powder
Clear goal
Max's wrench only
Enemies
Auntie Medusa ×4, Aqua Element ×8, Goyone ×6, Mimic ×4, Zappy ×2 (key)
ABS / Gilda
1,276 / 1,032
10Banquet of the Dead3 medals
Time Attack
Kill everything within 5:50
Spheda
Close the distortion — first win pays Absorption Coin
Clear goal
Items only
Enemies
Sooty ×4, Hornhead ×8, Pirate Tank ×4, King Mimic ×2, Sand Moler ×4 (key)
ABS / Gilda
1,360 / 1,176
11ImprovementsRED SEAL3 medals
Time Attack
Kill everything within 5:20
Spheda
Close the distortion — first win pays Treasure Chest Key ×5
Clear goal
Without healing
Enemies
Zappy ×4, Aqua Element ×2, Sea Tortoise ×2, Ragstink ×6, Neo Vanguard ×4 (key)
ABS / Gilda
1,200 / 818
12Return of the Serpent3 medals
Time Attack
Kill everything within 6:35
Fishing
Land a fish of 50 cm or longer
Spheda
None on this floor — the third medal is the fishing goal
Windmill + 8 Luna Stone Lights + 80 Culture Points.
Shigura Village
BOSS Dr. Jaming
Defend against the Shigura attacks. When they stoop their heads, hit the Shigura head as Flaming flies over. The timing is key — watch for the stoop animation.
SCOOP Dr. Jaming
After the Boss
100% Veniccio Georama prize: Nova Cannon Ridepod arm from Dr. Osmond.
Chapter 4 of 8
CH 5Heim RadaMount Gundor
The dungeon is Mount Gundor with 16 floors. Ridepod upgrades become critical from this point onward. The Nova Cannon is essential for the final bosses.
Before you start: Fit the Ridepod with a long-range gun such as the Nova Cannon and bank plenty of Gilda and parts — the mech solves most of Mount Gundor's roadblocks and the Heim Rada rebuild wants roughly 100 culture points.
Chapter Route
1
Break Griffon's opening assault Chapter 5 opens with Griffon's army pushing into the area. Sweep that floor completely — the Great Crane Geostone is here and it feeds straight into the town rebuild.
2
Rebuild Heim Rada properly This region is volcanic, so wood is effectively forbidden — build in brick and iron only. Raise houses with chimneys, cranes and a power arm on the roofs, add the generator and windmill, and scatter about 10 pots.
3
Climb the lower slopes Work up through Mt. Gundor Wind, Little Dragons on the Mountain and Steam Goyone. Everything here is fire-aligned, so lean on ice or thunder and keep repair powder stocked.
4
Snap the missable photos Detour back to town for the Cinders shot while ash is still falling, then get the Fire Squall itself on camera. Both feed inventions and neither can be recovered.
5
Fetch the Time Bomb Use the teleporter into the future workshop, head to the north side and ride the elevator up a floor to trigger the scene that hands you the Time Bomb. Nothing on the mountain progresses without it.
6
Detonate the Fire Squall Set the bomb at the Squall's door, which drops you straight into the Death Ark airship fight. Swap to the Ridepod and circle-strafe while pouring cannon fire into it — staying in motion makes most of its shots miss.
7
Claim the Fire Horn The story hands over the Fire Horn after the airship falls, which is what lets you survive the lava stretch. Push on through Walking the Path of Flames, Burning Undead and the Fire Dragon floor.
8
Reach the River of Flames Clear Treasure Chest Danger Zone and Road to the River of Flames, cashing in your new photos on the way. Top up healing before the final door — Gaspard's second form hits hard.
Missable / point of no return: Two photo ideas die here. Put up a straw or wooden house while cinders are falling on Heim Rada, leave town and come back to shoot the burnt remains for Cinders; and photograph the Fire Squall before you detonate it. Paving over every geyser with Hardened Mud also loses you the Geyser shot.
Scoop: Hot Springs Spirit
At the Heim Rada Stop, go to the hot springs (left side down a ramp). It must be between midnight and 4:00 AM for the spirit to appear. Aim at the spring on your right (facing down the ramp). Take pictures — the spirit appears as a white mist only visible in photos.
Floor-by-Floor Walkthrough
01Battle with Griffon's Army3 medals
Time Attack
Kill everything within 7:10
Spheda
Close the distortion — first win pays Level Up Powder
Clear goal
Without healing
Enemies
Griffon Soldier ×10, Stick Joe ×6, Rifle Wolf ×6 (key)
ABS / Gilda
1,692 / 1,128
02Mt. Gundor WindRED SEAL3 medals
Time Attack
Kill everything within 7:00
Spheda
Close the distortion — first win pays Treasure Chest Key ×5
Build 3 levels of Blocks, Brick House on top with Power Arm → move in Cedric.
Windmill + Brick House → Erik.
Brick House with chimney → Borneo.
Brick House with Iron Fence/Gate → Gerald.
Great Crane on roof, Generator, 10 Pots, 100+ Culture Points.
Future
Meet Garek on 2nd floor of Workshop, get Time Bomb.
Mount Gundor Peak
Scoop: Fire Squall (MISSABLE!)
Take a picture of the Fire Squall on the Mount Gundor Peak floor BEFORE you blow it up! This is a missable scoop — once you set the Time Bomb, the Fire Squall is gone forever.
Set Time Bomb at Fire Squall base.
BOSS Flying Battleship Death Ark
Only the Ridepod can damage it! Use the Nova Cannon. Dodge its attacks and keep firing. The Ridepod's mobility is key — strafe to avoid the battleship's barrages.
After the Death Ark
Go to Gundorada Workshop Operations Room (3rd floor), meet Galen Agaris, get the Fire Horn.
12Walking the Path of Flames3 medals
Time Attack
Kill everything within 7:40
Spheda
Close the distortion — first win pays Resurrection Powder ×2
Clear goal
Ridepod only
Enemies
Lava Bat ×6, Lava Golem ×6, Alexander ×2, Chimera ×2 (key)
ABS / Gilda
1,362 / 786
13Burning Undead3 medals
Time Attack
Kill everything within 6:52
Spheda
Close the distortion — first win pays Level Up Powder ×2
Clear goal
Items only
Enemies
Bone Lord ×2, Ultrasonic Bomber ×4, Mimic ×2, King Mimic ×1, Lava Runner ×6 (key)
ABS / Gilda
1,544 / 1,030
SCOOP Faintin' Bone Lord (throw rock at Bone Lord, picture when down)
14Fire DragonWHITE SEAL3 medals
Time Attack
Kill everything within 7:06
Spheda
Close the distortion — first win pays Indestructible Coin
Clear goal
Without healing
Enemies
Red Dragon ×5, Fire Gundron ×4, Bomber Head ×4, Lava Bat ×4, Chimera ×4 (key)
ABS / Gilda
2,042 / 1,460
15Treasure Chest Danger Zone3 medals
Time Attack
Kill everything within 8:00
Spheda
Close the distortion — first win pays Sapphire
Clear goal
Max's wrench only
Enemies
Mimic ×8, King Mimic ×4, Alexander ×4, Lava Bat ×4, Bone Lord ×4 (key)
ABS / Gilda
2,300 / 1,532
16Road to the River of Flames3 medals
Time Attack
Kill everything within 7:10
Spheda
Close the distortion — first win pays Turquoise
Clear goal
Items only
Enemies
Lava Bat ×6, Bone Lord ×6, Ultrasonic Bomber ×6, Red Dragon ×6 (key)
ABS / Gilda
2,346 / 2,130
Mount Gundor Mouth
Play the Fire Horn to clear the lava path.
Scoops: Lava Road & Fallen Battleship
Lava Road: Take a picture of the path that appears when you cause the lava to part. Fallen Battleship: Take a picture of the crashed battleship on the Mount Gundor Mouth floor.
BOSS Gaspard
Phase 1: Absorb Gaspard's attacks with Monica's sword, then throw them back. Phase 2 — Flame Demon Monster Gaspard: Switch to the Ridepod for Nova Cannon damage. Keep your distance and fire continuously.
SCOOP The Ultimate Gaspard
After the Boss
Heim Rada future: Galen gives Holy Daedalus Blade.
Scoop: Paznos (huge castle-like structure in Future Heim Rada).
Use the Transmission Device to reach the Bridge.
Chapter 5 of 8
CH 6Moon Flower Palace & Star Paths
This chapter involves the Moon Flower Palace, a boss fight with Emperor Griffon, and then revisiting all 4 previous dungeons via star-marked exits to collect the 4 elemental gems.
Before you start: Finish the Gundorada Workshop Georama first, Operations Room included, so Paznos is fully assembled when the story calls for it. Bring a well-synthesised gun for Max and quick Ridepod legs — each star path is short but ends on a boss.
Chapter Route
1
Find the palace sealed The chapter opens with Moon Flower Palace locked tight — you cannot brute-force your way in. The scene points you toward the ruins instead.
2
Wake Kazarov Stonehenge At Kazarov Stonehenge the Chrono Union lets one thing exist in two eras at once. Work the altars to obtain the Star Key; this is the hub you return to after every gem.
3
Build out Balance Valley Push Balance Valley to roughly 40 culture points with about 15 trees, 4 pot torches and a Star Lamp on a brick house, and house its five residents to lock in the future version of the ruins.
4
Earth gem in the wood Take the Rainbow Butterfly Wood star path through Something Rare Here! and Scary Tree to reach Trentos. He folds to a strong Steal Gun in a handful of shots.
5
Wind gem in the canyon Run the Starlight Canyon star path past Evil Spirit in the Valley and Brave Warriors in the Valley to face Lapis Garter. Backflip out of its extending fists and guard the spin, or let the Ridepod fight it at range.
6
Water gem in the cave Ocean's Roar Cave leads through Pirates' Revenge and Death Ocean to the Sea Dragon, which outruns a sluggish mech. Fit buggy-style feet to keep pace and unload the Nova Cannon whenever it lines up.
7
Fire gem on the mountain The Mount Gundor star path runs through Explosive Hot Spring and Crazy Mountain to Inferno. Charged power attacks stagger it repeatedly, so you can chain knockdowns and barely take a hit.
8
Launch Paznos at the palace Seat all four gems at the stonehenge to trigger the Chrono Union and bring Paznos into the present. It shifts into its giant robot form, hurls the palace aside, and drops you in front of Emperor Griffon.
Missable / point of no return:Griffon's Real Face has to be photographed in the opening seconds of your first battle with him, and the Dead Tree shot only exists at the Moon Flower Palace stop. Both are one-chance.
Moon Flower Palace Stop
Scoops available: Ixion (the time train), Moon Flower Palace (the door).
BOSS Emperor Griffon
Dodge and shoot with Max's left-hand weapon. Keep your distance and fire continuously. Don't get close to him.
SCOOP Griffon's Real Face (take photo at the start of the fight!)
Star Paths: Collecting the 4 Gems
After defeating Griffon, get the Star Key at Kazarov Stonehenge. You must revisit all 4 previous dungeons via their star-marked exits.
1. Rainbow Butterfly Wood (Star Exit on Floor 8)
Use the Star Key on the star exit found on Floor 8.
12★ Looking for the Earth Gem4 medals
Time Attack
Kill everything within 4:20
Fishing
Land a fish of 54 cm or longer
Spheda
Close the distortion — first win pays Gift Capsule ×3
Close the distortion — first win pays Level Up Powder
Clear goal
Monica's sword only
Enemies
Fat Naga ×4, King Mimic ×2, Pirate Eye ×4, Metal Bomber ×4, Arkerath ×4 (key)
ABS / Gilda
2,528 / 1,956
BOSS Sea Dragon (Water Gem Guardian)
Use the Ridepod with projectile weapons. The Sea Dragon can dive underground — watch for it resurfacing and dodge accordingly.
SCOOP Water Gem Altar
4. Mount Gundor (Star Exit on Floor 4)
Use the Star Key on the star exit found on Floor 4.
17★ Looking for the Fire Gem3 medals
Time Attack
Kill everything within 6:50
Spheda
Close the distortion — first win pays Level Up Powder
Clear goal
Monster transformation only
Enemies
Mimic ×1, Heat Wear ×6, Living Armor ×6, Rolling Rocks ×2, Red Fox ×6 (key)
ABS / Gilda
2,450 / 2,390
18★ Explosive Hot Spring3 medals
Time Attack
Kill everything within 7:05
Spheda
Close the distortion — first win pays Mighty Healing ×2
Clear goal
Ridepod only
Enemies
Mimic ×4, Triple Cracker ×4, Flaming Nail ×4, Ice Spirit ×4, Fire Spirit ×4 (key)
ABS / Gilda
2,480 / 2,172
19★ Crazy Mountain3 medals
Time Attack
Kill everything within 6:55
Spheda
Close the distortion — first win pays Wealth Coin
Clear goal
Items only
Enemies
King Mimic ×2, Heat Wear ×4, Rolling Rocks ×4, Arthur ×4, Flaming Nail ×8 (key)
ABS / Gilda
3,112 / 2,448
BOSS Inferno (Fire Gem Guardian)
Similar to Flaming Nails. Use the Nova Cannon for maximum damage.
SCOOP Fire Gem Altar
Kazarov Stonehenge
Place all 4 Gems in the colored columns at Kazarov Stonehenge.
Scoop: Gigantor Paznos
Once Paznos turns into a giant robot, go up where the altars are in Kazarov Stonehenge, then turn around toward Ixion. Paznos will be above Ixion. Take the picture.
Chapter 6 of 8
CH 7Moon Flower Palace Dungeon & Final Bosses
The final dungeon has 24 floors plus multiple boss fights in sequence. This is the most challenging content in the game — prepare your best weapons, items, and Ridepod.
Before you start: Treat this as your last cleanup stop: level a monster badge past 51 for the transform medals, fit Propeller or Jet Hover legs for the time trials, and carry close to 8,860 Gilda — the palace Georama uses a fixed shopping list.
Chapter Route
1
Storm the opened palace With the gates breached, start into Ancient Wind, Card Warriors Gather, Dangerous Treasure and Zombie Zone. Holy Water trivialises the undead packs and helps toward the items-only medals at the same time.
2
Grind through the mid floors Feeling Out of Place through Crush the Undead form the first long block. Nothing here flies, so items-only runs are straightforward — burn elemental stones freely on anything you cannot poison.
3
Start the palace Georama This region has no written checklist. Instead the game shows reference pictures and you place each unique part where the image indicates. Anchor off the road first and the rest lines up.
4
Clear the second block Missing Gem Dealer through Palace Watchdog come next. Keep both characters healed and the Ridepod fuelled, since these floors lean on one party member at a time.
5
Finish the reconstruction Two more building interludes add the Stardust Pond, Palace Stairs and Hall of Sorrow, and you need the Flower of the Sun from Alexandra's Room to advance.
6
Walk the last corridor Road to Memories, Final Trump Card, Elemental Party, Wandering Knight's Soul and Beware Carelessness are the run-up to the end. Do every outstanding medal attempt now — backtracking stops being possible shortly.
7
Beat Griffon in the Sun Chamber Griffon's real fight has three stages: guard his wing gusts, backflip rather than block once he lands and lunges, then slip behind him during charge-ups. Non-Stop Amulets carry the last phase.
8
Finish the Dark Element The Dark Element emerges straight after Griffon falls and runs on a five-minute timer, so fight it close rather than kiting. Block its two light swings, backflip the heavy one, and only commit damage when its colour shifts.
Missable / point of no return:Moon Flower Palace shuts forever once the final boss dies. Every medal, Spheda hole and fishing target inside it has to be finished beforehand — this is the single hard lock on the Medalhead trophy. Legend of the Moon also has to be photographed on the Palace Terrace floor the instant the boss battle begins.
Floor-by-Floor Walkthrough
01Ancient Wind3 medals
Time Attack
Kill everything within 8:00
Spheda
Close the distortion — first win pays Level Up Powder
Close the distortion — first win pays Holy Stone ×5
Clear goal
Items only
Enemies
King Mimic ×2, Evil Nail ×4, Lancer ×4, Clock Knight ×4, Earth Dragon ×4 (key)
ABS / Gilda
4,000 / 2,300
Alexandria's Room
Place the Sun Flower in the vase.
Sun Chamber
Puzzle: Griffon's Real Name
When prompted for Griffon's real name, answer "Sirus". Buy Non-Stop and Anti-Petrify Amulets before proceeding.
Scoop: Sun Chamber Gatekeeper
Take a picture of one of the two gargoyles next to the golden door in the Sun Chamber.
BOSS Emperor Griffon (3 Forms)
Form 1: Don't get close! Use projectiles. Defend the wing attack. Form 2: Wings replaced with swords. Sidestep (don't defend!) and use projectiles. Form 3: Launches projectiles causing Stop status. Wear an Anti-Petrify/Non-Stop Amulet. Get close, charge your attack, and release before he does.
Dream Spiral (Boss Sequence)
After defeating Griffon, you face a sequence of bosses in the Dream Spiral:
Detail
Info
Mammo
Keep distance, blast with gun.
Nightmare
Stay back, use projectiles.
Black Dragon
Projectiles or melee both work.
Uther
Insane defense — use your strongest weapons.
Gaja Ein & Gaja Zwei
Close range right-hand weapons or Ridepod.
Scoop: Legend of the Moon (MISSABLE!)
At the top of the Dream Spiral, once the final boss fight starts, take a picture of the moon. You can see the moon while going up the spiral, but the picture won't register until you're at the top. This is missable — take it during the Dark Element fight!
BOSS FINAL BOSS: Dark Element
5 minute time limit! Equip Anti-Petrify Elements. Keep your distance and dodge. Defend 2 attacks, then sidestep the 3rd. When he changes colors, attack! He warps and fires a beam — dodge then counterattack. Use your most powerful weapons and the Ridepod with Nova Cannon if needed.
Chapter 7 of 8
CH 8The Forgotten AdventureZelmite Mine
Before you start: Save on a fresh slot before the last fight and walk in with Max's best gun and melee weapon plus a deep stack of healing and repair powder. Chapter 8 cuts you off from most shops — anything you did not buy or build earlier is simply gone.
Zelmite Mine — every floor
Thirty-one of the mine's thirty-eight areas carry medals. The four Dead Ends, the two break rooms and the Depths do not — but the branch floors that lead to the Dead Ends do. Enemy counts and ABS/Gilda totals are per floor.
01Get the Zelmite!3 medals
Time Attack
Kill everything within 9:20
Spheda
Close the distortion — first win pays Healing Coin
Mini-boss: two Sphinxes. This one is mandatory — it drops the Dynamite you need to blast the wall in the Depths, plus an Experience Coin and a Poison Coin. No medals.
18Little Dragon Army3 medals
Time Attack
Kill everything within 11:40
Spheda
Close the distortion — first win pays Level Up Powder ×2
Clear goal
Without healing
Enemies
Holy, Wind, Thunder and Ice Wyrm ×4 each, Fire Wyrm ×4 (key)
ABS / Gilda
6,720 / 2,200
19Captain Returns3 medals
Time Attack
Kill everything within 12:00
Spheda
Close the distortion — first win pays Fruit of Eden
Clear goal
Monica's magic only
Enemies
Oyakata ×4, Elite Corsair ×8, Great Tree ×2 (key)
ABS / Gilda
4,440 / 1,584
20Hell's Turning Point3 medals
Time Attack
Kill everything within 11:55
Spheda
Close the distortion — first win pays Level Up Powder ×2
Clear goal
Ridepod only
Enemies
Moonlight Hulk ×6, Bandou ×6, Titan ×6, Ladha ×2 (key)
ABS / Gilda
7,200 / 2,220
21Mummy Heaven3 medals
Time Attack
Kill everything within 12:40
Spheda
Close the distortion — first win pays Stamina Drink ×2
Clear goal
Items only
Enemies
Dark Keeper ×2, Fire Wyrm ×2, Holy Wyrm ×2, Revenant ×16 (key)
ABS / Gilda
8,520 / 2,062
Dead End 4no medals
Mini-boss: eight Mandoras at once. Optional. Drops two Diamonds. No medals.
A Suspicious Openingno medals
Boss: Metal Flotsam. Photograph him before you finish him for a scoop. No medals.
22Ward 3 Entrance3 medals
Time Attack
Kill everything within 12:30
Spheda
Close the distortion — first win pays Garnet
Clear goal
Items only
Enemies
King Mimic ×1, Revenant ×4, Dark Alchemist ×6, Last Guardian ×6, Smiling Wolf ×6 (key)
King Mimic ×2, Spinning Saucer ×4, Flying Steel ×6, Bone King ×6, Tiamat ×6 (key)
ABS / Gilda
14,400 / 2,504
Zelmite Mine Depthsno medals
Final boss: the Fake Genie, back from the first Dark Cloud. You need the Dynamite from Dead End 3 to blast the wall. Photograph the zelmite and the genie for scoops. No medals.
Chapter Route
1
Take Mayor Need's request The mine only appears after the main story ends and the mayor asks Max to look for zelmite deposits. It is entirely optional content, and it leads to the game's second ending.
2
Descend the upper mine Work down through Get the Zelmite!, Moon Mole, Powerful Frog and Evil Bat Invasion, using the Miner's Breakroom to regroup — Monica rejoins you there. Only two floors in the whole mine carry seals, and both are White.
3
Take the first dead end Dead End 1 pits you against two Nail Bursts, which shrug off almost every hand weapon but take double from Smash — this is the Ridepod's fight. Clearing it pays a Healing Coin and a Sun Stone.
4
Clear the second branch Push on to Dead End 2 and its eight Rare Jackets. Do not use lock-on here: it grabs a distant one and drags the whole pack onto you. Peel one or two off at a time instead. The reward is an Absorption Coin and a Moon Stone.
5
Blast the wall open Dead End 3's two Sphinxes drop the Dynamite, and this one is not optional — without the explosives you cannot break the wall in the Depths and the mine ends there. Monica with Flame and Exorcism is the answer.
6
Photograph Flotsam and clear Dead End 4 The mechanical Flotsam returns at A Suspicious Opening, so have the camera ready before the fight starts. Fight him from the Ridepod — on foot you cannot match his speed. Dead End 4's eight Mandoras drop two Diamonds.
7
Farm the deep floors for medals Ward 3 Entrance onward is where most of the items-only medal floors live. Lean on elemental stones and Holy Water, and use Stone Berries to petrify the cannon-type enemies before they ruin a run.
8
Take the Depths Anxiety, Omen, Firm Belief and Seeping Light lead to Zelmite Mine Depths and the Fake Genie. Clear the clones, wait for the main body to turn blue, then burst it down — and treat every beam as lethal.
Missable / point of no return:Flotsam Revived! is a single-chance photo on the A Suspicious Opening floor. More importantly, the moment Chapter 8 opens, every remaining town photo and everything at Kazarov Stonehenge and Moon Flower Palace is locked away — clean those up before finishing Chapter 7.
BOSS Fake Genie (Dark Genie)
20,000 HP and widely called the hardest fight in the game. He is invulnerable most of the time and constantly summons Mini Dark Genies — clear the clones first, and he becomes attackable when he visibly turns blue. Burst him down in that window, then get clear before his beam sweeps the arena. A maxed Supernova is the community's answer.
Post-game dungeon unlocked after completing Chapter 7.
Max reunites with Monica.
BOSSMetal Flotsam.
BOSSDark Genie (returning boss from Dark Cloud 1).
Defeating the final boss grants the The Forgotten Adventure trophy.
Scoops: Flotsam Revived! (MISSABLE — on the Suspicious Opening floor), Mr. Big Shot's Shadow, Zelmite found.
Chapter 8 of 8
What is a Geostone?
A Geostone is a stone tablet buried in a dungeon floor, marked with a purple dot on the minimap. It is the most important thing you carry out of a floor, and the game barely explains it.
Question
Answer
What is on it?
Georama blueprints — the parts you are allowed to build in that region's town — and the conditions that region must satisfy to count as complete. Most Geostones carry several blueprints at once.
How many are there?
One per floor, per dungeon. Every floor has exactly one.
Where is the first one?
On the Rainbow Butterfly Wood floor literally named This is a Geostone? — Chapter 2. The Underground Water Channel has none at all, because Georama does not exist yet in Chapter 1.
What do I do with it?
Carry it back to the matching Georama town and open Georama mode. The Carpenterion reads the stone and adds its blueprints and conditions to your list.
Does reading it build anything?
No. A blueprint still needs crafting materials — common monster drops, steals, chest loot, or anything Conda sells. The build screen tells you what is missing.
Why do the conditions matter?
They are what unlock new shops and new residents, and several of them gate the story outright. Placing parts earns Culture Points, and some chapters will not advance until your CP total is high enough.
Is there a build limit?
Each region has a Polyn budget — think of it as a polygon allowance. You will not run out unless you decorate far beyond the requirements, and removing a part refunds its Polyn.
Miss a Geostone and you cannot finish that town. Georama completion is its own gold trophy (GeoraManiac), and a region locks once the story moves past it — so sweep every floor for the purple dot before you leave a chapter behind.
Georama System
The Georama system is Dark Cloud 2's town-building mechanic. In each chapter, you collect Geostones from dungeons and use them to place buildings, trees, rivers, and decorations to restore ruined settlements. Each region has a set of 100% completion requirements — fulfilling them all earns a rare weapon reward. Complete each region's Georama fully before leaving the area, as you cannot return later.
Tip: Culture Points accumulate based on the items you place. Keep adding decorations and residents to reach the required Culture Point thresholds for each restoration goal.
Sindain (Chapter 2)
Restoration Requirements
Forest Lake restored (15 River parts placed).
Glowing Mushrooms restored.
Elder Jurak revived (10 Trees placed, Withered Tree restored, Nose Tree placed between the Eye Trees).
Workshop Elevator restored (Resident in house with Chimney, 3rd Floor restored, 60 Culture Points).
Gundorada Workshop restored (Workshop Elevator restored, Borneo resides).
Work Crane and Arm restored (Generator placed, Work Crane restored, Resident in house with Crane, 3rd Floor restored, Windmill placed, Work Arm restored, Resident in house with Arm, 2nd Floor restored, 10 Pots placed).
Item Shop restored (Resident in house with Chimney, 70 Culture Points).
Weapon Shop restored (Erik in house near Windmill, 70 Culture Points).
Paznos completed and Gaspard defeated.
100% Reward: Holy Daedalus Blade
Granted for fully completing the Heim Rada Georama.
Unique Georama Items
Generator, Great Crane, Power Arm.
Moon Flower Palace (Chapter 7)
Restoration Requirements
The Moon Flower Palace Georama is unique — conditions are hidden and there is very little freedom in placement. You must spend exactly 8,860 Gilda to buy all necessary materials. Follow Alexandra's story cues and place items in the correct positions.
Georama Items Available
Item
Max Quantity
Road to Goldbad
8
Road
6
Camellia Tree
2
Silver Bench
2
Moon Column
16
Palace Stairs
1
Flower Bed
6
Starlight Stairs
2
Stardust Pond
1
Hall of Sorrow
1
Fountain
1
Petal Stream
16
Placement Guide
Detail
Info
The Scent of Water in the Sun
Place the Fountain in the center, lining up with the palace stairs and the gate of the area entrance.
The Path of Flowers
Place 4 Road to Goldbad pieces leading up to the fountain from one edge, then 4 more on the opposite side.
The Door and The Moon Column
Place 8 Moon Columns on either side of the fountain (4 left, 4 right), touching the flower section of the Road to Goldbad pieces.
The Path of the Sun
Place 2 Roads leading from either side of the fountain, followed by a Starlight Stair.
A Stream and a Starlight Stair
Start a Petal Stream directly underneath the gap in the Starlight Stair, extending both directions.
Flower Bed of Recollections
Place 2+ Flower Beds at the top edge of the map near the palace, on either side of the river.
You, Sitting by the Stairs
Place Palace Stairs on the right side of the river, with a Silver Bench to the right.
The End of the Hall of Sorrow
Place the Hall of Sorrow on the left side at the bottom, with the river leading from its center.
Feelings Deep in Stardust Pond
Place the Stardust Pond at the bottom right of the river.
The Murmur of the Trees
Place 2 Camellia Trees in front of the Hall of Sorrow, one on either side of the river.
Reward: Sun Stone and Moon Stone
Granted for restoring the Moon Flower Palace gardens.
Recruitment Guide (26 Characters)
Recruiting all characters is required for the Supporting Cast trophy. Many have specific item or action requirements. Below is the complete list with exact requirements.
MISSABLE:Mena requires beating 10 Spheda stages AFTER talking to her as Monica. Stages beaten before talking to her do not count. She is the most commonly missed recruit.
Automatic Recruits (4)
Character
How to Recruit
Goes To
Cedric
Joins automatically in Chapter 1
Heim Rada (Brick House with Power Arm)
Borneo
Joins automatically (Chapter 1)
Heim Rada (Brick House with chimney)
Erik
Joins automatically (Chapter 1)
Heim Rada (Brick House near Windmill)
Julia
Joins automatically once Parn is recruited
Balance Valley
Sindain Recruits
Swipe the table sideways
Character
Location
How to Recruit
Goes To
Gordon
Palm Brinks, Max's house garden
Give him Holy Water (buy from Priest Bruno or invent: Bottle + Holy Emblem + The Sun)
Sindain (Straw House next to trees)
Adel
Palm Brinks, servant's quarters in Max's mansion
Bring her Thick Hide, Hunk of Copper, and Sturdy Cloth (buy from Morton's Sundries)
Sindain (Straw House)
Aunt Polly
Palm Brinks, bakery
Get Crunchy Bread from Polly, bring it to Morton's house (the one with pumpkins), read the note about fondue night being cancelled, tell Morton, then tell Polly
Sindain (Eatery)
Milane
Palm Brinks, weapon shop
She gives you a Gladius. Bring her a Chopper or Sand Breaker (or better sword) — either built up or found
Sindain (Weapon Shop)
Balance Valley Recruits
Swipe the table sideways
Character
Location
How to Recruit
Goes To
Priest Bruno
Palm Brinks, church
Blow out candles in order: 1st on left, 3rd on right, 5th on left, 6th on right. Exit and re-enter to reset if you mess up
Balance Valley (Church)
Sheriff Blinkhorn
Palm Brinks, police station (outside by day)
Talk to him as Max, then run to the boat at the lake and back in under 2:01:00. Cut corners as much as possible
Balance Valley (Iron Fence house)
Stewart
Palm Brinks
Give him 1,000 Gilda twice (he returns some of the total at the end)
Balance Valley (Brick House)
Parn
Palm Brinks, studio
Bring him Gold Paint — buy from Woody Tailor in future Sindain, or get it from the Golden Eggs after completing the Jurak's Branch Georama checkpoint
Balance Valley (purple roof straw house)
Ferdinand
Palm Brinks, Max's mansion kitchen
Give him a Roasted Chestnut (found in treasure chests in Rainbow Butterfly Wood, or bought from food shop in Jurak Mall)
Balance Valley (Chinese Stand)
Dr. Dell
Palm Brinks, clinic across the lake
After talking to Argo in Balance Valley, go back to Palm Brinks and talk to Dr. Dell about Lin
Balance Valley
Mena
Palm Brinks, Town Hall (talk as Monica)
MISSABLE Talk to her as Monica, then beat 10 Spheda stages. Stages beaten before talking to her do NOT count
Balance Valley
Lin
Balance Valley
Joins automatically during story. She leaves permanently at the end of Chapter 3
Balance Valley (temporary)
Veniccio Recruits
Swipe the table sideways
Character
Location
How to Recruit
Goes To
Mayor Need
Palm Brinks, Town Hall
Tell him the safe combination: 1221
Veniccio
Claire
Palm Brinks, Claire's house
Show her a photo of the Lafrescia Flower (stem) — the photo must be stored in the camera
Veniccio (red iron house)
Donny
Palm Brinks Underground Channel
Complete the Item Shop Restored Georama achievement in Sindain, then buy the Dark Coin and Indestructible Coin in the future (1,500 Gilda each, or find in treasure chests)
Veniccio (blue iron house)
Corinne
Palm Brinks (moves between locations)
Find her in Morton's house (with pumpkins), then upstairs in Claire's house, then in Max's bedroom
Veniccio
Fabio
Palm Brinks, pier at the lake
Catch and show him a Nonky bigger than 60cm (fish at Palm Brinks lake with Mimi bait)
Veniccio
Granny Rosa
Palm Brinks
A text box will pop up — copy the text exactly, including punctuation
Veniccio
Rufio
Palm Brinks, found on the train
Show him a photo of The Moon from your camera
Veniccio
Pau
Veniccio (after Shigura Village saved)
Talk to him and give him a Carrot (buy from Fabio or Mushroom Burger Eatery)
Veniccio
Olivie
Palm Brinks, town square (when no fishing events)
Win any Finny Frenzy race, then talk to her in the town square when no events are being held
Veniccio
Heim Rada Recruits
Swipe the table sideways
Character
Location
How to Recruit
Goes To
Gerald
Palm Brinks, Max's mansion office
He gives you a Trumpet Gun. Upgrade it to a Bell Trigger (or find one) and show it to him. A stronger gun is also acceptable
Heim Rada (Brick House with Iron Fence)
Note: Cedric, Borneo, and Erik join automatically and are placed in Heim Rada. See the Automatic Recruits section above.
All 26 Recruits — Complete List
Swipe the table sideways
Name
Where
How to recruit
Chapter
What they give you
Adel
Max's house — the servant's room by the staircase
Bring her a Thick Hide, a Hunk of Copper and a Sturdy Cloth.
Ch.2
Repairs weapon durability
Aunt Polly
Polly's Bakery, Palm Brinks
Take her bread-delivery errand out to Morton at the pumpkin field and report back — this recruits both of them.
Ch.2
Eatery staff in Sindain
Borneo
Joins the party directly
Automatic — no requirement.
Ch.2
Improves monster item drops
Cedric
Joins the party directly
Automatic story recruit.
Ch.2
Synthesis and repair bonus; runs the Ridepod
Claire
Palm Brinks, her house near Max's
Photograph the Lafrescia — the giant flower of Rainbow Butterfly Wood — and show it to her.
Ch.4
Must live in the red Iron House in Veniccio
Corinne
Starts upstairs in Morton's house
Play her hide-and-seek game and find her at each place in turn — Morton's house, then Claire's house, then Max's own bedroom.
Ch.2
Easy to abandon halfway; the game expects you to keep chasing her
Doctor Dell
The clinic beside the Palm Brinks lake
Speak with Argo in Balance Valley about the sick villagers, then go back and collect Dell.
Ch.3
Story-driven, not an item quest
Donny
By the Underground Channel entrance
Carry Dark Coins plus a Protector or Indestructible Coin, or meet the Item Shop Georama goal. Try both.
Ch.4
Opens locked doors and chests — big time-saver for medals. Lives in the blue Iron House
Erik
Joins the party directly
Automatic.
Ch.2
Manufactures upgraded bombs; settles in Heim Rada
Fabio
The pier on the lake side of Palm Brinks
Catch a Nonky and show it to him. Size is disputed — aim for 60 cm+ to be safe.
Ch.2+
Supplies free fishing bait once housed near water
Ferdinand
The kitchen inside Max's house
Hand him a Roasted Chestnut.
Ch.3
Cooks premium chicken; staffs the Chinese Stand
Gerald
Max's house — he is Max's father
Build the starter gun up into a Bell Trigger or better and show him the result.
Mid-game
Needed by Ch.5 for Heim Rada
Gordon
The front garden of Max's house
He wants Holy Water for an ailing tree — buy it from Priest Bruno for about 40 Gilda. Unlocked after the Geostone on the Legendary Killer Snake floor.
Ch.2
Mandatory. His house needs a tree beside it, and housing him in Sindain unlocks six other recruits
Granny Rosa
The hallway in Max's house toward the kitchen
When the prompt appears, type the phrase back exactly as shown.
Ch.2
Produces cheese
Julia
Parn's Studio
No separate task — she comes along the moment Parn agrees to join.
Ch.3+
Miss Parn and you miss her too
Lin
With you during the Balance Valley arc
Joins through the story once Lao Chao's restaurant is rebuilt and you fetch the flower for his dish.
Ch.3
The one permanent loss — she leaves after the Chapter 3 boss
Mayor Need
City Hall, Palm Brinks
Tell him his forgotten safe combination: 1221.
After Gordon is housed in Sindain
Boosts money drops; runs the medal exchange
Mena
The ground floor of City Hall
Talk to her first, then clear ten Spheda rounds as Monica and report back.
Ch.3
Restores your health
Milane
The Palm Brinks Weapon Shop
Build up Monica's starting sword and show her the result (a Chopper or Sand Breaker specifically).
After Gordon is housed
Weapon Shop staff in Sindain
Olivie
Palm Brinks Town Square, often at night
Take first place in any Finny Frenzy class, then speak to her.
Ch.2+
Sells every lure in the game
Parn
Parn's Studio
Bring Gold Paint — made from the golden eggs Elder Jurak yields once Sindain is restored.
Ch.3+
Grants an escape-from-dungeon ability
Pau
His house in the Veniccio area
Available after Shigura Village is saved — give him a Carrot.
Ch.5
Fills in maps for you
Priest Bruno
The Palm Brinks church
Solve the candle puzzle inside — blow the candles out in the correct order.
After Gordon is housed
Can revive you on death
Rufio
Near the lake, around the bridge by Dr. Dell's clinic
Photograph the moon at night and show him the picture.
After Gordon is housed
Bonus damage against Undead
Sheriff Blinkhorn
Outside the Police Station
Beat his footrace — sprint to the dock and back inside roughly two minutes.
After Gordon is housed
Unlocks the Monster Notes
Stewart
The entrance area of Max's house
He is bidding on a rare book — give him money twice, commonly cited as 1,000 Gilda per instalment.
After Gordon is housed
Heals you automatically
Recruitment Traps
Lin leaves the party permanently once the Chapter 3 boss dies. She is the only recruit the game will not give you a second chance at.
Lin is the only genuine permanent loss. She walks out of the party once the Chapter 3 boss is beaten, so sign her up while the Balance Valley arc is still running.
Nearly half the roster is gated behind one invisible switch — moving Gordon into a Sindain house. Mayor Need, Milane, Priest Bruno, Rufio, Sheriff Blinkhorn and Stewart all stay unrecruitable until that happens, which is why players who delay Sindain assume those characters are bugged.
Gordon himself is easy to stall on, because his trigger is a Geostone deep in Rainbow Butterfly Wood, not a conversation.
Parn depends on a chain: Sindain has to be finished so Jurak produces golden eggs, which become the Gold Paint he wants. Julia is invisible collateral.
Several recruits hide behind minigames rather than exploration — Olivie (Finny Frenzy), Sheriff Blinkhorn (timed run), Mena (ten Spheda rounds) and Fabio (a large Nonky). None are strictly missable, but all are easy to never encounter.
Mena and Milane are Monica-side tasks. Players who main Max can reach the endgame without ever triggering either.
The Firbit Conda joins automatically once you pick up your first Geostone and runs the Carpenterion; most lists do not count him among the 26.
How Georama Actually Works
Nothing can be built until you own its blueprint, and blueprints come from Geostones buried in the dungeons — roughly one per floor, each usually carrying several designs at once.
A raw Geostone does nothing. Hand it to the Carpenterion on the Blackstone One, which decodes the tablet into usable building plans.
Every part costs Gilda plus crafting materials on top of the blueprint. Those come from monster drops, stealing, chests and shops, and are mostly cheap.
Placing parts earns Culture Points, the score representing how developed a settlement is. Small decorations give far better CP per Gilda than buildings do — that is the efficient way to grind toward a threshold.
Each region also has a Polyn budget capping how much can physically exist there. Demolishing an object refunds its Polyn, and ordinary completionist play never hits the cap.
The heart of the system is the goal checklist you open in Georama mode. Each entry has sub-conditions: a minimum CP total, specific parts placed, and a named resident living in a suitable house.
A resident refuses to move in unless their own conditions are met — the right house type, sometimes a specific position, sometimes nearby scenery. Gordon insists on a tree beside his home; Claire wants the red Iron House and Donny the blue one.
A region reads 100% complete only when every entry is ticked simultaneously. It is a live check, not a permanent flag — tearing down a required building afterwards drops the percentage again.
Story progress and full completion are different things. You usually only need part of the checklist to unlock the next boss; the last few goals are optional and pay out the region's bonus reward.
Missing a Geostone is not fatal — dungeon floors stay permanently revisitable, so an uncollected stone simply waits. But a single missed stone can block several unrelated requirements at once.
Sindain — 100% Checklist (Ch.2)
Becomes in the future: Jurak Mall
Lay 15 River parts to reform the Forest Lake
Plant 10 trees including Eye Tree 1, Eye Tree 2 and the Nose Tree — arranged so the Nose Tree sits between the two Eye Trees to form Jurak's face
Raise a Straw House plus roughly three more dwellings
Ring the Firbit's home with about 15 fence sections
Reach roughly 50 Culture Points
Give Gordon's house a tree standing next to it or he will not move in
Jurak Gun — plain-looking but hits hard for that stage. Restoring the region also revives Jurak, which produces the golden eggs that become Gold Paint (needed to recruit Parn).
Balance Valley — 100% Checklist (Ch.3)
Becomes in the future: Starlight Temple ruins
The signature constraint: four floating plateaus rise and sink with the weight built on them, and all four must sit at equal height at once
Use trees as ballast — cheapest way to nudge a plateau without disturbing a finished building
Plant roughly 15 trees
Build a Church for Priest Bruno and a Chinese Stand for Ferdinand
Fit a Star Lamp to a Brick House and set out 4 Pot Torches
Reach roughly 40 Culture Points
Budget around 4,700 Gilda
Residents required: Priest Bruno (Church) · Stewart · Ferdinand (Chinese Stand) · Parn · Sheriff Blinkhorn · Lin
100% Reward
The Serpent Slicer, which later evolves into the Seven Branch Sword a checklist entry than the reward.
Veniccio — 100% Checklist (Ch.4)
Becomes in the future: Luna Lab coast
You are building over open sea — lay all 8 Pier Part blocks first and hang everything else off them
Construct 4 Iron Houses painted red, blue, purple and green (budget about 10 units of each paint)
Moor a Shop Boat near the coloured houses
Place 8 Luna Stone Lights and erect a Windmill
Add the Iron Shed, Iron Stairs and Pot Torch unlocked here
Reach roughly 80 Culture Points (a lower 30 CP sub-goal covers the Luna Lab foundation)
Budget around 6,100 Gilda — the most expensive ordinary region
Residents required: Claire (red Iron House) · Donny (blue Iron House) · Pau is already local
100% Reward
Nova Cannon — a Ridepod arm rated around 240 attack that fires large, mildly homing energy beams. One of the strongest mech parts available at that point.
Heim Rada — 100% Checklist (Ch.5)
Becomes in the future: Gundorada Workshop
Region-wide constraint: this is volcanic ground, so flammable parts are off the table — build in brick and iron only
Put up 3–4 solid houses, one of them stacked 3 blocks high using Stair Blocks
Mount a Work Crane and a Power Arm on rooftops
Install a Generator and erect a Windmill
Scatter 10 Pots and place 3 Iron Stands
Add the Brick Chimney ×2, Iron Chimney 2 and a Hardened Mud Pile
Reach roughly 100 Culture Points — the highest of any region
Budget around 3,700 Gilda
Residents required: Borneo · Cedric · Gerald · Erik (Sheriff Blinkhorn is listed here by one guide and in Balance Valley by others)
100% Reward
Holy Daedalus Blade — the greatsword left behind by Monica's father, one of the best melee weapons in the game. Completion also turns the site into the Gundorada Workshop and lets the endgame proceed.
Moon Flower Palace — 100% Checklist (Ch.7)
Structurally different from every other region: there is no written checklist. The game shows reference pictures of the finished palace and you place each piece where the image indicates
Uses only unique parts — no generic houses, and nothing imported from other regions
No residents are involved at all
Full manifest: 2 Camellia Trees, 6 Flower Beds, 1 Fountain, 1 Hall of Sorrow, 16 Moon Columns, 1 Palace Stairs, 16 Petal Streams, 6 Roads, 8 Roads to Golbad, 2 Silver Benches, 1 Stardust Pond, 2 Starlight Stairs
Cost is fixed and exact at 8,860 Gilda — the priciest Georama in the game
Blueprints come from Geostones in the late-game star-path dungeons
Residents required: None — this region is purely architectural
100% Reward
Sun Stone and Moon Stone, a pair of elemental enhancement items for weapon building, plus the cutscene revealing Emperor Griffon's origins.
Georama Tips
Sweep every dungeon floor completely before taking the exit. One Geostone per floor is the rule, and a skipped floor is the single most common reason a Georama refuses to hit 100%.
Open the goal checklist before you start building, not after. Building blind almost always means demolishing and rebuilding later.
Read each resident's move-in conditions individually — people refuse houses that are the wrong type, and some have environmental demands.
When you need raw Culture Points, buy cheap decorations rather than more buildings. They deliver far better CP per Gilda and cost less Polyn.
In Balance Valley, build the mandatory structures first and level the plateaus last. Trees make excellent adjustable ballast.
In Veniccio, lay all 8 pier blocks before anything else, and stock four colours of paint first — running dry mid-build stalls the region.
In Heim Rada, treat wood as forbidden and commit to brick and iron from the first placement.
Save your money across chapters. Veniccio (~6,100) and Moon Flower Palace (a fixed 8,860) are far more expensive than the early regions.
Do not demolish finished regions to salvage parts — completion is evaluated continuously, so removing a required structure retroactively drops that region out of 100%.
Finish Sindain promptly even though the story only demands part of it. Completing it revives Jurak, which produces the golden eggs that become Gold Paint, which is the only way to recruit Parn and Julia.
Photograph everything. Several recruitments and a great many invention ideas for Georama parts run through the camera.
Inventions & Photography
The invention system is central to Dark Cloud 2. Max takes photos of objects in the world to unlock Ideas. Each Idea is a recipe combining three photographed subjects; combining the right three photos creates a new invention. There are over 100 inventions to discover across weapons, Ridepod parts, consumables, and amulets. The A True Visionary trophy requires inventing everything.
Dark Cloud 2 - The invention combination process
MISSABLE: Many photos and Scoops are one-time only. Take photos of everything in every chapter to avoid missing Ideas.
Weapons — Max (Wrenches / Hammers)
Wrenches & Hammers
Swipe the table sideways
Invention
Photo 1
Photo 2
Photo 3
Smash Wrench
Rock
Constructor
Star Lamp
Stinger Wrench
Air Cleaner
Pipe
Wheel
Poison Wrench
Deer Horn
Mushroom
Sulfur-Colored Juice
Cubic Hammer
Dresser
Gold Store
Work Equipment
Digi Hammer
Computer
Constructor
Decorative Lights
Heavy Hammer
Drum Can
Paznos / Gigantor Paznos
Power Arm
Weapons — Max (Guns)
Guns
Swipe the table sideways
Invention
Photo 1
Photo 2
Photo 3
Trumpet Gun
Fountain
Rapper
Tree
Bell Trigger
Fountain
Phone
Tree
Grenade Launcher
Chimney
Egg
Fountain
Magic Gun
Fountain
Moon Crystal
The Moon / The Sun
Star Breaker
Chimney
Fire House
Phantom Memo Eater
Wild Cat
Charging Ram
Rifle
Work Equipment
Dark Viper
Night Stalker
Puppet
Shingala Rifle
Question Shooter
Brave Little Linda
Fountain
Neo-Projector
Soul Breaker
Energy Pipe
Geyser
Transmission Device
Steal Gun
Work Crane
Fountain
Book
Sexy Panther
Elena's Portrait
Flower Bathed in Light
Rifle
Twin Buster
Flower Chandelier
Jurak's Nose
Rifle
Weapons — Monica (Swords)
Swords
Swipe the table sideways
Invention
Photo 1
Photo 2
Photo 3
Bone Rapier
Bone
Cloth
Withered Jurak
Wise Owl Sword
Charging Ram
Grass
Tree
Sand Breaker
Hand-Sewn Silk
Flag
Horn Spinning Ivanoff
Ruler's Sword
Figure
Iron Maiden
Paznos / Gigantor Paznos
Weapons — Monica (Brassards / Boots)
Brassards & Boots
Swipe the table sideways
Invention
Photo 1
Photo 2
Photo 3
Bandit Brassard
Clock
Gold Store
Show Window
Leather Shoes
Chair
Cloth
Gyumo's Yell
Wing Shoes
Cloth
Parasol
Windmill Feather
Work Shoes
Cloth
Constructor
Ladder
Dragon Shoes
Cloth
Runaway Dragon
Waterfall
Clown Shoes
Cloth
Clown Robo's Attack
Parasol
Knight Boots
Belt
Shield
The Moon
Metal Boots
Belt
Drum Can
Work Robot
Wing Boots
Belt
Weather Vane
Windmill Feather
Spike Boots
Moon Crystal
Parasol
Pumpkin
Princess Boots
Flower Chandelier
Moon Flower
Palace Waterfall Curtain
Panther Boots
Bone
The Moon
The Ultimate Gaspard
Ridepod Parts — Bodies
Bodies
Swipe the table sideways
Invention
Photo 1
Photo 2
Photo 3
Drum Can Body
Chair
Drum Can
Lamp
Clown Body
Cup
Paints
Parasol
Milk Can Body
Chimney
Milk Can
Peeping Pole
Wooden Box Body
Giant Yorda Tree
Hmmm! Jurak
Wooden Box
Samurai Body
Cedric's Shop Sign
Crescent-Shaped Light
Telescope
Refrigerator Body
Refrigerator
Small Generator
Traffic Light
Super-Alloy Body
Gold Store
Search Light
Work Equipment
Sun and Moon Armor
Electric Sesame
The Moon
The Sun
Ridepod Parts — Packs
Packs
Swipe the table sideways
Invention
Photo 1
Photo 2
Photo 3
Energy Pack
Belt
Milk Can
Pipe
Energy Pack (Barrel)
Barrel
Belt
Tree
Bucket Pack
Mailbox
Trashcan
Warehouse
Cleaner Pack
Air Cleaner / Can Belt / Water Tank
Vacuum / Vacuum Bag
—
Energy Pack (Urn)
Energy Pipe
Generator
Pot
Triple-Urn Pack
Flower Chandelier
Light of Luna Stone
Pot
Ridepod Parts — Legs
Legs
Swipe the table sideways
Invention
Photo 1
Photo 2
Photo 3
Iron Leg
Constructor / Fence
Phonograph / Old-Style Robot Saw
—
Caterpillar
Car
Cart
Wheel
Clown Foot
Clown Robo's Attack
Egg / Eyeball
Scale / Paints
Bucket Leg
River Can / Trashcan
Well / Water Tank
—
Roller Foot
Freight Train
Rotating Sign / Ventilation Wheel
—
Multi Feet
Deer Horn
Post
Work Robot
Buggy
Belt
Car System
5WP2
Propeller Leg
Cart
Fan
Windmill Feather
Jet Hover
Candle
Fire House
Relaxation Fountain
Ridepod Parts — Arms (40 total)
Each arm type has 4 versions (I–IV), each invented with a unique 3-photo combination. See the Ridepod tab for capacity and availability details.
Note: Samurai Arm II formula is not documented. It may require upgrading from Samurai Arm I or have a unique combination not yet documented.
Consumables
Consumable Items
Swipe the table sideways
Invention
Photo 1
Photo 2
Photo 3
Bread
Fireplace
Polly's Bakery Sign
Wheat Flour
Cheese
Cafe Sign
Lao Chao's Trademark
Milk Can
Premium Chicken
Burning Dragon Fire
Pork Dumpling
Special Peking Duck
Double Pudding
Find the Golden Egg!
Milk Can
Wheat Flour
Tasty Water
Bottle
Fountain
Waterfall
Antidote Drink
Bottle
Dell Clinic Sign
Well
Soap
Laundry
Palm Tree
Waterfall
Holy Water
Bottle
Holy Emblem
The Sun
Stamina Drink
Bottle
Chinese Lantern
King Mardan
Escape Powder
Ancient Mural
Elevator
Transmission Device
Resurrection Powder
Fruit
Hot Springs
Spirit Lotus Flower
Level Up Powder
Sun Chair
Sun Table
The Sun
Bomb
Candle
Pot
Weapon Shop Sign
Improved Bomb
Candle
Coal
Egg
Final Bomb
Candle
Cinders
Oven
Lightspeed
Candle
Flower
Rock
Gift Capsule
Bone
Letter
Pot
Aquarium
Fountain
Window
Wooden Box
Lure Rod
Fish
Lafrescia Stem
River
Treasure Chest Key
Golden Door
Labyrinth Door
Sun Chamber Gate Keeper
Amulets
Amulets
Swipe the table sideways
Invention
Photo 1
Photo 2
Photo 3
Antidote Amulet
Bed
Dell Clinic Sign
Holy Emblem
Anti-Goo Amulet
Laundry
Ruler of the Pond
Waterfall
Anti-Curse Amulet
Hmmm! Jurak
Holy Emblem
Saint's Writings
Non-Stop Amulet
Clock
Monument
Starglass
Anti-Petrify Amulet
Clock
Jurak's Eye
Morning Sun
Weapon Upgrade System
Dark Cloud 2 features a deep weapon upgrade system. Each character wields a right-hand and a left-hand weapon. Weapons gain ABS (experience) from kills, level up to earn Synthesis Points, and can be Built Up into stronger forms once their stats meet thresholds. The pages below detail EVERY weapon for both Max and Monica, organized by hand, with complete build-up trees and evolution paths.
Weapons gain ABS (experience) from kills. The weapon that deals the final blow gets the ABS.
Leveling up grants Synthesis Points.
Spectrumize items to create Synth Spheres.
Attach Synth Spheres to weapons to raise their stats.
Build Up: when a weapon's stats meet the requirements, it transforms into a stronger version.
WHP (Weapon Hit Points) decrease with use — repair with Repair Powder.
WARNING: If a weapon breaks (WHP reaches 0), you lose its upgrade progress. Always carry Repair Powder.
Key upgrade tip: Spectrumize feeder weapons at +5 for 60% stat transfer. Buy Battle Wrenches from Milane, level to +5, synth crystals, spectrumize for +11 all stats.
Weapon Categories Overview
The table below summarizes all weapon categories by character and hand. Color coding in the trees below: green = starting weapon, blue = mid-tier, gold = ultimate weapon.
Swipe the table sideways
Character
Hand
Category
Ultimate Weapon
# of Weapons
Max
Right
Wrenches & Hammers
LEGEND / Grade Zero
~20
Max
Left
Guns (Pistol/Beam/Grenade/Machine)
Supernova / Last Resort
~25
Monica
Right
Swords
Island King
~45
Monica
Left
Brassards / Armlets
5 Star Armlet / Love
~20
Weapon Abilities Reference
Many weapons carry special abilities. These affect combat in various ways:
Steal — Chance to steal an item from the enemy on hit.
Heal — Recovers the wielder's HP on hit.
ABS Up — Slower WHP loss / more ABS gain.
Durable — Slower WHP loss, weapon lasts longer.
Critical — Higher critical hit chance.
Stop — Chance to stop the enemy (freeze movement).
Dark — Adds dark element damage.
Wealth — Earn more gilda from defeated enemies.
Poison Absorb — Absorbs poison / cures poison on hit.
Max’s Right-Hand Weapons (Wrenches & Hammers)
Max's right-hand weapons are wrenches and hammers, used for melee. The main build-up path leads from the starting Battle Wrench all the way to the ultimate LEGEND. Several invented wrenches/hammers provide alternative options with special abilities.
Main Path: Battle Wrench → LEGEND
Battle Wrench
Starting weapon / buy from Milane (150 gilda). Also builds from Wrench (base).
Tier 1 (20-36 atk)
↓
branches into:
True Battle Wrench
Build-up from Battle Wrench (top option). Buy Battle Wrenches from Milane, level to +5, upgrade here.
Tier 1
Drill Wrench
Attack 15, Smash 9, Beast 5. Build-up from Battle Wrench (bottom) OR True Battle Wrench.
Tier 1
Turtle Shell Hammer
Build-up from Battle Wrench. Hammer made from a turtle's shell.
ULTIMATE hammer. Build-up from Heavy Hammer. Defeat Evil Nail, Guardia and Lancer.
Grade Zero
Attack 300. Rolls attack points all the way around to zero again.
ULTIMATE wrench. Build-up from Big Bucks Hammer OR Sigma Breaker. The alternative ultimate to LEGEND.
Support character: Cedric gives +1 synth point per level for wrenches.
Invented Wrenches & Hammers (Alternatives)
These standalone weapons are obtained via invention (combining three photos). Some carry useful special abilities:
Handy Stick: The starting Spheda club obtained in Balance Valley (Ch.3). Cannot be built up or obtained in any other way. Can be used as a melee weapon but is inferior to wrenches/hammers.
Albatross— Recipe: Fire Squall + Geyser + Tree • Ch.5 • 1260 gilda
Max’s Left-Hand Weapons (Guns)
Max's left-hand weapons are guns. There are several gun types: pistols (standard), beam guns (shoot lasers, effective vs. enemies strong against bullets), machine guns (fire faster, less damage per shot), and grenade guns (fire slower, more powerful). The main path leads to the ultimate beam gun Supernova.
Main Path: Classic Gun → Supernova (Pistol/Beam)
Classic Gun
Starting weapon (from Donny). Buy 150 gilda.
Tier 1 (24-44 atk)
↓
branches into:
Trumpet Gun
Attack 14, Cyclone 11
Tier 1. Build-up from Classic Gun. Invent Ch.1, 260 gilda.
Dryer Gun
Pistol. Build-up from Classic Gun.
Tier 1. Alternative to Trumpet Gun.
↓
from Trumpet Gun:
Bell Trigger
Attack 22, Cyclone 19, Exorcism 14
Tier 2. Build-up from Trumpet Gun (top). Invent Ch.1, 620 gilda. Needed to recruit Gerald.
Grenade Launcher
Grenade path entry.
Tier 2. Build-up from Trumpet Gun. Invent Ch.1, 520 gilda. Buy from Gerald 500 gilda. (See Grenade Path below)
ULTIMATE beam gun (500 atk). Build-up from Steal Gun. Defeat Moonflowephant, Vanguard Mk 2 and Diamond.
Alternative entry to Question Shooter: The Jurak Gun (obtained from 100% Sindain Georama as a gift from Jurak) is a very powerful beam gun if obtained early in Ch.2, and builds into the Question Shooter → Steal Gun → Supernova path.
Support character: Gerald gives +1 synth point per level for guns.
Grenade Path (Alternative)
Grenade guns fire slower projectiles but can be more powerful depending on the enemy. This path branches off from the Trumpet Gun:
Grenade Launcher
Grenade path entry.
Build-up from Trumpet Gun. Invent Ch.1, 520 gilda. Buy from Gerald 500 gilda.
↓
branches into:
Dark Viper
Attack ~60. Has dark-element grenade shots.
Build-up from Grenade Launcher. Invent Ch.4, 840 gilda. Recipe: Night Stalker + Puppet Shingala + Rifle.
Twin Buster
Tier 5 grenade gun.
Build-up from Grenade Launcher. Invent Ch.7, 2500 gilda. Recipe: Flower Chandelier + Jurak's Nose + Rifle.
Sigma Bazooka
Tier 5 grenade gun.
Build-up from Grenade Launcher.
Machine Gun Path (Star Breaker → Last Resort)
Machine guns fire faster but deal less damage per shot. They branch from Bell Trigger and have their own complete build-up path to the ultimate machine gun Last Resort:
Star Breaker
First machine gun, fully automatic.
Tier 1 (60 atk). Build-up from Bell Trigger. Invent Ch.3, 1470 gilda.
↓
Wild Cat
Machine gun.
Tier 2. Build-up from Star Breaker. Invent Ch.4, 2550 gilda.
↓
Sexy Panther
Machine gun.
Tier 3. Build-up from Wild Cat. Invent Ch.7, 13100 gilda.
↓
Desperado
Machine gun.
Tier 4. Build-up from Sexy Panther. Cannot be bought or invented.
↓
Last Resort
Attack 301. Ultimate machine gun.
ULTIMATE. Build-up from Desperado. Cannot be bought or invented. Last weapon of the machine gun path.
Special & Invented Guns
These standalone guns are obtained via invention or Georama completion:
Jurak Gun— 100% Sindain Georama (gift from Jurak) • Ch.2 • Georama rewardBeam gun, very powerful early
Monica’s Right-Hand Weapons (Swords)
Monica's right-hand weapons are swords. There are multiple build-up paths leading to the ultimate Island King (500 attack, the highest-attack sword in the game). The main path runs from the starting Royal Sword/Long Sword, while the Holy Daedalus and Serpent Slicer paths offer alternative routes.
ULTIMATE (500 atk, highest attack sword in game). Build-up from Shining Bravado (top option). Defeat Lancer, S. Club and S. Joker.
Support character: Milane gives +1 synth point per level for swords.
Holy Daedalus Path (Alternative → Island King)
This prestigious path starts from the Holy Daedalus Blade, obtained by completing the Heim Rada Georama 100% (King Raybrandt's sword). It leads to the Sword of Zeus and ultimately the Island King:
Holy Daedalus Blade
Attack ~100.
Tier 3. From 100% Heim Rada Georama. King Raybrandt's sword.
↓
Ruler's Sword
Attack 123-125. Has ABS Up ability.
Tier 4. Build-up from Brave Ark or Holy Daedalus Blade. Can invent Ch.5. Recipe: Figure + Iron Maiden + Paznos, 4400 gilda.
↓
branches into:
Cross Heinder
Attack 150-170. Has Durable ability.
Tier 5. Build-up from Ruler's Sword.
Chronicle Sword
Attack 150-170. Has Stop ability.
Tier 5. Build-up from Ruler's Sword.
↓
Sword of Zeus
Attack 300.
Tier 6. Build-up from Cross Heinder. Requires defeating Fire Drake, Ice Drake, Thunder Ghost.
↓
Island King
Attack 500 (displayed as 135 + modifiers).
ULTIMATE. Build-up from Sword of Zeus. Requires defeating Lancer, S. Club, S. Joker.
Serpent Slicer Path (Alternative)
The Serpent Slicer is obtained from 100% Balance Valley Georama. It is the only sword that can kill the Killer Snake enemy, and branches into several options:
Serpent Slicer
Attack 89-112.
Tier 3. From 100% Balance Valley Georama. Only sword that can kill Killer Snake.
↓
branches into:
7 Branch Sword
Attack 150-170.
Tier 5. Build-up from Serpent Slicer.
Tsukikage
Attack 123-125.
Tier 4. Build-up from Serpent Slicer.
Sargatanas
Attack 123-125. Has Dark ability.
Tier 4. Build-up from Serpent Slicer.
Complete Sword List by Tier
Every sword in the game, organized by attack tier. Abilities are noted where applicable:
Tier
Sword
Notes / Ability
Tier 1 (34-46 atk)
Royal Sword
—
Long Sword
Monica's favorite
Gladius
—
Baselard
—
Bastard Sword
—
Cliff Knife
—
Broad Sword
—
Bone Rapier
Poison (invent Ch.2)
Tier 2 (60-62 atk)
Mardan Sword
—
Shamshir
—
Sax
—
Chopper
—
Sand Breaker
Fragile (invent Ch.3)
Kitchen Knife
—
Evilcise
Poison
Tier 3 (89-112 atk)
Wise Owl Sword
Poverty (invent Ch.3)
Dusack
—
Brave Ark
—
Holy Daedalus Blade
Heim Rada Georama
Antique Sword
Stop
Choora
—
Serpent Slicer
Balance Valley Georama
Drain Seeker
Poison Absorb
Garayan Sword
—
Tier 4 (123-125 atk)
Claymore
—
Ruler's Sword
ABS Up (invent Ch.5)
Sun Sword
—
Halloween Blade
—
Tsukikage
—
Lamb's Sword
—
Small Sword
Critical
Sargatanas
Dark
Tier 5 (150-170 atk)
Cross Heinder
Durable
Chronicle Sword
Stop
Big Bang
—
Shining Bravado
Heal
Ama no Murakumo
—
Maneater
—
Dark Excalibur
Dark
Mardan Garayan
Heal
7 Branch Sword
—
Tier 6 (300 atk)
Sword of Zeus
Requires Fire/Ice/Thunder Drake defeats
Chronicle 2
Critical
Atlamillia Sword
—
Muramasa
—
7th Heaven
—
Dark Cloud
—
Griffon Fork
—
Tier 7 (500 atk)
Island King
ULTIMATE — highest attack sword in game
Invented Swords
These swords are obtained via invention (combining three photos):
Bone Rapier— Bone + Cloth + Withered Jurak • Ch.2 • 1350 gildaPoison
Ruler's Sword— Figure + Iron Maiden + Paznos • Ch.5 • 4400 gildaABS Up
Monica’s Left-Hand Weapons (Brassards / Armlets)
Monica's left-hand weapons are brassards and armlets. There are two ultimate weapons: the 5 Star Armlet (main path) and Love (alternative path). Multiple build-up routes converge on these ultimates.
Main Path: Magic Brassard → 5 Star Armlet
Magic Brassard
Attack 35-44. Starting weapon.
Tier 1
↓
branches into:
Bandit Brassard
Attack 22, Cyclone 18. Has Steal ability.
Tier 1. Build-up from Magic Brassard (bottom option). Buy 700 gilda Ch.3. Also invent: Clock + Gold Store + Show Window, Ch.1, 8100 gilda.
Gold Brassard
Tier 1.
Build-up from Magic Brassard (top option).
↓
from Bandit Brassard:
Thorn Armlet
Attack 32, Cyclone 28. Has Poverty + ABS Up abilities.
Tier 6. Requires defeating S. Heart, Miss Gourgon, Silver Gear. Then → Angel Shooter → Love.
Complete Brassard List by Tier
Every brassard/armlet in the game, organized by attack tier:
Tier
Brassard
Notes / Ability
Tier 1 (35-44 atk)
Magic Brassard
Starting weapon
Bandit Brassard
Steal ability
Gold Brassard
—
Tier 2 (60-88 atk)
Crystal Brassard
—
Thorn Armlet
Poverty + ABS Up abilities
Tier 3 (110 atk)
Platinum Brassard
Wealth ability
Pocklekul
—
Tier 4 (125 atk)
Athena's Armlet
—
Destruction Brassard
—
Moon Armlet
—
Spirit Brassard
—
Tier 5 (150 atk)
Goddess Brassard
—
Satan Brassard
—
Star Armlet
—
Sun Armlet
—
Tier 6 (300 atk)
Angel Shooter
—
Mobius Bangle
Durable ability
Tier 7 (500 atk)
Five-Star Armlet
ULTIMATE
Love
ULTIMATE
Invented Brassard
The Bandit Brassard can also be obtained via invention (it carries the Steal ability):
Bandit Brassard— Clock + Gold Store + Show Window • Ch.1 • 8100 gildaSteal
Weapon Upgrade Tips
Keep weapons balanced across all stats — Build Up requires multiple thresholds.
Check the Build Up screen regularly — stats shown in red still need work.
Use elemental weapons against enemies weak to that element (Flame vs. ice, Chill vs. fire, etc.).
Save before Build Up — the transformation cannot be undone.
Spectrumize unwanted items to stockpile Synth Spheres.
Repair Powder is essential — carry plenty, especially in long dungeons.
Support characters give +1 synth point per level: Cedric (wrenches), Gerald (guns), Milane (swords), Lin (armlets).
Synthesize crystals onto feeder weapons at +5, then spectrumize for 60% stat transfer.
Buy Battle Wrenches from Milane, level to +5, upgrade to True Battle Wrench, level to +5, synth crystals, spectrumize for +11 all stats at cost of 5 synth points.
Ridepod upgrades are also critical — Nova Cannon is the best weapon for late game bosses.
Use Level Up Powder (invent it!) on fully built weapons to push them to maximum power.
Beam guns (Question Shooter, Steal Gun, Supernova, Jurak Gun) shoot lasers instead of bullets — more effective against enemies strong against normal guns.
Machine guns (Star Breaker, etc.) fire faster but deal less damage per shot.
Grenade guns fire slower but can be more powerful depending on the enemy.
Photos & Scoops
Photography is central to Dark Cloud 2's invention system. Max takes photos of objects and enemies to unlock Ideas (recipes for inventions). Scoops are special photos of enemies performing unique actions — they're worth more points and are often missable. The Take a Picture, It Will Last Longer trophy requires collecting ALL Ideas and Scoops.
Photography tips: Normal photos give 2 points each, scoops give 5 points. You level up your photography skill every 100 points. Take photos of EVERYTHING in every chapter!
MISSABLE WARNING: Several scoops are one-time only and cannot be reobtained. Photos marked with MISSABLE below must be taken at the right time or they're gone forever. Photos marked SPECIAL have time-limited availability.
Photography Level Rewards from Donny
Each photography level requires 100 points to advance. Ideas give 2 points each, scoops give 5 points. Talk to Donny after reaching each level to claim your reward.
Total: 747 max photography points available (241 ideas × 2 + 53 scoops × 5). You can miss some photos and still reach Level 8.
Photo Checklist Summary
Total photos: 294 | Scoops: 53 | Missable/Special: 19
Legend:SCOOP = special enemy action photo (5 pts). MISSABLE = one-time only, cannot be reobtained. SPECIAL = time-limited availability.
Chapter 1 — Palm Brinks
86 photos in this chapter.
Photo Name
Missable?
Location / Description
auto book reader
No
In Cedric's Shop in Palm Brinks. A stand with a book with hands turning pages.
bar sign
No
A large sign on the roof of the Bar in Palm Brinks.
barrel
No
In Cedric's Shop in Palm Brinks. A wooden barrel.
belt
No
Sheriff Blinkhorn outside the Police Station. Zoom in on his belt.
bench
No
In the Police Station in Palm Brinks. A bench near the door.
binoculars
No
In Cedric's Shop. Unusual binoculars on the desk by the front door.
Blackstone One
SPECIAL
In the Train Station. Picture of the train on the left. Available Ch.1-5, not Ch.6-7, again Ch.8.
book
No
In Morton's Item Shop. The book on the counter.
bottle
No
In the Bar. The bottle inside the car the bartender is standing in.
bread
No
Inside Polly's Bakery. Bread on the table to the right of the door.
car
No
In the Bar. The bartender is standing in it.
cart
No
In Cedric's Shop. A wooden two-wheeled cart near boxes and barrels.
Cedric's Shop Sign
No
Above the entrance to Cedric's Shop. Held by two iron clamps.
chair
No
In the Bar. It is a chair.
chandelier
No
In Morton's Item Shop. A light near the ceiling.
chimney
No
On the roof of Polly's Bakery.
clock
No
A small alarm clock on a desk in Cedric's Store.
cloth
No
In Parn's Studio. The piece of cloth on the floor.
constructor
No
In Cedric's Shop in Palm Brinks. A constructor machine on the workbench.
cup
No
In the Train Station. Next to the bartender on the counter.
drawbridge
No
In Palm Brinks. A large wooden bridge.
evening sun
No
Stand in the street outside Cedric's Shop, take picture of the sun from 4:30-6:15 PM.
fan
No
In Cedric's Shop. Near the wall on the right facing away from the door.
flag
No
Orange and yellow flags hanging in front of Cedric's Shop.
flower
No
Inside Polly's Bakery on top of a barrel.
flower chair
No
In the Train Station. A large metal flower with a seat around the base.
fountain
No
In Palm Brinks outside the Bar, Cafe, and Train Station.
freight train
No
In the Train Station. The train on the right.
gold store
No
In the Weapon Shop. The curved doors behind Milane.
iron bridge
No
In the Underground Channel on the Channel Exit floor.
iron maiden
No
In the Weapon Shop. Down both flights of stairs.
ladder
No
In the Bar. A few stairs above the car. Stand near the front of the car and aim up.
lamp
No
A blue light on the wall of Milane's Weapon Shop.
light
No
A blue light near the ceiling of Milane's Weapon Shop.
mailbox
No
A red mailbox near the entrance to Milane's Weapon Shop.
manhole
No
A manhole near the entrance to Cedric's Shop. Entrance to the Underground Channel.
milk can
No
Gray cans outside Polly's Bakery.
morning sun
No
Stand outside Cedric's Shop, take picture of the sun from 6:00-8:30 AM.
Morton's Sundries Sign
No
Small open sign above the pumpkin next to the entrance to Morton's Item Shop.
old-style robot
No
The robot near the door inside Cedric's Shop.
oven
No
In Polly's Bakery. Can be hard to take since Polly is in the way.
painting
No
In Morton's Item Shop. A painting on the wall, looks like a person screaming.
parasol
No
Near the drawbridge, a table with an umbrella above it.
phonograph
No
In Morton's Item Shop. On a shelf behind Morton. A record player.
piano
No
In the Bar.
pipe
No
On the roof of Cedric's Shop.
Police Sign
No
The sign on top of the Police Station.
Polly's Bakery Sign
No
The sign next to the entrance to Polly's Bakery.
post
No
The stone pillars inside the Police Station.
pot
No
On the shelves behind the girl in the shop stall in the Train Station.
pumpkin
No
Near the door to Morton's Item Shop.
railroad
No
In the Train Station. The railroad tracks.
rapper
No
In Cedric's Shop. A brass horn along the right wall.
refrigerator
No
In Morton's Item Shop. A blue refrigerator up the stairs.
register
No
In Cedric's Shop. On the counter near the door.
river
No
Near the Drawbridge. It is a river.
shield
No
In Milane's Weapon Shop. A large shield on the wall.
show window
No
In Milane's Weapon Shop. The lighted window down the stairs.
shrubbery
No
The plants inside the Police Station.
sign
No
Any of the blank signs on the houses in Palm Brinks.
staircase
No
Inside Cedric's Shop. The first set of stairs.
streetlight
No
An iron stand with 2 lights near the top near the Police Station.
sunshade
No
Any of the striped shades over doors and windows of houses.
table
No
Inside Cedric's Shop. A round table near the bed.
The Moon
No
Stand outside Cedric's Shop and take a picture of the Moon.
The Sun
No
Stand outside Cedric's Shop, take picture of the sun from 8:31 AM-4:44 PM.
tiny hammer
No
In Cedric Shop. On the right wall, partly behind the fan. A very large hammer.
traffic light
No
Above the drawbridge. A traffic light with red and green lights.
trashcan
No
2 gray trashcans near the entrance to Cedric's Shop.
tree
No
Near the drawbridge on the right.
vacuum
No
Inside Cedric's Shop. On a desk down the stairs.
vacuum bag
No
Inside Cedric's Shop. The trashcan next to the auto book reader.
vegetable/fruit
No
Inside Morton's Item Shop. The large watermelon in the refrigerator.
vending machine
No
Right next to the door inside Morton's Item Shop.
waterfall
No
In the Underground Channel. Water falling from pipes on the Channel Exit floor.
weapon
No
In Milane's Weapon Shop. The weapons inside the boxes below the stairs.
Weapon Shop Sign
No
The small circular sign near the entrance to Milane's Weapon Shop.
weight gauge
No
The scale near the door inside Cedric's Shop.
wheat flour
No
In Morton's Item Shop. White bags near the door.
wheel
No
In the Bar. A large wooden wheel on the wall near the bartender.
window
No
On any of the houses. It is a window.
wooden box
No
In Cedric's Shop. A large wooden box.
Brave Little Linda
MISSABLE
In the Underground Channel. During the Linda boss fight, switch to Max and wait for her to stomp. Take a picture of the stomp. ONE CHANCE ONLY - boss fight!
Clown Robo's Attack
MISSABLE
In the Underground Channel. During the Halloween boss fight, stand back and take a picture as it fires a missile from its eye. ONE CHANCE ONLY - boss fight!
Baron's Hangin' On
No
In the Underground Channel. Find a Vanguard enemy and take a picture when it does its flip attack (not the spinning attack, the close-range flip).
Night Stalker
No
In the Underground Channel. Find a Night Stalker enemy and take a picture during its spinning spiral attack.
Chapter 2 — Sindain and New Areas in Palm Brinks
65 photos in this chapter.
Photo Name
Missable?
Location / Description
bed
No
In Parn's Studio. It is a bed.
boat
No
Across the drawbridge, the boat is on the pond next to a pier.
bone
No
In Dell Clinic. Take a picture of the skeleton.
bridge
No
An arched stone bridge near the gate to Max's House.
candle
No
In the Church across the drawbridge. It is a candle.
coal
SPECIAL
In the engine of Blackstone One (Sindain station). Available Ch.2-5, not Ch.6-7, again Ch.8.
curtain
No
In Parn's Studio. Pieces of cloth hanging on the walls.
Dangerous Pumpkin
No
In Rainbow Butterfly Wood. Find a Pumpkinhead and take his picture when spinning his spear.
deer horn
No
In City Hall. Mayor's Office, the horns on the deer head on the wall.
Dell Clinic Sign
No
Across the drawbridge, sign on the house next to the pond with a duck's head.
drawer
No
In Max's House. Father's room, bookcase with glass front next to fireplace.
dresser
No
In Max's House. Max's Room second floor, the wardrobe near the door.
egg
No
In Dell Clinic. Inside a nest on a high shelf.
Elena's Portrait
No
In Max's House. Father's room, over the bed. Only visible in first person view.
eyeball
No
In Dell Clinic. The giant eyeball in the Clinic.
fence
No
The fence around Max's House.
figure
No
In Parn's Studio. One of the statues.
Find the Golden Egg!
No
In Future Sindain. Complete the last Georama condition, then find golden eggs in a nest.
fire house
SPECIAL
In the engine of Blackstone One (Sindain station). Available Ch.2-5, not Ch.6-7, again Ch.8.
fireplace
No
In Max's House. Father's room, take picture of the fireplace.
fish
No
In Max's House kitchen. Lying on a table.
Floating Earth Digger
No
In Rainbow Butterfly Wood. Find a Moler and take his picture while he is jumping.
fruit
No
In Sindain. Build the Fruit Tree Georama piece and take a picture of the fruit.
gate
No
The gate of the fence around Max's House.
glasses case
No
In the Town Hall. Mayor's office second floor, case with all the pairs of glasses.
grass
No
In Sindain on the ground. Look for darker patches of grass.
Gyumo's Yell
No
In Rainbow Butterfly Wood. Find a Gyumo and take his picture when he howls.
hammock
No
Inside the Firbit's House in Sindain.
Hmmm! Jurak
No
In Future Sindain. Revive Elder Jurak and take his picture.
hoe
No
In Morton's House. Upstairs, a row of hoes along one wall.
Jurak Arms Sign
No
In Future Sindain. Restore the Weapon Shop and take picture of the sign above it.
Jurak's eye
No
In Sindain. Build one of the eye tree Georama pieces.
Jurak's nose
No
In Sindain. Build the nose tree Georama piece.
King Mardan
MISSABLE
In Rainbow Butterfly Wood. Fish in the large swamp with Poison Apple on the Fish Master Swamp floor. MISSABLE - only available during Ch.2!
Lafreccia Stem
No
In Rainbow Butterfly Wood. Picture of the giant flower you grow on the Rainbow Falls floor.
letter
No
In Max's House. Servant's room upstairs, an envelope on a desk.
log
No
In Sindain on the ground. A wooden log.
Master Utan
No
In Rainbow Butterfly Wood. Take picture of Master Utan on the Fish Monster Swamp floor.
monument
No
Across the drawbridge, near the pond. A large white monument.
mushroom
No
In Future Sindain. Restore the Glowing Mushrooms and take picture.
Mushroom Burgers Sign
No
In Future Sindain. Restore the Eatery and take picture of the sign over it.
paints
No
In Parn's Studio. An open paint can on the floor near the stairs.
palm tree
No
In Max's House hallway. The trees with Granny Rosa.
Parn's Studio sign
No
The sign above the door to Parn's Studio.
phone
No
In Max's House. Servant's quarters upstairs. Only visible in first person view.
pier
No
The wooden pier on the pond across the drawbridge.
pot torch
No
In Sindain. Build the Pot Torch Georama piece.
quartz
No
In Future Sindain. Restore the Weapon Shop, take picture of the large white crystal above it.
R. Butterfly United
MISSABLE
In Rainbow Butterfly Wood. Take picture of the butterfly reuniting on the Rainbow Falls floor. MISSABLE - one-time during boss fight!
rifle
No
In Max's House. Father's room, the gun hanging over the door.
robot
No
In Max's House. Max's room second floor, take picture of the robot.
rock
No
In Sindain on the ground. It is a rock.
rug
No
In the Church. The rug on the floor between the rows of benches.
Ruler of the Pond
No
Across the drawbridge, on the pier. Midnight-4:00 AM. White fog visible only in photos.
saw
No
In Dell Clinic. On the floor by the dentist-like chair.
Spooky Grass Smile
No
In Rainbow Butterfly Wood. Find a Man-Eating Grass and take picture when chewing/laughing.
stained glass
No
In Max's House. A window high above the front door.
stand
No
In City Hall. Mayor's office second floor, a small lamp on his desk.
stove
No
In Max's House kitchen. The large fireplace.
telescope
No
In Max's House. Max's room second floor.
Tore's Nap
No
In Rainbow Butterfly Wood. Find a Tore and take his picture before he starts to move.
water wheel
No
In Sindain. Build the Waterwheel Georama piece on a river.
withered Jurak
No
In Sindain. The large withered tree that water is coming out of.
wooden bookshelf
No
In the Firbit's House in Sindain. On the tree, has books on it.
Woody Tailor Sign
No
In Future Sindain. Restore the Tailor Shop and take picture of the sign above it.
Chapter 3 — Balance Valley
41 photos in this chapter.
Photo Name
Missable?
Location / Description
basket steamer
No
In Balance Valley. Place the Chinese Stand Georama piece. A brown basket on the cart.
Burning Dragon Fire
No
In Starlight Canyon. Find a dragon and take his picture when he breathes fire.
Changing Dog Statue
No
In Starlight Canyon. Find a Dog Statue and take picture when changing from block to dog shape.
Charging Ram
No
In Starlight Canyon. Find a Ram and take his picture when he charges you.
Chinese lantern
No
In Balance Valley. Place the Chinese Stand Georama piece, round hanging paper lantern.
crescent shaped light
No
In Future Balance Valley. Restore the tool shop, yellow light near ceiling.
electric bulletin
No
In the Fishing Contest Tent in Palm Brinks. Large electronic screen on one wall.
Face Behind the Devil Mask
No
In Starlight Canyon. Find a Masked Tribesman, defend until mask mouth opens, take picture through it.
Fishing Contest Sign
No
On the outside of the Fishing Contest Tent in Palm Brinks above the entrance.
Flying Battleship
MISSABLE
In Starlight Canyon. Take picture of the Flying Battleship from the Lighthouse. Also appears in Ch.4 and Ch.5. MISSABLE - limited chances!
fresco painting
No
In Balance Valley. Build the Church Georama piece and go inside.
giant Yorda tree
No
In Starlight Canyon. The giant tree on the Yorda's Valley floor.
glowing gate
No
In the Fishing Contest Tent. A red glowing arch near the entrance.
hand-sewn silk flag
No
In Balance Valley. Build the Chinese Stand, one of the flags hanging down.
hat
No
In Future Balance Valley. Restore the Weapon Shop, giant hat on the wall.
Holy Emblem
No
In Balance Valley. Build the Church, diamond shaped emblem on the roof or inside.
horn
No
In Future Balance Valley. Restore the Weapon Shop, giant horn above the entrance.
Hurray For Rock Man!
No
In Starlight Canyon. Find a Golem and take picture when he lifts both arms.
In Balance Valley. Build the laundry Georama piece on a house.
Lin's house
No
In Balance Valley. Take a picture of Lin's House.
Moon Crystal
No
In Future Balance Valley. Complete the last Georama condition, take picture of the purple crystal.
Nice Massage
No
In Starlight Canyon. Find a Priest of Rama and take picture when he gives himself a shoulder massage.
peeping pole
No
In Future Balance Valley. Restore the Tool Shop, in a glass case. Looks like a spyglass.
Phantom Memo Eater
MISSABLE
In Starlight Canyon. Take picture of the Memo Eater boss on the Yorda's Valley floor. MISSABLE - one-time boss fight!
pork dumpling
No
In Balance Valley. Build the Chinese Stand, white dumplings on the stand.
rotating sign
No
In Balance Valley. Build the Chinese Stand, round turning sign on top.
runaway dragon
No
In Future Balance Valley. Restore Lao Chao's Bistro, one of two dragons on the wall.
Saint's Writings
No
In Balance Valley. Build the Church, the book on the stand inside.
scale
No
In the Fishing Contest Tent. The large scale fish are weighed on.
scroll
No
In Future Balance Valley. Restore Lao Chao's Bistro, cloth hangings with Chinese characters.
special Peking duck
No
In Future Balance Valley. Restore Lao Chao's Bistro, brown cooked duck on the counter.
Spinning Ivanoff
No
In Starlight Canyon. Move toward an Ivanoff until he rolls, take picture before he stops.
star lamp
No
In Balance Valley. Build the Star Lamp Georama piece on a house.
starglass
No
In Future Balance Valley. Restore the Tool Shop, large crystal on the wall over the counter.
torch
No
In Balance Valley. One of the flaming torches around the valley.
victory stand
No
In the Fishing Contest Tent. First, second and third place stand.
warehouse
No
In Balance Valley. Build the Warehouse Georama piece on a house.
weather vane
No
In Balance Valley. Build the Weather Vane Georama piece on a house.
well
No
In Balance Valley. Build the Well Georama piece.
Cafe Sign
No
In Balance Valley. Build the Cafe Georama piece, take picture of the sign above the entrance.
Chapter 4 — Veniccio
31 photos in this chapter.
Photo Name
Missable?
Location / Description
A Surviving Soldier
No
In Veniccio. In a tunnel halfway down, midnight-4:00 AM. White fog behind a boulder, only visible in photos.
air cleaner
No
In Future Veniccio. Restore any Luna Lab, machine in the corner.
Ancient Mural
No
In Ocean's Roar Cave on the Cave of the Ancient Mural floor. Picture of the mural on the wall.
banana
No
In Veniccio. Build the Iron House, take picture of banana on the table.
can
No
In Veniccio. Build the Iron House Georama piece, cans on a shelf inside.
Doctor Jaming
MISSABLE
In Ocean's Roar Cave. On the Shigura Village floor, take picture of Doctor Jaming on his hover platform.
egg chair
No
In Future Veniccio. Restore any Luna Lab, white egg shaped chair.
egg-shaped transmitter
No
In Veniccio. Build the Iron House, egg shaped machine inside.
energy pipe
No
In Future Veniccio. Restore any Luna Lab, one of the glowing pipes.
Fish Race Sign
No
On the outside of the Finny Frenzy tent in Palm Brinks above the entrance.
futuron 800
No
In Future Veniccio. Restore the Central Luna Lab, one of the machines around the edge.
iron shed
No
In Veniccio. Build the Iron Shed Georama piece on a house.
Light of Luna Stone
No
In Veniccio. Build the Luna Stone Light Georama piece.
Luna Stone shards
No
In Veniccio. Look into the ocean for shining blue lights under the water.
neo-projector
No
In Future Veniccio. Restore the Central Lab, machine near the ceiling in the center.
opposed island
No
In the Finny Frenzy Tent in Palm Brinks. Islands in the center of the fish racetrack.
Puppet Shingala
MISSABLE
In Ocean's Roar Cave on the Cave of the Ancient Mural floor. Take picture of Shingala when being controlled.
red house
No
In Veniccio. The red houses on the cliff across from the entrance.
searchlight
No
In Future Veniccio. Restore the Search Lights, red globe shaped lights on the ground.
small generator
No
In Veniccio. Build the Iron House, moving generator in the room.
Symbol of Luna Lab
No
In Future Veniccio. Restore the Symbol of Luna Lab, it's on top of the central lab.
system 5WP2
No
In Future Veniccio. Restore the Central Lab, large machinery on the wall.
T.V.
No
In Veniccio. Build the Iron House, take picture of the T.V. inside.
Veniccio's Evening Sun
No
In Veniccio. Take picture of the sun when it is setting.
ventilation
No
In Veniccio. Build the Iron House, take picture of the ceiling fan.
water tank
No
In the Finny Frenzy tent in Palm Brinks. Gray fish tanks around the edge.
windmill
No
In Veniccio Station. The turning windmill on top of the grass huts on the cliffs.
windmill feather
No
In Veniccio. Build the Windmill Georama piece, take picture of the turning blades.
work arm
No
In Future Veniccio. Restore any Luna Lab, machine on the edge of the glowing platform.
work equipment
No
In Future Veniccio. Restore any Luna Lab, machine above the glowing platform.
work robot
No
In Future Veniccio. Restore any Luna Lab, machine on the edge of the glowing platform.
Chapter 5 — Heim Rada
29 photos in this chapter.
Photo Name
Missable?
Location / Description
Bomber Head Boom!
No
In Mount Gundor. Find a Bomber Head, reduce HP, dodge his jump, take picture while he's lying down after exploding.
cinders
MISSABLE
In Heim Rada. While cinders are falling, build a straw house, leave and return. Take picture of the ashes. Before blowing up Fire Squall!
computer
No
In Future Heim Rada. Restore the Operations Room, take picture of a computer.
decorative lights
No
In Future Heim Rada. Restore the Item Shop, moving lights on the wall.
display robo
No
In Future Heim Rada. Restore the Parts Shop, robot near the counter.
drum can
No
In Future Heim Rada. Restore the Parts Store, round metal barrels.
electric sesame
No
In Future Heim Rada. Restore the Parts Store, glowing machine to the right of the door.
elevator
No
In Future Heim Rada. Restore the Workshop Elevator, blue glowing elevator.
Faintin' Bone Lord
No
In Mount Gundor. Find a Bone Lord, throw a boulder at him, take picture when he's knocked out with spinning stars.
Fallen Battleship
No
In Mount Gundor. On the Mount Gundor Mouth floor, take picture of the crashed battleship.
Fire Squall
MISSABLE
In Mount Gundor. Take picture of the Fire Squall on the Mount Gundor Peak floor BEFORE you blow it up!
generator
No
In Heim Rada. Build the Generator Georama piece.
geyser
SPECIAL
In Heim Rada. Take picture of a geyser. Only missable if you cover ALL geysers with Hardened Mud.
hammer
No
In Future Heim Rada. Restore the Weapon Shop, hammer hanging on the wall.
hot-springs pond
No
In Heim Rada. The pool of water on the left side down a ramp.
Hot Springs Spirit
No
In Heim Rada. Hot springs, midnight-4:00 AM. Aim at right spring, white mist only visible in photos.
large crane
No
In Heim Rada. Build the Great Crane Georama piece on a house.
Lava Road
No
In Mount Gundor on the Mount Gundor Mouth floor. Picture of the path when lava parts.
Mount Gundor
No
In Heim Rada. The mountain to the right of the entrance.
mud
No
In Heim Rada. Build the Hardened Mud Pile Georama piece. Don't place over a geyser!
patterned rug
No
In Future Heim Rada. Restore the Item Shop, rug on the floor.
Paznos
No
In Future Heim Rada. Restore Paznos, huge castle-looking thing in the center.
Paznos pattern
No
On Paznos' Bridge in Future Heim Rada. Small circular flower shaped emblem on the wall.
power arm
No
In Heim Rada. Build the Power Arm Georama piece on a house.
propeller
No
In Future Heim Rada. Restore the Operations Room, turning propellers on the wall near the door.
sulphur-colored juice
No
In Future Heim Rada. Restore the Item Shop, large bottle on the floor or shelf.
The Ultimate Gaspard
MISSABLE
In Mount Gundor on the Mount Gundor Mouth floor. Take picture of Gaspard when he turns into a lava giant. MISSABLE - one-time boss fight!
transmission device
No
In Future Heim Rada. The circular teleporter on the ground near the Time Gate.
work crane
No
In Future Heim Rada. Restore the Work Crane, giant mechanical cranes on the third floor.
Chapter 6 — Kazarov Stonehenge, Moon Flower Palace and Star Paths
17 photos in this chapter.
Photo Name
Missable?
Location / Description
dead tree
MISSABLE
At the Moon Flower Palace Stop. Take picture of one of the dead trees around the landscape.
Earth Altar
No
In Kazarov Stonehenge. The pillar with the yellow light.
Earth Gem Altar
No
In Rainbow Butterfly Wood. Star path, take picture of the Earth Gem Altar in the Chamber of the Sleeping Earth Gem.
Fire Altar
No
In Kazarov Stonehenge. The pillar with the red light on top.
Fire Gem Altar
No
In Mount Gundor. Star path, take picture of the Fire Gem Altar in the Chamber of the Blazing Fire Gem.
Gigantor Paznos
No
At Kazarov Stonehenge. When Paznos turns into a giant robot, go up to the altars and turn toward Ixion.
gold gate
No
At Moon Flower Palace Stop. The gate to the inner courtyard of the Moon Flower Palace.
Griffon's Real Face
MISSABLE
In Moon Flower Palace. Take picture of Griffon as soon as you begin to fight him!
hooked nose
No
In Moon Flower Palace. Inner courtyard, large stone beak above the stairs.
Ixion
No
At Moon Flower Palace Stop. Take picture of Ixion the time train.
Kazarov Stonehenge
No
At Kazarov Stonehenge. The central stones you got the star key from.
Moon Flower Palace
No
At Moon Flower Palace Stop. The door into the Moon Flower Palace, after the first gate and up the stairs.
Pinky
No
Inside Ixion. One of the machines near the doors between cars.
Water Altar
No
In Kazarov Stonehenge. The pillar with the purple light on top.
Water Gem Altar
No
In Ocean's Roar Cave. Star path, take picture of the Water Gem Altar in the Chamber of the Sleeping Water Gem.
Wind Altar
No
In Kazarov Stonehenge. The pillar with the green light on top.
Wind Gem Altar
No
In Starlight Canyon. Star path, take picture of the Wind Gem Altar in the Chamber of the Defending Wind Gem.
Chapter 7 — Moon Flower Palace
22 photos in this chapter.
Photo Name
Missable?
Location / Description
Alexandra's bed
No
In the Moon Flower Palace Dungeon. The bed in the Alexandra's Room floor.
blue lantern
No
In Moon Flower Palace Dungeon. One of the blue crystals on top of pillars in the Garden floor.
camellia tree
No
In the courtyard of Moon Flower Palace. A tree already placed or make the Georama piece.
flower bathed in light
No
In the Moon Flower Palace Dungeon. A sunflower in a pot near the water on the Garden floor.
flower bed
No
In the courtyard of Moon Flower Palace. Build the Flower Bed Georama piece.
flower chandelier
No
In the Moon Flower Palace Dungeon. The lights near the ceiling on the Sun Chamber floor.
Flower of the Sun
No
In the Moon Flower Palace Dungeon. The sunflower on the table in the Garden floor, or in the vase in Alexandra's Room.
golden door
No
In the Moon Flower Palace Dungeon. The red and yellow door between two gargoyles on the Sun Chamber floor.
labyrinth door
No
In the Moon Flower Palace Dungeon. The flower shaped exit in the Sun Chamber floor.
Legend of the Moon
MISSABLE
At the top of the Dream Spiral. Once the boss fight starts, take a picture of the moon.
lotus flower
No
In the Moon Flower Palace Dungeon. Flowers floating on the water in the Garden floor.
moon column
No
In the courtyard of Moon Flower Palace. Make the Moon Column Georama piece.
relaxation fountain
No
In the courtyard of Moon Flower Palace. Create the fountain Georama piece.
road to Golbad
No
In the courtyard of Moon Flower Palace. Create the Road To Golbad Georama piece.
silver bench
No
In Moon Flower Palace Courtyard. Create the Silver Bench Georama piece.
stardust pond
No
In the courtyard of Moon Flower Palace. Create the Stardust Pond Georama piece.
starlight stairway
No
In the courtyard of Moon Flower Palace. Create the Starlight Stairs Georama piece.
starlight tunnel
No
In the courtyard of Moon Flower Palace. Create the Starlight Stairs, take picture of the tunnel under the stairs.
sun chair
No
In the Moon Flower Palace Dungeon. One of the chairs on the Garden floor.
Sun Chamber Gatekeeper
No
In the Moon Flower Palace dungeon. One of the two gargoyles next to the golden door in the Sun Chamber.
sun table
No
In the Moon Flower Palace Dungeon. The table on the Garden floor.
waterfall curtain
No
In the Moon Flower Palace Dungeon. Water falling from the ceiling in the Garden floor.
Chapter 8 — Zelmite Mine
3 photos in this chapter.
Photo Name
Missable?
Location / Description
Flotsam Revived!
MISSABLE
In the Zelmite Mines. Take picture of the robot Flotsam on the Suspicious Opening floor.
Mr. Big Shot's Shadow
No
In the Zelmite Mine. The large flying genie on the Zelmite Mine Depths floor.
Zelmite found
No
In the Zelmite Mines. Blue crystals on the wall of the Zelmite Mine Depths floor.
Monster Transformation Guide
Monster Transformation is a unique ability for Monica Raybrandt, unlocked at the end of Chapter 2 after talking to Jurak in Rainbow Butterfly Wood. Monica receives the Badge Box and can purchase the first badge (Himarra) from the Woody Tailor for 500 Gilda.
How it works: To collect monster badges, you need a Gift Capsule (buy for 400 Gilda or invent: Bone + Letter + Pot). Load it with 3 of the required item for the monster you want to befriend, then throw it at that monster. If successful, the monster shows a music note and drops its badge upon defeat.
All Monster Badges (12 Total)
There are 12 badges in total: 10 monster badges + 2 special badges (Moon & Sun).
Swipe the table sideways
#
Badge
Family
Starting Monster
How to Get
Gift Capsule Item
1
Beast
Beast
Sewer Rat
Gift Capsule on a Sewer Rat or Ram
Cheese (Sewer Rat) / Premium Chicken (Ram)
2
Windup
Windup
Bomber Head
Kill a Bomber Head with a Bomb
Bomb (use as weapon, not Gift Capsule)
3
Aquatic
Aquatic
Froggy
Gift Capsule on a Froggy
Battan
4
Aquatic (Goyone)
Aquatic
Goyone
Gift Capsule on a Goyone
Evy
5
Flora
Flora
Himarra
Buy from Woody Tailor (500 Gilda) or Gift Capsule
Gooey Peach
6
Magical Creature
Magical Creature
Statue
Gift Capsule on a Statue
Sturdy Rock
7
Darkling
Darkling
Spider Lady
Gift Capsule on a Spider Lady
Gold Bar
8
Darkling (Medusa)
Darkling
Auntie Medusa
Gift Capsule on an Auntie Medusa
Ruby
9
Reptile
Reptile
Gemron (5 elements)
Gift Capsule on any Gemron
Element matching the Gemron type
10
Spirit
Spirit
Pixie
Gift Capsule on a Pixie
Gooey Peach
11
Undead
Undead
Skeleton Soldier
Kill a Skeleton Soldier with Holy Water
Holy Water (use as weapon)
12
Card
Card
Club
Gift Capsule on a Diamond enemy
Diamond
Special Badges (Moon & Sun)
These two badges are not monster badges. They enhance Monica's transformation ability.
Badge
How to Get
Effect
Moon Badge
Reach Photography Level 7 (600 points), then talk to Donny as Max
Extends the duration of monster transformations
Sun Badge
Reach Photography Level 8 (700 points), then talk to Donny as Max
Raises all monster form attack and defense power
Photography Points: Each Idea photo = 2 points, each Scoop = 5 points. You need 100 points per level. Total available: 747 points (241 ideas × 2 + 53 scoops × 5).
Monster Evolution Paths
Each monster badge starts at Level 1 and can be leveled up by fighting in that form. Monsters evolve at levels 26, 51, and 76. Some families have branching evolution paths.
Beast
Swipe the table sideways
Level 1
Level 26
Level 51
Level 76
Sewer Rat
Beach Rat
Castle Eater
Death Mouse
Sewer Rat
Beach Rat
Hunter Fox
Smiling Wolf
Sewer Rat
Ram
Savage Ram
Bandou
Windup
Swipe the table sideways
Level 1
Level 26
Level 51
Level 76
Bomber Head
Triple Cracker
Danger Bomb
Sweet Dynamite
Aquatic
Swipe the table sideways
Level 1
Level 26
Level 51
Level 76
Froggy
Geron
Gamal
Plutos
Froggy
Geron
Moon Goyone
Mariner
Flora
Swipe the table sideways
Level 1
Level 26
Level 51
Level 76
Himarra
Balalla
Stormflower
Mandora
Himarra
Balalla
Mallone
Scarecrow
Magical Creature
Swipe the table sideways
Level 1
Level 26
Level 51
Level 76
Baron Balloon
Flotsam Balloon
Count Balloon
Duke Balloon
Baron Balloon
Flotsam Balloon
Guardia
Dark Keeper
Darkling
Swipe the table sideways
Level 1
Level 26
Level 51
Level 76
Spider Lady
Shiva
Spider Lady
Bambamchoo
Spider Lady
Shiva
Miss Gourgon
Mrs. Gourgon
Reptile Family
Swipe the table sideways
Level 1
Level 26
Level 51
Level 76
Wind Gemron
Ice Gemron
Thunder Gemron
Fire Gemron
Wind Gemron
Ice Gemron
Thunder Gemron
Holy Gemron
Spirit
Swipe the table sideways
Level 1
Level 26
Level 51
Level 76
Pixie
Sylph
Faerie
Imp
Undead
Swipe the table sideways
Level 1
Level 26
Level 51
Level 76
Skeleton Soldier
Hornhead
Master Jacket
Rare Jacket
Skeleton Soldier
Hornhead
Whitebeard
Oyakata
Card
Swipe the table sideways
Level 1
Level 26
Level 51
Level 76
Club
Heart
Diamond
Spade
Club
Heart
Diamond
Joker
Trophy: Fully evolving any monster transformation to Level 76 unlocks the What? Your Monster is Evolving! trophy. Collecting every Transformation Badge — the monster badges plus the Moon and Sun badges, which come from photography ranks — unlocks the Monster Master trophy.
Transformation Tips
Gift Capsules can be bought for 400 Gilda from Woody Tailor or Claire's Place, or invented (Bone + Letter + Pot).
The Undead Badge and Windup Badge are special — you must kill the monster with the required item (Holy Water or Bomb) instead of using a Gift Capsule.
The monster you start as is not always the one you used the Gift Capsule on. For example, using a Gift Capsule on a Death Mouse or Ram still gives you a Sewer Rat at Level 1.
Some dungeons require monster transformation to access certain areas or talk to NPC monsters.
The Reptile Badge requires different elements depending on which Gemron type you target: Wind, Fire, Ice, Thunder, or Holy Element.
Ridepod (Steve) Guide
The Ridepod (nicknamed Steve by Cedric) is Max's customizable mech suit, obtained in Chapter 1 during the fight with Linda in the Underground Water Channel. It consists of a Body, Legs, Arms (weapons), Energy Pack, and a Core that determines max capacity.
Trophy: The Core Strength trophy requires fully upgrading the Ridepod — invent and equip every body, leg, arm, and pack part. You also need the Master Grade Core (6500 EXP).
Core Upgrades (7 Tiers)
The Core determines the maximum Capacity available for equipping parts. Upgrade by purchasing from Cedric.
Swipe the table sideways
Core
EXP Cost
Max Defense
Max Capacity
Core (Default)
—
12
60
Improved Core
900
24
90
Core II
1,400
36
120
Core III
2,000
48
160
Super Core
3,500
60
200
Hyper Core
5,000
72
240
Master Grade Core
6,500
84
300
Note: It is impossible to equip the Nova Cannon IV (40 cap) with the Sun and Moon Armor (40 cap), Triple-Urn Pack (60 cap), and Jet Hover (40 cap) simultaneously as they total 180 capacity for those parts alone, exceeding even the Master Grade Core's 300 limit. You must downgrade one part if you want maximum ranged power.
Each melee arm type has 4 versions (I through IV), with each version more powerful than the last. All are invented using photo combinations.
Name
Invention Formula
Cannonball Arm I
Manhole + Old Style Robot + Post
Cannonball Arm II
Constructor + Post + Rock
Cannonball Arm III
Moon Crystal + Constructor + Post
Cannonball Arm IV
Constructor + Egg Chair + Rock
Clown Hand I
Clown Robo's Attack + Parasol + Pipe
Clown Hand II
Clown Robo's Attack + Parasol + Scale
Clown Hand III
Clown Robo's Attack + Flag + Work Arm
Clown Hand IV
Clown Robo's Attack + Paints + Power Arm
Hammer Arm I
Barrel + Post + Work Robot
Hammer Arm II
Hammer + Post + Work Arm
Hammer Arm III
Earth Gem Altar + Chimney + Hammer
Hammer Arm IV
Moon Column + Power Arm + Tiny Hammer
Drill Arm I
Auto Book Reader + Fan + Windmill
Drill Arm II
Electric Sesame + Horn + Work Arm
Drill Arm III
Ixion + Luna Stone Shards + Work Arm
Drill Arm IV
Flower of the Sun + Deer Horn + Work Arm
Samurai Arm I
Barrel + Crescent Shaped Light + Weapon
Samurai Arm II
Formula not documented
Samurai Arm III
Deer Horn + Moon Column + Weapon
Samurai Arm IV
A Surviving Soldier + Flotsam Revived + Legend of the Moon
Ranged Arms (5 types, 4 versions each = 20)
Each ranged arm type has 4 versions (I through IV). The Nova Cannon IV is the strongest ranged weapon in the game.
Name
Invention Formula
Barrel Cannon I
Barrel + Fountain + Mushroom
Barrel Cannon II
Barrel + Fountain + Well
Barrel Cannon III
Barrel + Water Tank + Waterfall
Barrel Cannon IV
Air Cleaner + Barrel + Fire Squall
Machine Gun Arm I
Fan + Rifle + Runaway Dragon
Machine Gun Arm II
Fan + Telescope + Windmill
Machine Gun Arm III
Propeller + Rifle + Windmill
Machine Gun Arm IV
Wind Gem Altar + Drum Can + Propeller
Laser Arm I
Barrel + Energy Pipe + Geyser
Laser Arm II
Ixion + Crescent Shaped Light + Energy Pipe
Laser Arm III
Energy Pipe + Relaxation Fountain + Searchlight
Laser Arm IV
Legend of the Moon + Blue Lantern + Energy Pipe
Missile Pod Arm I
Mushroom + Rotating Sign + Wooden Box
Missile Pod Arm II
Symbol of Luna Lab + Fountain + Wooden Box
Missile Pod Arm III
Deer Horn + Generator + Gold Store
Missile Pod Arm IV
Fire Gem Altar + Gold Store + Mount Gundor
Nova Cannon I
Generator + Rapper + The Sun
Nova Cannon II
Fire Gem Altar + Streetlight + The Sun
Nova Cannon III
Moon Column + Stove + The Sun
Nova Cannon IV
Flotsam Revived + Pot Torch + The Sun
Voice Unit
The Voice Unit can be purchased from Cedric's Parts for 1,000 EXP. It lets Steve make random comments while in use. It can be turned on and off from the Core item in the inventory.
Ridepod Tips
By default, the Ridepod comes with the Drum Can Body, Cannonball Arm, Iron Leg, and the Energy Pack.
Ridepod weapons cannot be upgraded through synthesizing — they don't collect ABS. You must invent better versions.
Each part has a Capacity cost. To equip better parts, upgrade the Core first.
The Buggy leg part transforms the Ridepod into a motorcycle for fast travel.
The Propeller Leg allows limited flight/hovering over gaps.
Ridepod Fuel is consumed while in use. Refuel with Ridepod Fuel items (invented: Lune Stone Shards + Mud + Stardust Pond).
Dungeons
Dark Cloud 2 - Grinding Down in a dungeon
Dark Cloud 2's dungeons are randomly generated — floor layouts, enemy placements, and loot change each visit. Each dungeon has a number of floors, a Gate Key item needed to unlock the exit on each floor, and a boss at the end. Clearing a floor means defeating enough enemies to spawn the Gate Key, then reaching the exit.
Tip: Save at the entrance of each dungeon floor. Since layouts are random, a bad floor can be re-rolled by reloading your save.
All Dungeons
Swipe the table sideways
#
Dungeon
Chapter
Floors
Gate Key
Boss
1
Underground Water Channel
Ch.1
4
Valve
BOSS Linda
2
Rainbow Butterfly Woods
Ch.2
11
Candy
BOSS Rainbow Butterfly
3
Starlight Canyon
Ch.3
16
Red Meat
BOSS Gaspard
4
Ocean's Roar Cave
Ch.4
14
Coral
BOSS Dr. Jaming
5
Mount Gundor
Ch.5
16
Rope
BOSS Gaspard / Flame Demon
6
Moon Flower Palace + Star Paths
Ch.6
varies
Crest
BOSS Emperor Griffon
7
Moon Flower Palace Dungeon
Ch.7
24
Crest
BOSS Dark Element
8
Zelmite Mine
Epilogue
38
—
BOSS Dark Genie
Medals
Medals are the per-floor challenge currency, and they are the longest job in the game — 396 medals across 127 dungeon floors. Collecting every one unlocks the Medalhead trophy.
Medal Condition Types
Clear the floor within a time limit.
Clear the floor without healing.
Defeat all enemies with a specific weapon type (Max's Gun, Monica's Sword, Monica's Magic, Ridepod, Monster Transformation, Max's Right-Hand Weapon).
Catch a fish exceeding a certain length.
Complete a Spheda round on that floor.
Defeat all monsters on the floor.
Collect all items on the floor.
Notable Medal Conditions
Detail
Info
Chapter 2 (Rainbow Butterfly Wood)
Mostly fishing medals (catch fish of specific lengths) and weapon-type medals.
Chapter 3 (Starlight Canyon)
Spheda medals (Ruby, Amethyst, Topaz, etc.) and Monster Transformation medals.
Chapter 4 (Ocean's Roar Cave)
Fishing medals and weapon-type medals.
Chapter 5 (Mount Gundor)
Weapon-type medals and no-healing medals.
Chapter 7 (Moon Flower Palace Dungeon)
All 24 floors have unique medal conditions — get all of them before finishing the chapter!
Tip: Each floor has a unique medal condition — check the condition before clearing the floor so you can plan your approach. Medals are used to purchase rare items from medal exchange shops.
IMPORTANT: Get all Medals from Moon Flower Palace (Chapter 7) before proceeding to the final boss. You cannot return to these floors later.
How Medals Really Work
A floor does not have one medal — it has up to four at once: a Time Attack goal, a Spheda goal, a Fishing goal (only where there is water), and a rotating Clear Goal. That is why the total is 396 medals across 127 floors, not one per floor.
Every condition is shown before you enter, on the floor-select screen, with its cleared / not-cleared status beside it.
There is no accept-or-decline step. All of that floor's medals are live at the same time, and one run can satisfy several — an items-only clear that also beats the clock scores both.
Most medals are awarded on the All Monsters Defeated! results screen. Fishing, Spheda and the no-healing medal resolve at other moments — the no-healing one is only confirmed when you leave the floor through the Gate Key.
Failed medals can be retried without limit. Just re-enter the floor. Most players sweep medals late, once they are heavily overpowered.
Floor layouts regenerate every time you enter. That does not change what the conditions are, but it is a free reroll — a bad Spheda layout or a sprawling time-attack map can simply be reshuffled by leaving and coming back.
Every Medal Condition Type
Type
What it demands
Time Attack
Kill every enemy on the floor inside the posted limit. Present on essentially every non-boss floor, from about 2:30 in the Underground Water Channel up to 13:40 in the Zelmite Mine. Method is unrestricted, and menu time counts against the clock — a true pause does not.
Spheda
After the floor is cleared, close the time distortion with the golf minigame inside the stroke limit. Only the first win on a floor pays the medal.
Fishing
Land a fish at or above the stated length in that floor's water. Thresholds run from 46 cm to 72 cm. Only exists on floors with fishable water.
Clear Goal — Without Healing
Clear the floor and exit through the Gate Key without using a single recovery item. Ridepod repair and refuelling are generally allowed.
Clear Goal — Items only
Every enemy must die to thrown consumables — bombs and elemental stones. No weapon attacks at all. Universally called the most tedious type.
Clear Goal — Max's right-hand weapon only
Every kill with Max's wrench or hammer. No gun, no Ridepod, no items, no Monica.
Clear Goal — Max's gun only
Every kill with Max's ranged weapon.
Clear Goal — Monica's sword only
Every kill with Monica's melee weapon.
Clear Goal — Monica's magic / armband only
Every kill with Monica's armband.
Clear Goal — Ridepod only
Every kill from inside the mech. Fuel, not damage, is the real limit here.
Clear Goal — Monster Transformation only
Every kill while transformed with a badge. Uptime is the constraint, so bring the badge stock to re-transform.
Medal conditions, floor by floor
Every one of the 127 medal floors is now listed in full — time limit, fishing length, Spheda prize and clear goal — on the All 396 Medals tab. That page also shows the arithmetic, so you can check the totals against your own save.
The Medal Exchange (Mayor Need)
Item
Medals
Notes
Name-Change Ticket
40
Buy this first. The only functional purchase — it renames a weapon, which is also how you steer a weapon's evolution into other types, and it unlocks the Alternate Alias trophy.
Panther Ensemble
65
Costume. The most expensive item in the exchange.
Princess Dress
60
Costume for Monica.
Clown Suit
55
Costume body piece.
Panther Boots
50
Skippable — comparable footwear can be invented instead.
Kitty Bell
45
Accessory.
Clown Hat
40
Accessory.
Clown Shoes
40
Skippable — inventable footwear covers this.
Princess Orb
40
Accessory.
Princess Boots
40
Skippable — inventable footwear covers this.
Beating the Awkward Conditions
Condition
How
Fishing-length medals (46–72 cm)
Raise the rod's Luck above everything else — Luck sets the maximum size of fish that can bite at all, so a low-Luck rod makes a 72 cm medal literally unreachable. Raise every stat except Grip, use the Lure Rod rather than bait (lure-caught fish run bigger), and expect to recast many times. Leaving and re-entering rerolls the fish.
Spheda medals
Clear all monsters first — the distortion only appears afterwards. The rule people miss is that the sphere must be the opposite colour to the vortex, and you only flip its colour by bouncing it hard off a wall or floor. Never take the give-up option where Monica finishes the shot — that forfeits the medal. Back out and re-enter instead.
Specific-weapon medals
Every kill has to come from the named weapon — no chip damage from anything else. Deliberately build one strong late-game weapon of all four types (Max melee, Max gun, Monica sword, Monica armband), because the medal list forces you through every one. Unequip everything else so you cannot disqualify yourself by accident.
Monster Transformation only
The constraint is uptime, not damage. Bring the badge stock to re-transform mid-floor and pick a form whose attack actually clears that floor's enemy types. Common on Starlight Canyon, which has four such floors.
Ridepod only
Fuel is the real limit. Top off before entering and carry spares — running dry mid-floor forces you out on foot and voids the run. A master-grade core with a Nova Cannon trivialises these, and speed legs let the same run also beat the clock.
Without Healing
No recovery items from entry until you exit through the Gate Key — surviving the last enemy is not enough. The reliable answer is to come back overpowered and kill things before they touch you.
Items only
Do not buy your bombs — invent and craft them in bulk, which is far cheaper, and stock deep before you start. A late-game floor holds a lot of enemies and running out mid-floor wastes the whole run. Fruits are excellent here because they deal a flat 5% of an enemy's max HP.
Time limits
Method is unrestricted, so use your strongest tools. Long-range weapons let you start killing before enemies close, Ridepod speed legs cut travel time, and recruiting Donny (opens locked doors) and Pau (map access) removes the wandering that kills most attempts. Do not stop for chests during the run.
Medal Hunting Tips
Do not chase medals as you play the story. Sweep them late, at Chapter 8 power, when overpowered characters make time limits, no-healing and weapon restrictions trivial. The one exception is Moon Flower Palace.
Set a hard rule: finish every Moon Flower Palace medal BEFORE fighting the Chapter 7 boss. It is the only permanently missable part of Medalhead.
Read the floor-info screen before entering. All of that floor's medals and their status are listed there, so you can plan a run that satisfies two at once.
Treat the random layouts as free rerolls. A bad Spheda layout or a sprawling time-attack map can simply be reshuffled by leaving and re-entering.
Build one strong weapon of all four restricted types. A single over-invested favourite leaves you stuck on half the clear goals.
Fully upgrade the Ridepod including fuel capacity, a heavy cannon and speed legs — it is required outright for the Ridepod-only medals and is one of the best time-attack tools at the same time.
Invent and craft your throwables rather than buying them, and stockpile deep before any items-only floor.
Recruit Donny and Pau before serious time-trial work; both directly cut the wandering that blows time limits.
Use Stone Berries to petrify cannon-type enemies. Shooters ruining an attempt from off-screen is the single biggest cause of failed runs.
Buy the Name-Change Ticket before the costume pieces — the shop's stock is finite and the ticket is the only functionally useful item in it.
Track cleared floors on paper. 396 medals across eight chapters is easy to lose your place in, and the in-game menus do not help.
Zelmite Mine — The Post-Game Dungeon
The seventh and final dungeon, and the reason the save keeps going after the credits. It is entirely optional, it is where the game's second ending lives, and it is far harder than anything in the main story.
Detail
Info
Unlock
Finish the main story. The save continues into Chapter 8, The Forgotten Adventure, and Mayor Need asks Max to look for zelmite.
Entrance
In the lower part of Palm Brinks — take the path branching left of the church, the same road toward the lake and Dr. Dell's clinic.
Floors
38 areas in total: 31 ordinary medal floors, 4 Dead End mini-boss chambers, 2 break rooms, and the final Depths.
Party
You start alone as Max. Monica rejoins at the Miner's Breakroom on floor 5, after which monster transformation works again.
Gate key
Every floor uses the same one — Trolley Oil. One monster per floor carries it; feed it to the mine cart to move on.
Seals
Only two in the whole dungeon, both White Seals (blocking all healing), on Murderous Tank and Omen. Blitz those floors rather than fighting attritionally.
Hard gate
The Dynamite dropped by the Sphinxes in Dead End 3 is mandatory — without it you cannot blow open the wall in the Depths.
Shops / saves
None inside. Chapter 8 cuts you off from most towns, so everything you will use has to be bought, built or synthesised beforehand.
Everything you will use, you carry in. There are no shops, no save points and no Geostones inside, and Chapter 8 cuts you off from most towns. Finish your weapon build-up, max your HP and defence, and fill the bag before you step in.
The Four Dead Ends
Four closed arenas hold mini-boss groups instead of a normal floor, and each pays a fixed reward. None of them is a fair fight head-on — peel enemies off the group one at a time.
Swipe the table sideways
Dead End
Enemies
HP
How to beat it
Reward
Dead End 1 — floor 10
Nail Burst ×2
18,000 HP each
Halves Wrench, Sword, Gun, Beam and Magic; takes double from Smash and 150% from Flame and Lightning — this is the Ridepod's fight. It only closes once you are inside a certain range, so play the range game: close, hit, back off.
Healing Coin + Sun Stone
Dead End 2 — floor 16
Rare Jacket ×8
15,000 HP each
Resists Gun, Beam, Grenade and Magic; Smash does 150% and Wrench 120%. Do not use lock-on — it grabs a distant one and drags the whole pack onto you. Creep forward, peel one or two off, kill them in isolation, repeat.
Absorption Coin + Moon Stone
Dead End 3 — floor 21
Sphinx ×2
20,000 HP each
Resists Wrench, Gun, Beam, Grenade and Magic; Sword does 120% and it takes double from Flame and Exorcism — Monica's fight, ideally with a Flame/Exorcism Island King. Not optional: they drop the Dynamite.
Experience Coin + Poison Coin + Dynamite
Dead End 4 — floor 26
Mandora ×8
10,000 HP each
The squishiest group but there are eight. Flame and Cyclone both do double, Sword 120%, while Gun is halved. Same divide-and-conquer approach as the Rare Jackets.
2× Diamond
Fake Genie — the Final Boss
BOSS Fake Genie (Zelmite Mine Depths)
20,000 HP, 145 Attack, only 20 Defense — and widely called the hardest fight in the game. The gimmick is that he is invulnerable most of the time while constantly summoning Mini Dark Genies. Clear the clones first; he becomes attackable when he visibly turns blue. Burst him down with ranged damage in that window, then get clear before his beam sweeps the arena — treat every beam as lethal and dodge rather than tank. Then repeat the loop: clones, blue window, burst, dodge. A maxed Supernova is the community answer because it deletes his health bar fast enough that you only have to survive the cycle a few times. Bring Revival Powders — Chapter 8 locks you out of most restocking.
Clearing the Mine Efficiently
Finish your build-up before you set foot inside. Chapter 8 cuts you off from most shops — max your Fruit of Eden HP and defence items first; roughly 240 HP / 104 DEF is the realistic pre-mine target.
Fill the bag with Premium Chicken, Stamina Drinks, Revival Powders and Repair Powders. Item slots are the real constraint on how deep you can push in one run.
Treat the Ridepod as a main character. Dead End 1 resists every hand weapon and takes double from Smash, and Metal Flotsam is only catchable in the mech. Hoard Repair Powder to keep it alive.
Split the roster by damage type: Monica with a Flame/Exorcism sword for the Sphinxes, Mandoras and undead; Max with a maxed Supernova for the final boss. Grade Zero is too weak down here despite its speed.
Never fight a Dead End group head-on. All four are many-enemies-at-once fights — peel one off with a ranged poke, kill it in isolation, reset.
Do Dead End 3 no matter how much you want to skip it. Showing up at the Depths without the Dynamite means walking the whole dungeon again.
Farm medals on the way down, not on a second trip. Time limits here are a generous 8:40 to 13:40, so clear them in passing and save the awkward items-only floors for dedicated attempts.
Stock elemental stones, Holy Water and fruits for the items-only floors. Fruits deal a flat 5% of an enemy's max HP, which is exactly what you want against inflated post-game health pools.
Petrify the shooters with Stone Berries. Iron Ghosts in particular will end a medal attempt from off-screen.
Open every locked chest and hunt Sigma Breakers. The efficient loop is: build a Heavy Hammer to +5, dump skill points into Flame, then synthesise Sigma Breakers into it — that scales far better than grinding a weapon from scratch.
Do not plan on casual Spheda here — the mine's geometry is awkward and prediction lines misbehave around pillars. Go in only when you are specifically medal-hunting.
Skip fishing entirely. There are no fishing spots in the Zelmite Mine.
Fishing
Fishing is available from Chapter 2 at Sindain. After clearing monsters on a dungeon floor, you can fish in the pools. Use the Fishing Rod with bait, or the Lure Rod (invented: Lafrescia Stem + Fish + River) with reusable lures.
All Fish Types (18) + Bait Guide
Swipe the table sideways
Fish
Best Bait
Lure Alternative
Locations
Time
Baku Baku
Mellow Banana or Mimi
Frog, Minnow, or Spinner
Palm Brinks (lake), Fish Monster Swamp, Starlight Canyon
Day, Night
Baron Garayan
Fork Lure only
Fork (lure rod required)
Heim Rada (hot springs)
Evening
Bobo
Gooey Peach or Evy
Mimi or Minnow
Veniccio, Ocean's Roar Cave
Day, Evening, Night
Bon
Bomb Nut or Evy
Mimi or Potato Cake
Veniccio, Ocean's Roar Cave
Morning, Day, Evening, Night
Den
Battan or Evy
Potato Cake or Minnow
Palm Brinks (river), Cave of Ancient Murals, Heim Rada
Rainbow Butterfly Wood, Fish Monster Swamp, Heim Rada, Yorda's Valley
Morning, Day, Night
Tarton
Evy or Mimi
Potato Cake or Spinner
Palm Brinks (lake), Balance Valley Station, Veniccio, Ocean's Roar Cave, Cave of Ancient Murals
Day, Night
Umadakara
Carrot
None
Starlight Canyon
Night (better chance with rain)
General Bait:Mimi catches the widest variety of fish. Petite Fish and Minon also catch most fish types. For rare fish, use specific bait: Poison Apple for Mardan Garayan, Carrot for Umadakara, Fork Lure for Baron Garayan.
King Mardan: To catch the "Holy One" (King Mardan) in Fish Monster Swamp during Chapter 2, use a Poison Apple as bait. This is part of the story to free the Firbits.
Bait Acquisition Guide
Bait
How to Get
Mimi
Buy from Morton's Sundries (Palm Brinks) or find in treasure chests
Petite Fish
Use bait fish to catch smaller fish, or buy from shops
Minon
Buy from various shops, found in dungeon chests
Evy
Dropped by monsters, found in breakable objects in dungeons
Battan
Dropped by monsters, found in dungeon chests
Bomb Nut
Dropped by monsters, found in breakable rocks
Gooey Peach
Found in treasure chests, dropped by monsters
Heart-Throb Cherry
Found in treasure chests, dropped by monsters
Mellow Banana
Buy from shops, found in chests
Potato Cake
Buy from shops, found in chests
Poison Apple
Found in treasure chests in dungeons, or dropped by specific monsters
Carrot
Buy from shops, found in chests
Prickly
Found in dungeons, dropped by monsters
Stone Berry
Found in dungeons, dropped by monsters
Rods: The Bait Rod is obtained automatically in the story. The Lure Rod can be invented (Fish + Lafrescia Stem + River) or won as the Fishing Contest prize. Lures (Frog, Minnow, Spinner, Fork) are reusable and only work with the Lure Rod.
Ridepod Fuel: Invent with Luna Stone Shards + Mud + Stardust Pond. This fuel is needed to deploy the Ridepod in dungeons.
Spheda
Dark Cloud 2 - Spheda minigame
Spheda is a golf-like minigame learned in Chapter 3 (Balance Valley). After clearing a floor of monsters, a time distortion may appear. Hit the sphere (red or blue) into the distortion using a Spheda Club. The sphere color must match the distortion.
Spheda Clubs (5)
Club
How to Get
Swan
Invent: Boat + Tiny Hammer + Tree
Turkey
Invent: Special Peking Duck + Tree + Windmill Feather
Flamingo
Invent: Light of Luna Stone + Palm Tree + Tiny Hammer
Albatross
Invent: Fire Squall + Geyser + Tree
Falcon
Invent: Hammer + Large Crane + Withered Jurak
Spheda and the Medalhead trophy: there is no separate Spheda trophy — the roughly 119 Spheda medals are part of Medalhead. Each floor has three reward tiers: Medal Reward (1st clear), Secondary Reward (2nd clear), and Repeating Reward (3rd+ clear). See the Dungeons & Medals tab for full floor-by-floor rewards.
Spheda — The Full Rules
Spheda is the golf-like side activity Max plays inside cleared dungeon floors, and it is roughly 119 of the game's 396 medals — which makes it the single biggest tax on the Medalhead trophy.
A cleared floor may hold one time distortion — a slowly rotating vortex, coloured either red or blue. The vortex never changes colour for the whole round.
The sphere you hit is also red or blue, and it flips between the two only when it slams hard into a wall, floor or ceiling. A soft roll will not flip it.
You only sink the shot if the sphere is the opposite colour to the vortex at the moment it arrives. A perfect line into the hole is wasted if the colours match.
The number floating above the sphere is your remaining strokes — the floor's par. Spending the last stroke without sinking it is a hard fail; the sphere vanishes and the distortion stays open.
Swinging uses a two-press power gauge: first press starts the bar, second stops it. Stopping inside the small yellow band gives the club's full clean distance.
While the gauge moves, tilt the stick for spin — up for topspin (extra roll), down for backspin (kills roll), right for hook and left for slice to bend around obstacles.
Water, pits and the marked arena edges are out of bounds: the ball returns to a drop point and it costs you a stroke.
Pressing Square repositions a ball that is wedged somewhere unhittable. It normally costs a stroke, but it is free once you are down to your last one.
A failed floor is not lost. Exit and re-enter and the distortion regenerates — the standard practice is to hard-save before each swing and reload on a bad shot.
First clear pays the medal and a prize, a second clear pays a different prize, and every clear after that pays a repeating prize, so floors can be farmed.
Winning ten Spheda rounds is what lets you recruit Mena.
Spheda Tips
Save immediately before every single swing. Reloading a bad shot costs seconds and makes the medal grind essentially failure-proof — every guide converges on this as the single biggest tip.
Solve the colour problem before the distance problem. If the ball and vortex match, spend an early stroke deliberately smashing the ball into a wall hard enough to flip it.
Do not chase distance with the top clubs. Turkey and Flamingo win more medals than Albatross, because a wide perfect band beats raw power when one mishit ends the round.
Aim to land short and roll in. Add only about 5–10% over the power you think you need — overshooting into out of bounds is the most common way rounds die.
Use backspin whenever the vortex sits near an edge or a drop, and topspin on long open floors to squeeze extra ground distance out of a mid-tier club.
Bank shots deliberately. A wall bounce both redirects the ball toward the hole and flips its colour in one stroke — that two-birds trick rescues tight par counts.
Watch the mini-map's red dot as much as the on-screen arc. The 3D camera misleads on elevation and the map is the only reliable read on multi-level floors.
On Mount Gundor and the Underground Channel, play deliberate short strokes with Turkey. Those floors punish ambition with instant out of bounds.
Play each floor's Spheda the first time you visit. Re-treading a cleared dungeon just for distortions is far slower.
Use the practice range that opens after Chapter 7 to learn what each club's perfect band actually feels like before committing a real distortion.
Which Dungeons Are Kind to Spheda
Dungeon
Difficulty
Why
Moon Flower Palace
Easiest
Flat, open floors with only hanging chandeliers to dodge.
Ocean's Roar Cave / Starlight Canyon
Easy
Open and generous, with plenty of room to line up a shot.
Zelmite Mine
Mixed
Wooden beams give handy bounce surfaces, but prediction lines misbehave around pillars.
Underground Water Channel
Hard
Water lines every edge, so a long drive is an instant out of bounds.
Mount Gundor
Hardest
Jagged geometry everywhere — widely called Spheda Hell.
All Six Spheda Clubs
Swipe the table sideways
Club
Stats
How to get it
Notes
Handy Stick
Attack 3 → 19
Given automatically during the Chapter 3 Barga's Valley scene.
A dead-end trainer with no build-up path — but it has the most generous perfect window in the game.
Turkey
Attack 25 → 45, Flame 10, Cyclone 10
Awarded at Barga's Valley if you let Monica close the first distortion; also 460 Gilda from Gerald in Ch.4.
Short-range putter with a wide perfect band and the best backspin of any club — the anti-overshoot tool. Builds into Flamingo.
Swan
Attack 24 → 45, Chill 10, Cyclone 10
Awarded at Barga's Valley if you close the first distortion yourself; also 450 Gilda at Starlight Temple.
Stronger than Turkey with still-forgiving timing, but backspin and the curve shots over-deliver. Builds into Flamingo.
Flamingo
Mid-tier, roughly Attack 29 → 50
Built up from either Turkey or Swan, which converge here; also inventable.
Widely rated the best all-round club — solid power, a usable perfect window and no nasty surprises. Builds into Falcon.
Falcon
Attack 50 → ~110, Cyclone 55, Beast 40
Built up from Flamingo; also drops from chests or 900 Gilda at Gundorada Workshop.
High power and long carry with the Critical ability, but a much narrower perfect band than Flamingo. Builds into Albatross.
Albatross
Attack 77 → 120, Cyclone 80, Beast 80
Built up from Falcon only — never found in chests and never sold.
The highest raw power in the game and excellent on long curves, but the perfect zone is tiny, so anything but a perfect stop is a badly mishit ball.
Turkey or Swan, not both. The Barga's Valley scene gives you Turkey if you let Monica close the first distortion and Swan if you close it yourself. Both build into Flamingo, and both can be bought later, so the choice is not permanent.
Finny Frenzy (Fish Racing)
Available from Chapter 4 after beating "Return of the Serpent". The Finny Frenzy tent appears in Palm Brinks near the Town Hall. Race your raised fish against others in 4 classes.
Race Classes & Rewards
Swipe the table sideways
Class
1st Place (Initial)
1st Place (After Initial)
1st Place (Final)
Beginner
Mardan Sword x1
Gold Bar x3
Plum Rice Ball x1
Junior
Garayan Sword x1
Aquamarine x1
Sea Dragon Crystal x5
Senior
Mardan Garayan (sword) x1
Diamond x1
Power Crystal x10
Master
Sun Stone x1
Diamond x1
—
Finny Frenzy First Trophy: Win the Finny Frenzy race. Train your fish by feeding them specific foods to raise Strength, Stamina, and other stats. Different stats matter for different race types.
Rod Stats — Where to Spend Points
Stat
What it does
Resilience
How fast the tension gauge drains. Raise this first — it is what stops the line snapping.
Strength
Reeling power. Second priority.
Luck
Sets the maximum size of fish that can bite at all. A low-Luck rod makes the 70 cm+ medals literally unreachable, so this is the stat that gates the fishing medals.
Flight
Casting distance. Useful but not urgent.
Grip
Controller vibration only. Skip it.
The Four Lures
Lure-caught fish run noticeably bigger than bait-caught ones, which is why the Lure Rod is the answer to every fishing medal. Win the rod at the Chapter 3 Fishing Contest, or invent it from Fish, River and Lafrescia Stem photos. Recruit Olivie and she sells every lure in the game.
Lure
Reeling rhythm
Best for
Minnow
Quick left-right taps interleaved with X.
Den, Hama Hama, Kaji, Baku Baku, Gobbler
Frog
Left-right-left-right sweep, then about a one-second hold and a pause.
General purpose
Fork
Same pattern as the Frog.
Baron Garayan — the only bait it will take
Spinner
The Minnow pattern with longer holds.
Tarton, Kaji, Baku Baku
Breeding & the Aquarium
Everything happens in the Aquarium, an invention built from the Fountain, Wooden Box and Window photos. It switches between three configurations.
Rec Tank — general storage and feeding, and the tank you pick your racer from when entering Finny Frenzy.
Breeding Tank — holds exactly one male and one female. The pairing produces a single offspring whose stats start slightly above the parents', and crossing two species yields a third. The parents are consumed, so plan for it.
Battle Tank — holds up to four fish and is the only way to raise Strength, since no bait feeds it. Fish genuinely die in here, so stock two identical fish of the same species, which is both safer and gives better gains.
Feeding maps onto stats: Minon or Carrot for Boost, Mimi or Petite Fish for Endurance, Evy or Potato Cake for Stamina, Prickly or Battan for Tenacity, and the Battle Tank for Strength.
Watch the Carrot — it raises Boost but also flips the fish's gender, which will silently break a breeding pair you had lined up. Potato Cake raises Stamina but shaves weight off.
The efficient build is three cheap fish raised in parallel, each fed toward one stat, then bred together so the child inherits the combined ceiling. Breeding never lowers a stat, so stacking generations is safe.
Hard warning: on the PS2 version, pushing any single stat above 100 freezes the game. Cap feeding at 100 and save before going near the line.
Finny Frenzy — Classes and Rewards
The fish-racing tournament opens partway through Chapter 4 and runs on a recurring in-game timer at the Palm Brinks town square. You need the Aquarium built and a raised fish before you can enter at all.
Class
Entry requirement
Prizes
Beginner
Stats around 20+
1st Mardan Sword · 2nd Destruction Crystal ×3 · 3rd Protector Crystal, then a rotating table
1st Sun Stone · 2nd Moon Stone · 3rd Diamond — then a repeating Final Bomb / Ridepod Fuel / Seal Breaking Scroll table
For 100% you need the Sun Stone and Moon Stone from the Master class plus the three unique class swords — Mardan Sword, Garayan Sword and Mardan Garayan. Because a winning fish is promoted out of its bracket, those swords have to be collected one tier at a time; a monster fish cannot go back for the Beginner sword it skipped.
A tournament is three races back to back. You must place 1st in the first heat, 2nd or better in the second, and 3rd or better in the final to collect anything.
Boost, Stamina and Endurance are the racing stats. Maxed, those three alone carry a fish through any class — Strength and Tenacity only matter if you race a deliberate bumping strategy.
Raise three throwaway fish in parallel, each fed a single bait type, then breed them together. The offspring inherits the combined highs and you skip most of the grind.
Stop every stat at 100 — the PS2 freeze at 101 will eat your progress.
Pick the all-out pacing strategy once your stats are high, and avoid the hold-back style, which strands the fish at the back and rarely recovers.
Race the classes in order and do not over-level too fast. A winning fish is promoted out of its bracket, so the unique class swords have to be collected one tier at a time.
Once the unique items are claimed, Master class becomes a permanent farm — the fish is never promoted out and the repeating table hands out Final Bombs, Ridepod Fuel and Seal Breaking Scrolls indefinitely.
Save before entering. One unlucky race wastes the whole event and you wait for the next cycle.
All 396 medals — one card per floor
The Medalhead trophy wants every medal in the game. This is the whole list: 127 medal floors across seven dungeons carrying 396 medals, and every floor gets its own card so you read one floor at a time instead of scanning across a wide table. Event and boss rooms are listed in place, marked as carrying no medals, so the running order is the real one.
How a floor's medals are built
Swipe the table sideways
Slot
What it is
How many exist
1
Time Attack — kill everything on the floor inside the posted limit
127, one per medal floor
2
Clear goal — the rotating restriction (items only, Ridepod only, no healing, one named weapon…)
127, one per medal floor
3
Spheda — once the floor is cleared, sink the sphere into the time distortion
119
3 or 4
Fishing — land a fish at or above the stated length
23
Slot 3 is where the confusion comes from. On 15 floors you get both Spheda and fishing, so those are worth four medals. On the eight coastline floors of Ocean's Roar Cave you get fishing instead of Spheda — the only Spheda-less medal floors in the game. Everywhere else it is Spheda alone.
The arithmetic, so you can check us
Medal type
Count
Time Attack
127
Clear goal
127
Spheda
119
Fishing
23
Total
396
Here is how the 396 medals split across the eight clear goals:
Clear goal
How many in the game
Items only
34
Ridepod only
24
Without healing
21
Max's wrench only
12
Monster transformation only
11
Max's gun only
9
Monica's sword only
9
Monica's magic only
7
Spheda has no par and no stroke target. The counter above the sphere is a shot allowance, not a score. Sink it on the first swing or the last and the medal is identical — and it only drops on your first win on that floor, which is the prize named on each card.
Failed medals can be retried forever. Walk out and walk back in; the layout regenerates every time, so a bad Spheda course or a sprawling map is a free reroll. The one exception is the Moon Flower Palace, which closes permanently.
Per-dungeon totals
Swipe the table sideways
Dungeon
Ch.
Medal floors
Spheda
Fishing
Medals
Underground Water Channel
Ch.1
5
5
—
15
Rainbow Butterfly Wood
Ch.2
12
12
11
47
Starlight Canyon
Ch.3
19
19
4
61
Ocean's Roar Cave
Ch.4
17
9
8
51
Mount Gundor
Ch.5
19
19
—
57
Moon Flower Palace
Ch.7
24
24
—
72
Zelmite Mine
Ch.8
31
31
—
93
Total
127
119
23
396
Moon Flower Palace is missable and Medalhead is a gold trophy. The palace seals itself the moment the final boss dies, taking 72 medals with it. Finish all 24 of its floors before you walk into the Sun Chamber.
Floors marked ★ are the Chapter 6 star-path branches. They live inside their parent dungeon and only open once you are hunting the four gems, so it is easy to finish a dungeon without ever seeing them.
Underground Water Channel Ch.1
The shortest dungeon in the game and the tightest time limits — 2:30 on the last floor. No fishing here; you do not own a rod yet, and there are no Geostones either because Georama has not been introduced.
Donny's camp. He hands Max the pistol and the communicator, and this is where you trade photography levels for rewards later. No medals.
01To the Outside World — 3 medals
Time Attack
Kill everything within 2:35
Spheda
Close the distortion — first win pays Treasure Chest Key ×2
Clear goal
Without healing
Enemies
Clown ×6, Froggy ×6, Sewer Rat ×6 (key)
ABS / Gilda
108 / 108
02Battle with Rats — 3 medals
Time Attack
Kill everything within 2:40
Spheda
Close the distortion — first win pays Diamond
Clear goal
Items only
Enemies
Baron Balloon ×4, Bat ×5, Clown ×2, Froggy ×4, Sewer Rat ×3 (key)
ABS / Gilda
116 / 120
03Ghost in the Channel — 3 medals
Time Attack
Kill everything within 3:00
Spheda
Close the distortion — first win pays Improved Bomb ×4
Clear goal
Max's wrench only
Enemies
Bat ×3, Night Stalker ×3, Turtle ×4, Baron Balloon ×4 (key)
ABS / Gilda
98 / 105
Channel Pump Room — no medals
Boss: Linda. She is invulnerable until Cedric hands you the Ridepod. Missable scoop — photograph her as she rears up on her hind legs, before smashing down. No medals.
04Steve's Battle — 3 medals
Time Attack
Kill everything within 2:45
Spheda
Close the distortion — first win pays Level Up Powder ×2
Clear goal
Ridepod only
Enemies
Bat ×5, Clown ×2, Mimic ×3, Night Stalker ×4, Vanguard ×4 (key)
ABS / Gilda
162 / 170
05Sweet, Scary Treasure Chest — 3 medals
Time Attack
Kill everything within 2:30
Spheda
Close the distortion — first win pays Treasure Chest Key
Clear goal
Without healing
Enemies
Darkness ×4, Froggy ×4, King Mimic ×1, Vanguard ×3 (key)
ABS / Gilda
122 / 126
Channel Reservoir — no medals
Boss: Halloween, the clown robot. Missable scoop — photograph it in the act of firing a missile, with the eye plates visible. That photo unlocks the Clown Foot and the clown Ridepod parts. No medals.
Channel Exit — no medals
Not really a dungeon floor. Cedric picks Max up, Flotsam attacks the train in the P-3000, and Monica reveals herself. No medals.
Rainbow Butterfly Wood Ch.2
Where fishing, Geostones and Georama all start. Eleven of these twelve medal floors carry a fishing medal — every one except the star-path floor Something Rare Here!
The floor that starts everything. Give the fishing Firbit Grape Juice for the Fishing Rod and bait, then fish King Mardan out of the big swamp using a Poison Apple, and bring him a Priscleen. That frees the Firbits and unlocks Georama. No medals.
04This is a Geostone? — 4 medals
Time Attack
Kill everything within 5:00
Fishing
Land a fish of 50 cm or longer
Spheda
Close the distortion — first win pays Level Up Powder ×2
Clear goal
Ridepod only
Enemies
Face of Prajna ×4, Moler ×6, Mimic ×2, Pumpkinhead ×6 (key)
ABS / Gilda
188 / 236
05Noise in the Forest — 4 medals
Time Attack
Kill everything within 4:10
Fishing
Land a fish of 60 cm or longer
Spheda
Close the distortion — first win pays Stamina Drink ×2
Clear goal
Max's gun only
Enemies
Fire Element ×2, Sonic Bomber ×4, Himarra ×6, Tore ×5 (key)
ABS / Gilda
240 / 276
06I'm a Pixie Blue seal— 4 medals
Time Attack
Kill everything within 4:16
Fishing
Land a fish of 66 cm or longer
Spheda
Close the distortion — first win pays Armband Repair Powder ×4
Clear goal
Items only
Enemies
Face of Prajna ×4, Mimic ×2, King Mimic ×1, Pixie ×6 (key)
ABS / Gilda
132 / 200
07Legendary Killer Snake — 4 medals
Time Attack
Kill everything within 4:40
Fishing
Land a fish of 49 cm or longer
Spheda
Close the distortion — first win pays Gun Repair Powder ×4
Clear goal
Ridepod only
Enemies
Killer Snake ×2, Sonic Bomber ×3, Fire Element ×6, Ice Element ×6, Gyumo ×5 (key)
ABS / Gilda
352 / 392
08Grotesque Spider Lady — 4 medals
Time Attack
Kill everything within 4:26
Fishing
Land a fish of 50 cm or longer
Spheda
Close the distortion — first win pays Gift Capsule ×3
Clear goal
Without healing
Enemies
Spider Lady ×6, Tigriff ×1, King Mimic ×1, Hunter Fox ×6 (key)
ABS / Gilda
194 / 216
09Rainbow Falls Entrance White seal— 4 medals
Time Attack
Kill everything within 4:00
Fishing
Land a fish of 68 cm or longer
Spheda
Close the distortion — first win pays Treasure Chest Key ×3
Clear goal
Monica's sword only
Enemies
Tigriff ×2, Sonic Bomber ×3, Gyumo ×5, Hunter Fox ×4 (key)
ABS / Gilda
236 / 272
Rainbow Falls — no medals
Boss: Rainbow Butterfly. She will not appear until Sindain's Georama is done — plant the Lafrescia Seed, then speed it up with a Sundrop taken from a Himarra using Monica's transformation. No medals.
10★ Looking for the Earth Gem — 4 medals
Time Attack
Kill everything within 4:20
Fishing
Land a fish of 54 cm or longer
Spheda
Close the distortion — first win pays Gift Capsule ×3
Close the distortion — first win pays Level Up Powder ×2
Clear goal
Without healing
Enemies
Holy, Wind, Thunder and Ice Gemron ×4 each, Fire Gemron ×4 (key)
ABS / Gilda
504 / 420
Barga's Valley — no medals
Where Spheda is taught. Max improvises a club from a Handy Stick and closes the distortion by the condor's nest. Clear it cleanly and you get the Swan; fail and you get the Turkey. Either way you leave with the White Windflower that cures Lin. No medals.
08Warrior in Starlight Canyon White seal— 3 medals
Time Attack
Kill everything within 6:50
Spheda
Close the distortion — first win pays Wind Stone ×5
Boss: Memo Eater. You cannot pass here until Balance Valley's Georama has progressed and Lin has joined. The great tree brings her memories back and the Memo Eater comes out of her head. No medals.
13Rama Priests Like Cheese — 4 medals
Time Attack
Kill everything within 7:15
Fishing
Land a fish of 62 cm or longer
Spheda
Close the distortion — first win pays Level Up Powder
Clear goal
Items only
Enemies
Priest of Rama ×10, Yo-Yo Barrel ×4, Mimic ×4, Wind Element ×5 (key)
Close the distortion — first win pays Indestructible Coin
Clear goal
Items only
Enemies
Ivanoff ×4, Wind Element ×4, Crescent Baron ×6, King Mimic ×2, Dragon ×5 (key)
ABS / Gilda
778 / 922
Lighthouse on the Cape — no medals
Bosses: Evil Flame (Max) and Gaspard (Monica). Buy the Starglass from the future first. The fight alternates between the two characters, and Crest dies at the end of it. No medals.
Close the distortion — first win pays Level Up Powder
Clear goal
Items only
Enemies
Mimic ×4, Iron Mask ×6, Mummy ×6, Balalla ×6 (key)
ABS / Gilda
2,752 / 2,414
19★ Brave Warriors in the Valley Blue seal— 3 medals
Time Attack
Kill everything within 6:50
Spheda
Close the distortion — first win pays Resurrection Powder ×2
Clear goal
Max's gun only
Enemies
King Mimic ×2, Iron Mask ×6, Sleeber ×6, Blumo ×6 (key)
ABS / Gilda
2,972 / 2,184
★ Chamber of the Defending Wind Gem — no medals
Boss: Lapis Garter. Beat it for the Wind Gem, and photograph the altar for a scoop. No medals.
Ocean's Roar Cave Ch.4
The one dungeon where a floor can lack Spheda. Floors with a stretch of coastline give you fishing instead; the fully underground floors give you Spheda. Never both — and these eight fishing floors are the only Spheda-less medal floors in the whole game.
Close the distortion — first win pays Chill Stone ×5
Clear goal
Ridepod only
Enemies
Pirate Tank ×6, Corsair ×3, Captain ×10, King Mimic ×1, Shiva ×2 (key)
ABS / Gilda
1,294 / 1,006
Cave of Ancient Murals — no medals
Boss: Shingala. Locked until Veniccio's Georama has progressed — Osmond sends you for an Aquarium and an Electric Worm, and you feed the worm to a fish to make the electrified fish this fight needs. No medals.
09Wandering Zappy White seal— 3 medals
Time Attack
Kill everything within 6:30
Spheda
Close the distortion — first win pays Level Up Powder
Clear goal
Max's wrench only
Enemies
Auntie Medusa ×4, Aqua Element ×8, Goyone ×6, Mimic ×4, Zappy ×2 (key)
ABS / Gilda
1,276 / 1,032
10Banquet of the Dead — 3 medals
Time Attack
Kill everything within 5:50
Spheda
Close the distortion — first win pays Absorption Coin
Clear goal
Items only
Enemies
Sooty ×4, Hornhead ×8, Pirate Tank ×4, King Mimic ×2, Sand Moler ×4 (key)
ABS / Gilda
1,360 / 1,176
11Improvements Red seal— 3 medals
Time Attack
Kill everything within 5:20
Spheda
Close the distortion — first win pays Treasure Chest Key ×5
Clear goal
Without healing
Enemies
Zappy ×4, Aqua Element ×2, Sea Tortoise ×2, Ragstink ×6, Neo Vanguard ×4 (key)
ABS / Gilda
1,200 / 818
12Return of the Serpent — 3 medals
Time Attack
Kill everything within 6:35
Fishing
Land a fish of 50 cm or longer
Spheda
None on this floor — the third medal is the fishing goal
Boss: Dr. Jaming. Needs the Shell Talkie from Dr. Nobb in the future so you can talk to the shigura and get the Secret Dragon Remedy for Shingala. No medals.
15★ Looking for the Water Gem — 3 medals
Time Attack
Kill everything within 6:40
Spheda
Close the distortion — first win pays Resurrection Powder ×2
Close the distortion — first win pays Level Up Powder
Clear goal
Monica's sword only
Enemies
Fat Naga ×4, King Mimic ×2, Pirate Eye ×4, Metal Bomber ×4, Arkerath ×4 (key)
ABS / Gilda
2,528 / 1,956
★ Chamber of the Sleeping Water Gem — no medals
Boss: Sea Dragon. Beat it for the Water Gem, and photograph the altar for a scoop. No medals.
Mount Gundor Ch.5
No water, so no fishing. Spheda here is the worst in the game — jagged walls, lava pits and steam vents are all off-course. Small, deliberate shots with the Turkey.
Boss: the Death Ark. Plant Garek's Time Bomb to destroy the Fire Squall first — that is also what lets you build flammable structures in Heim Rada. Last chance to photograph the flying battleship. No medals.
12Walking the Path of Flames — 3 medals
Time Attack
Kill everything within 7:40
Spheda
Close the distortion — first win pays Resurrection Powder ×2
Clear goal
Ridepod only
Enemies
Lava Bat ×6, Lava Golem ×6, Alexander ×2, Chimera ×2 (key)
ABS / Gilda
1,362 / 786
13Burning Undead — 3 medals
Time Attack
Kill everything within 6:52
Spheda
Close the distortion — first win pays Level Up Powder ×2
Clear goal
Items only
Enemies
Bone Lord ×2, Ultrasonic Bomber ×4, Mimic ×2, King Mimic ×1, Lava Runner ×6 (key)
ABS / Gilda
1,544 / 1,030
14Fire Dragon White seal— 3 medals
Time Attack
Kill everything within 7:06
Spheda
Close the distortion — first win pays Indestructible Coin
Clear goal
Without healing
Enemies
Red Dragon ×5, Fire Gundron ×4, Bomber Head ×4, Lava Bat ×4, Chimera ×4 (key)
ABS / Gilda
2,042 / 1,460
15Treasure Chest Danger Zone — 3 medals
Time Attack
Kill everything within 8:00
Spheda
Close the distortion — first win pays Sapphire
Clear goal
Max's wrench only
Enemies
Mimic ×8, King Mimic ×4, Alexander ×4, Lava Bat ×4, Bone Lord ×4 (key)
ABS / Gilda
2,300 / 1,532
16Road to the River of Flames — 3 medals
Time Attack
Kill everything within 7:10
Spheda
Close the distortion — first win pays Turquoise
Clear goal
Items only
Enemies
Lava Bat ×6, Bone Lord ×6, Ultrasonic Bomber ×6, Red Dragon ×6 (key)
ABS / Gilda
2,346 / 2,130
Mount Gundor Mouth — no medals
Boss: Gaspard, then his forced monster form. The lava river blocks the way until you have Galen Agaris's Fire Horn. Photograph the path, the fallen battleship and Gaspard's final form. No medals.
17★ Looking for the Fire Gem — 3 medals
Time Attack
Kill everything within 6:50
Spheda
Close the distortion — first win pays Level Up Powder
Clear goal
Monster transformation only
Enemies
Mimic ×1, Heat Wear ×6, Living Armor ×6, Rolling Rocks ×2, Red Fox ×6 (key)
ABS / Gilda
2,450 / 2,390
18★ Explosive Hot Spring — 3 medals
Time Attack
Kill everything within 7:05
Spheda
Close the distortion — first win pays Mighty Healing ×2
Clear goal
Ridepod only
Enemies
Mimic ×4, Triple Cracker ×4, Flaming Nail ×4, Ice Spirit ×4, Fire Spirit ×4 (key)
ABS / Gilda
2,480 / 2,172
19★ Crazy Mountain — 3 medals
Time Attack
Kill everything within 6:55
Spheda
Close the distortion — first win pays Wealth Coin
Clear goal
Items only
Enemies
King Mimic ×2, Heat Wear ×4, Rolling Rocks ×4, Arthur ×4, Flaming Nail ×8 (key)
ABS / Gilda
3,112 / 2,448
★ Chamber of the Blazing Fire Gem — no medals
Boss: Inferno. Beat it for the Fire Gem, and photograph the altar for a scoop. No medals.
Moon Flower Palace Ch.7
The missable one. Twenty-four medal floors, every one with a Spheda medal, and the whole dungeon seals itself once the final boss dies. Spheda is at its easiest here — flat walls, almost nothing off-course.
Reached by taking the sun path at Zombie Zone. Take the Flower of the Sun from the table at the back — you cannot pass Alexandra's Room without it. No medals.
11Missing Gem Dealer — 3 medals
Time Attack
Kill everything within 7:40
Spheda
Close the distortion — first win pays Level Up Powder
Close the distortion — first win pays Holy Stone ×5
Clear goal
Items only
Enemies
King Mimic ×2, Evil Nail ×4, Lancer ×4, Clock Knight ×4, Earth Dragon ×4 (key)
ABS / Gilda
4,000 / 2,300
Sun Chamber — no medals
Boss: Emperor Griffon. The guardian will not open the doors until the palace Georama is at 100% and you speak Griffon's real name — Sirus. No medals.
Spiral of Dreams — no medals
Seven bosses back to back — Mammo, Nightmare, Black Dragon, Uther, Gaja Ein and Gaja Zwei, then the Dark Element on a five-minute timer. This is the point of no return: the palace and its 72 medals close forever. No medals here.
Zelmite Mine Ch.8
The post-game dungeon and the biggest single block of medals — 93 of the 396. The four Dead End mini-boss rooms carry no medals, but the branch floors leading to them do.
Mini-boss: two Sphinxes. This one is mandatory — it drops the Dynamite you need to blast the wall in the Depths, plus an Experience Coin and a Poison Coin. No medals.
18Little Dragon Army — 3 medals
Time Attack
Kill everything within 11:40
Spheda
Close the distortion — first win pays Level Up Powder ×2
Clear goal
Without healing
Enemies
Holy, Wind, Thunder and Ice Wyrm ×4 each, Fire Wyrm ×4 (key)
ABS / Gilda
6,720 / 2,200
19Captain Returns — 3 medals
Time Attack
Kill everything within 12:00
Spheda
Close the distortion — first win pays Fruit of Eden
Clear goal
Monica's magic only
Enemies
Oyakata ×4, Elite Corsair ×8, Great Tree ×2 (key)
ABS / Gilda
4,440 / 1,584
20Hell's Turning Point — 3 medals
Time Attack
Kill everything within 11:55
Spheda
Close the distortion — first win pays Level Up Powder ×2
Clear goal
Ridepod only
Enemies
Moonlight Hulk ×6, Bandou ×6, Titan ×6, Ladha ×2 (key)
ABS / Gilda
7,200 / 2,220
21Mummy Heaven — 3 medals
Time Attack
Kill everything within 12:40
Spheda
Close the distortion — first win pays Stamina Drink ×2
Clear goal
Items only
Enemies
Dark Keeper ×2, Fire Wyrm ×2, Holy Wyrm ×2, Revenant ×16 (key)
ABS / Gilda
8,520 / 2,062
Dead End 4 — no medals
Mini-boss: eight Mandoras at once. Optional. Drops two Diamonds. No medals.
A Suspicious Opening — no medals
Boss: Metal Flotsam. Photograph him before you finish him for a scoop. No medals.
22Ward 3 Entrance — 3 medals
Time Attack
Kill everything within 12:30
Spheda
Close the distortion — first win pays Garnet
Clear goal
Items only
Enemies
King Mimic ×1, Revenant ×4, Dark Alchemist ×6, Last Guardian ×6, Smiling Wolf ×6 (key)
King Mimic ×2, Spinning Saucer ×4, Flying Steel ×6, Bone King ×6, Tiamat ×6 (key)
ABS / Gilda
14,400 / 2,504
Zelmite Mine Depths — no medals
Final boss: the Fake Genie, back from the first Dark Cloud. You need the Dynamite from Dead End 3 to blast the wall. Photograph the zelmite and the genie for scoops. No medals.
Working through them efficiently
Situation
What to do
Time Attack
Fit the fastest Ridepod legs you own and take Pau as support — he hands you the floor map at the start and spots the Mimics, which is where the time usually goes. From Mount Gundor onward the limits are generous; the tight ones are all in the first two dungeons.
Items only
34 of these, more than any other goal. Improved Bombs early, Final Bombs later, Poison Apples to soften anything that survives, elemental Stones to finish, Holy Water for the undead. Cannon-type enemies ruin runs by chip-damaging you — stop them with a Stone Berry or a Heart-Throb Cherry first.
Without healing
The medal only confirms when you leave through the gate key, so a panic heal on the last screen still voids it.
One-weapon goals
Every kill has to come from the named weapon — no chip damage from anything else, including a Ridepod standing next to you.
Monster transformation only
Level a badge past 51 first and carry spares; running out mid-floor ends the attempt.
Fishing
23 in the game and all of them are luck. Pour rod points into Luck before anything else — Luck sets the size range you can hook at all.
Spheda
Kill everything first; the distortion will not appear until the floor is clear, and the sphere has to be the opposite colour to it. Turkey for Mount Gundor's short careful shots, Flamingo for Starlight Canyon and Zelmite Mine's curves, Swan or Flamingo for Ocean's Roar Cave, anything at all for the Moon Flower Palace.
Trophies
Dark Cloud 2 has 31 trophies on the PlayStation re-release — 1 Platinum, 4 Gold, 17 Silver and 9 Bronze. Seven of them are missable, and one of those is hard-locked by a boss fight, so read the roadmap below before you start.
All 31 Trophies
The PlayStation re-release added 31 trophies: 1 Platinum, 4 Gold, 17 Silver and 9 Bronze. Seven of them are missable — the Missable? column below flags each one.
Swipe the table sideways
Trophy
Grade
Requirement
Missable?
Past, Present, and Future
Platinum
Earn every other trophy in the game.
Yes inherits every missable below
Freak Show
Bronze
Get Max out of the big top after he is caught eavesdropping.
No
Weapon Synthesis
Bronze
Fuse one weapon into another for the first time.
No
Tinkering Away
Bronze
Photograph the right parts and assemble your first invention.
No
Shapeshifter
Bronze
Have Monica take a monster form with a Transformation Badge.
No
Birds and the Bees
Bronze
Put two fish in the breeding tank and produce offspring.
No
Playing with Time
Bronze
Sink one Spheda shot into a distortion to seal it.
No
Mechanical Upgrades
Bronze
Buy any single Ridepod part from Cedric.
No
Alternate Alias
Bronze
Spend a Name-Change Ticket to rename a weapon.
Yes the medal shop's stock is finite, so buy the ticket before the costumes
Partners in Time
Bronze
Get any townsperson to join your active party.
No
To the Outside World
Silver
Finish Chapter 1.
No
Resurrection of the Great Elder
Silver
Finish Chapter 2.
No
The Sage of the Stars
Silver
Finish Chapter 3.
No
Good-Bye Shingala
Silver
Finish Chapter 4.
No
Conflict of the Past and Future
Silver
Finish Chapter 5.
No
When Two Eras Collide
Silver
Finish Chapter 6.
No
Palace of Flowers
Silver
Defeat the Dark Element at the end of Chapter 7.
No but clearing it permanently seals Moon Flower Palace and Kazarov Stonehenge
The Forgotten Adventure
Gold
Bring down the Dark Genie at the bottom of the Zelmite Mine.
No
Take a Picture, It Will Last Longer
Silver
Raise your camera skill to rank 8.
Yes dozens of subjects exist only in one chapter
Monster Master
Silver
Collect the full set of Transformation Badges.
Yes the Moon and Sun badges come from photography ranks
Core Strength
Silver
Fit Steve's top-tier Master Grade core.
No pure Ridepod EXP grind
What? Your Monster is Evolving!
Silver
Raise one captured monster to its final evolution.
No
Fighting for Fun
Silver
String together 200 kills in a single life.
No
Supporting Cast
Silver
Sign up every recruitable character.
Yes Lin leaves after the Chapter 3 boss
A Royal Arsenal
Silver
Build Monica's trees up to Island King and Five Star Armlet.
No
LEGENDary
Silver
Build Max's trees up to LEGEND and Supernova.
No
A Class of its Own
Silver
Land a Baron Garayan.
Yes Heim Rada hot spring, late afternoon, Fork lure only
Finny Frenzy First
Silver
Take first place in the top-tier Finny Frenzy race.
No
A True Visionary
Gold
Assemble every invention on the list.
Yes many depend on chapter-exclusive photos
Medalhead
Gold
Claim every medal challenge in every chapter.
Yes hard-locked at the Chapter 7 boss
GeoraManiac
Gold
Satisfy 100% of the Georama checklists.
Yes each region must be finished inside its own chapter
The Trophies That Actually Cost You Time
Trophy
Why
Medalhead
By far the biggest lift — 396 medals across 127 floors, mixing time attacks, no-heal runs, weapon restrictions, Spheda holes and fishing lengths. Early-chapter medals are brutal at early-chapter power, and the Chapter 7 boss permanently closes two dungeons' worth of them. Budget around 30 hours for this alone.
A True Visionary
Over 100 inventions, many gated behind scoop photos that exist during one chapter only. Essentially impossible without a checklist open beside you, and one missed shot voids it for that save.
Take a Picture, It Will Last Longer
Camera rank 8 needs a large point total and a big chunk of the available points come from one-time subjects. It also feeds Monster Master (Moon/Sun badges) and A True Visionary, so failing it cascades into two more trophies.
GeoraManiac
Five separate town-building puzzles with fiddly placement, resident and culture-point conditions that all have to be finished inside their own chapter. There is no way back once the era closes.
Supporting Cast
Roughly two dozen optional recruits, each with its own hidden trigger — a photo, a puzzle, a contest, an item. Lin is the one genuine permanent loss.
Spheda (feeds Medalhead)
Around 119 golf holes on distorted dungeon terrain with par limits and awkward physics. Not a trophy on its own past the first hole, but it is roughly a 10-hour tax on Medalhead.
Platinum Roadmap
1
Prologue and Chapter 1 — set your habits Clear the circus escape, get the camera immediately, and start photographing everything that is not nailed down. Make your first invention, first synthesis, first recruit. Open a scoop checklist now and treat the camera as mandatory equipment for the rest of the run.
2
Chapters 1–6 — never leave a chapter dirty For each chapter: finish 100% of that region's Georama before advancing, sweep every medal on every floor, take all chapter-exclusive photos, and grab that chapter's optional recruits. Talk to Mena early in Chapter 3 and recruit Lin before her boss. Buy the Name-Change Ticket the moment Mayor Need's medal shop opens.
3
Chapter 7 — stop at the door Explore Moon Flower Palace and go back through Kazarov Stonehenge for every remaining medal, photo and item BEFORE fighting the Dark Element. This is the point of no return for Medalhead and for several photo and invention subjects.
4
Chapter 8 and the Dark Genie Push through the Zelmite Mine, collect its medals and remaining Transformation Badges, and finish the story for The Forgotten Adventure.
5
Post-game grind With endgame gear, close out the pure time sinks: camera rank 8 and the Sun/Moon badges, all badges for Monster Master, the Master Grade core, Max's LEGEND/Supernova and Monica's Island King/Five Star Armlet, monster evolution, and the Finny Frenzy top class.
6
Final sweep and Platinum Audit the invention and recruit lists against a checklist, mop up leftover Spheda and medals in still-accessible dungeons, and Past, Present, and Future drops. Budget 100–140 hours end to end.
The one hard lock: beating the Dark Element at the end of Chapter 7 permanently seals Moon Flower Palace and Kazarov Stonehenge. Every medal, photo, Spheda hole and item in them has to be finished first, or Medalhead and several inventions are lost for that save file.
Printable 100% checklist
Everything the 100% needs, on one page. The print version drops the menus, the images and the other tabs — just the boxes.
Every trophy except the platinum — 30 of them
Freak ShowBronze — Get Max out of the big top after he is caught eavesdropping.
Weapon SynthesisBronze — Fuse one weapon into another for the first time.
Tinkering AwayBronze — Photograph the right parts and assemble your first invention.
ShapeshifterBronze — Have Monica take a monster form with a Transformation Badge.
Birds and the BeesBronze — Put two fish in the breeding tank and produce offspring.
Playing with TimeBronze — Sink one Spheda shot into a distortion to seal it.
Mechanical UpgradesBronze — Buy any single Ridepod part from Cedric.
Alternate AliasBronze — Spend a Name-Change Ticket to rename a weapon. Missable
Partners in TimeBronze — Get any townsperson to join your active party.
To the Outside WorldSilver — Finish Chapter 1.
Resurrection of the Great ElderSilver — Finish Chapter 2.
The Sage of the StarsSilver — Finish Chapter 3.
Good-Bye ShingalaSilver — Finish Chapter 4.
Conflict of the Past and FutureSilver — Finish Chapter 5.
When Two Eras CollideSilver — Finish Chapter 6.
Palace of FlowersSilver — Defeat the Dark Element at the end of Chapter 7.
The Forgotten AdventureGold — Bring down the Dark Genie at the bottom of the Zelmite Mine.
Take a Picture, It Will Last LongerSilver — Raise your camera skill to rank 8. Missable
Monster MasterSilver — Collect the full set of Transformation Badges. Missable
Core StrengthSilver — Fit Steve's top-tier Master Grade core.
What? Your Monster is Evolving!Silver — Raise one captured monster to its final evolution.
Fighting for FunSilver — String together 200 kills in a single life.
Supporting CastSilver — Sign up every recruitable character. Missable
A Royal ArsenalSilver — Build Monica's trees up to Island King and Five Star Armlet.
LEGENDarySilver — Build Max's trees up to LEGEND and Supernova.
A Class of its OwnSilver — Land a Baron Garayan. Missable
Finny Frenzy FirstSilver — Take first place in the top-tier Finny Frenzy race.
A True VisionaryGold — Assemble every invention on the list. Missable
MedalheadGold — Claim every medal challenge in every chapter. Missable
GeoraManiacGold — Satisfy 100% of the Georama checklists. Missable
The long grinds
396 medals across the dungeons → Medalhead
100+ inventions, many gated behind scoop photos → A True Visionary